Target
Our target for this lesson will be Assault Cube 1.2.0.2.
Identify
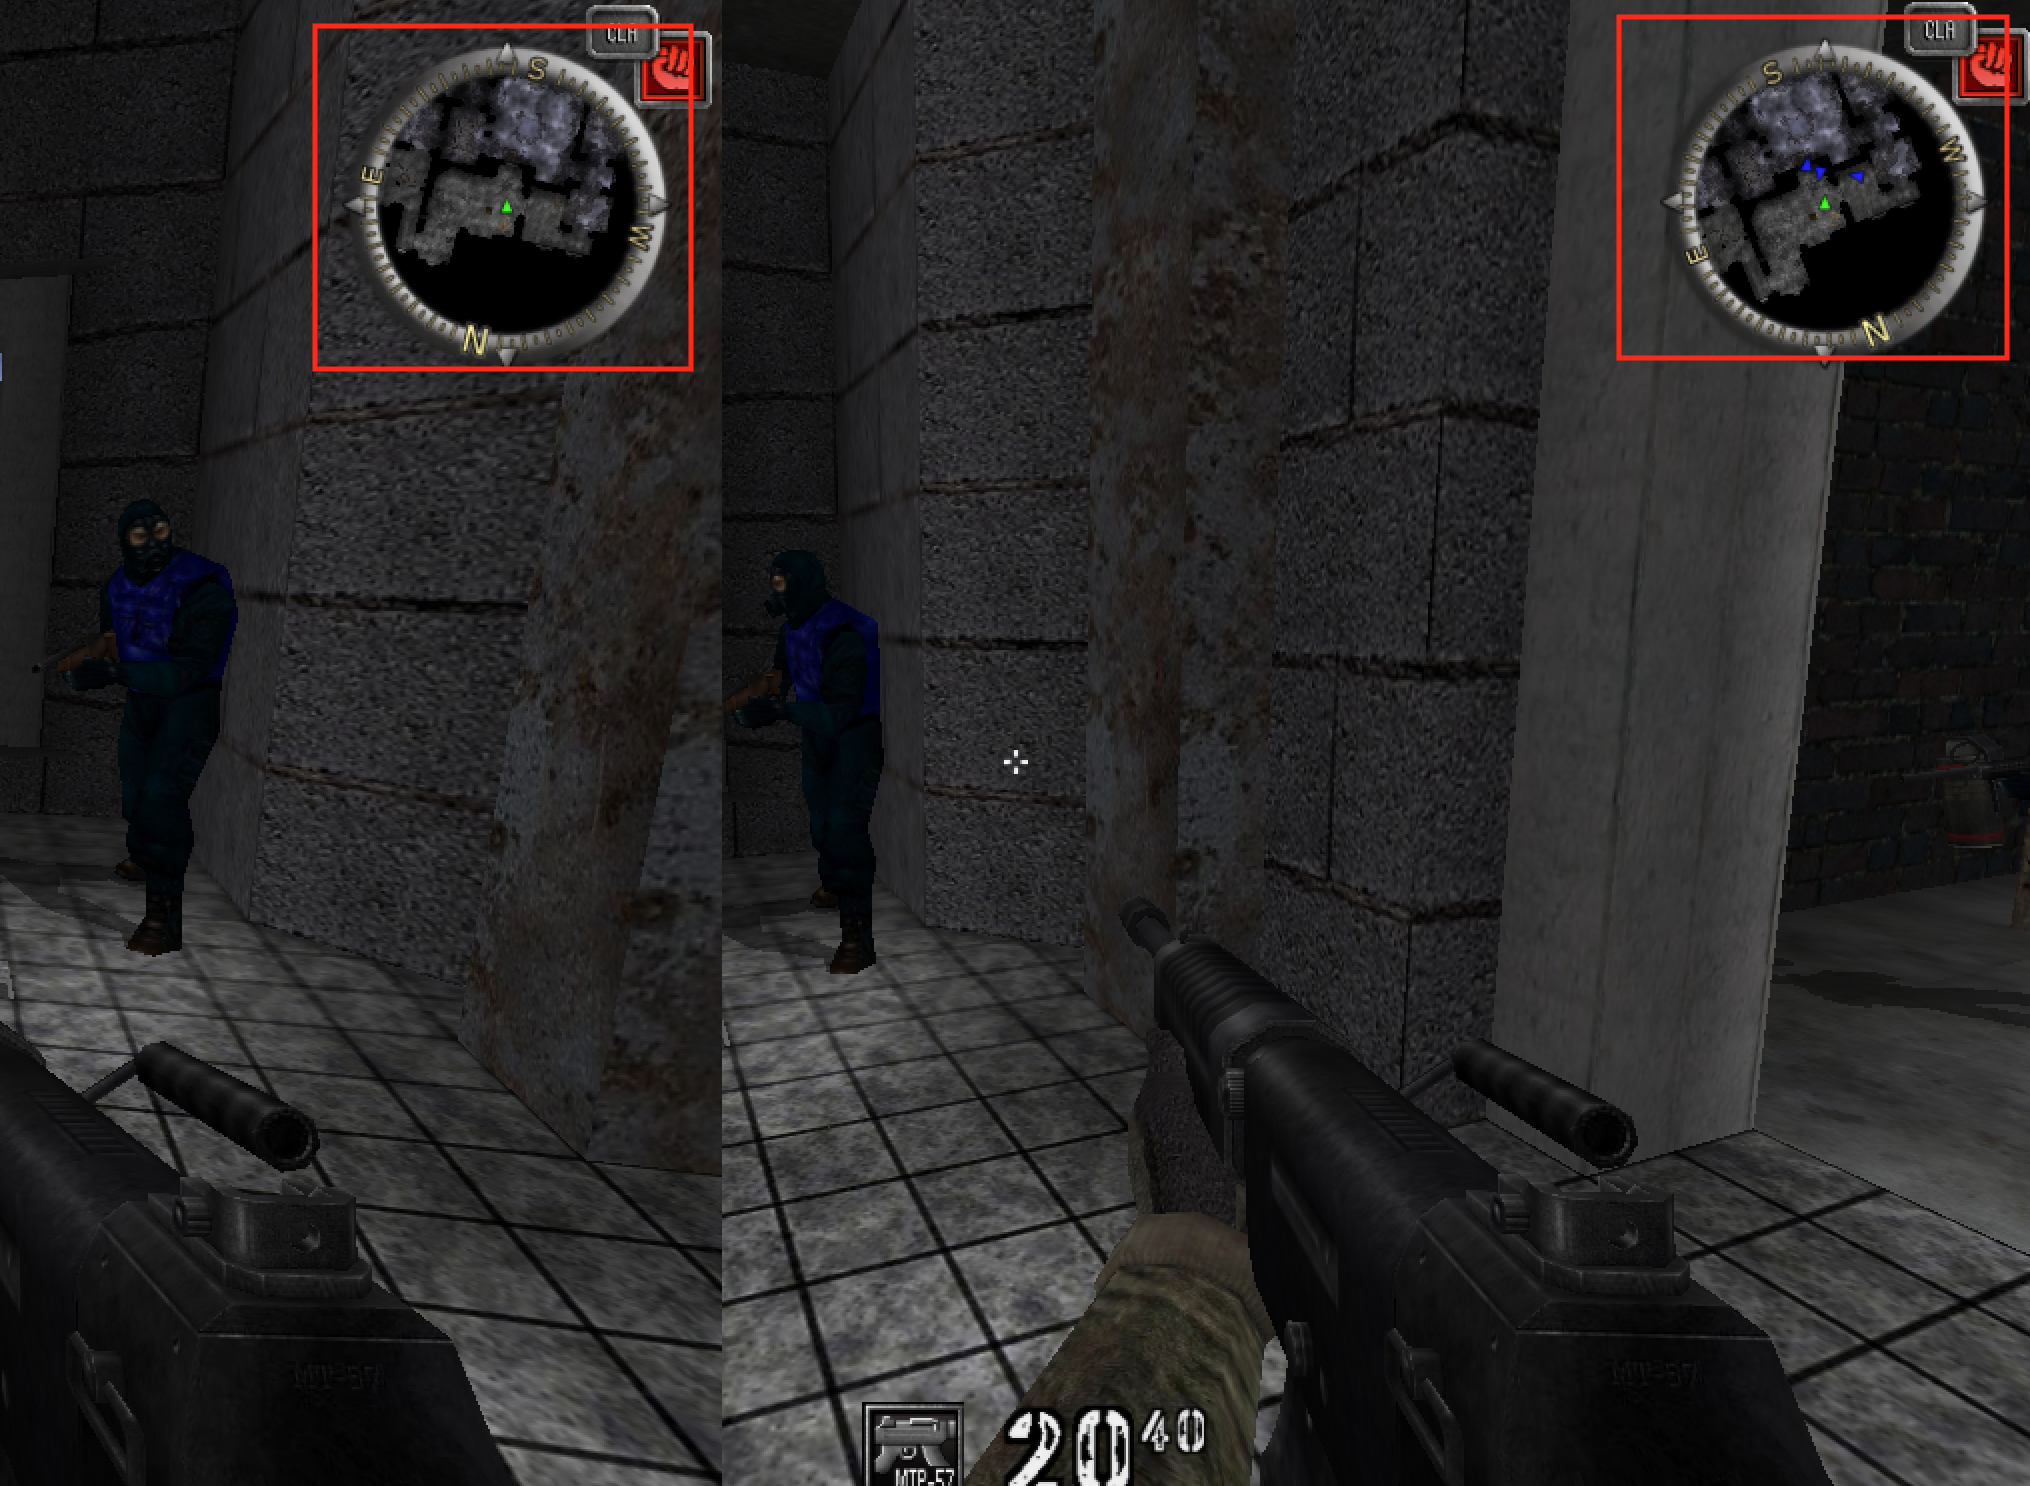
Our goal in this lesson is to create a radar hack, a type of hack that displays both enemies and friendly players on the radar.
Understand
Many FPS games have a radar that will display an icon for each player on top of a scaled-down version of the current map. When playing in a game with teams, these radars will only show the players on the same team as the active player. In the Aimbot lesson, we discovered the location of the list of players in the game. The code for most games will iterate over this list when drawing a player’s icon on the radar, in a similar manner to the following block:
void draw_radar() {
  for(int i = 0; i < max_players; i++) {
    if(player_list[i]->team == current_player->team) {
      //draw on radar
    }
  }
}
If we locate this code, we can change the if conditional to always draw the player on the radar regardless of the team. To locate the code, we will first need to identify the team member in our player structure. Then, we can set a breakpoint on access to identify where this member is accessed in code.
Locate Player’s Team
We can use two approaches to locate the player’s team in the player structure:
- Use Cheat Engine and search for an Unknown initial value. Then, alternate between teams and search for Changed value.
- Use x64dbg and locate the player’s structure in a dump. Then, alternate between teams and search for a member that changes.
We have covered both of these approaches in past lessons. Using the techniques discussed previously, you should be able to identify a member that alternates between 0 and 1 depending on your team. This member is relatively close to the member we identified previously that held whether the player was alive or not.
Locate Radar Function
We know that the radar function must access the player’s team. Therefore, we can place a breakpoint on access on the team member we just identified. Immediately, the breakpoint should pop. However, if you continue execution several times, you should see that the breakpoint pops in completely different sections of code. This is most likely because several sections of code access this member. Our next step is identifying the section of code responsible for drawing the radar.
We can assume a few things about the code we are looking for, based on the pseudo code we described above:
- It will have a cmp (or test) instruction followed by a conditional jump (je, jne, jg, etc.).
- It will either call a function or have a fair amount of code, due to the many operations involved.
- It will most likely make use of the floating point operations (fld, fstp) to position the icon on the radar.
We can use these features to help figure out which location we care about in the code.
Because we are interrupting program execution, the breakpoints will not pop in a consistent manner. In this lesson, we will examine each piece of code in the order they were encountered when writing the lesson. In your environment, the order of pops will most likely be different.
The first pop occurs at the following code:
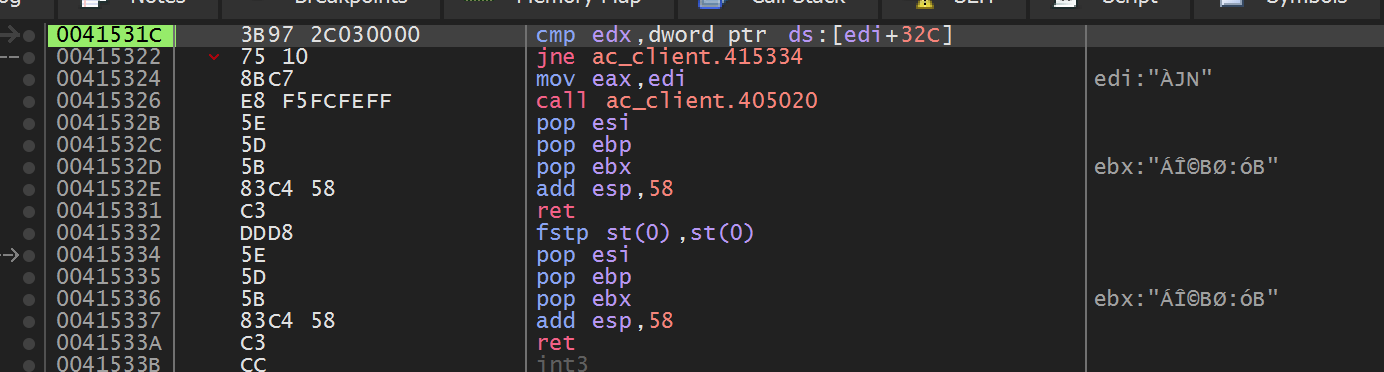
This initially looks like it checks off several of the conditions we care
about. However, if we nop the
jne instruction at 0x415322, we notice that
there is no change in the game. If you explore the
call at 0x415326, you should see the
following code:

From this string constant, we can assume that this code has something to do with drawing the voice chat (or communication) symbols on the radar. Now we will continue on to the next location:

For our immediate reversing purpose, testing a register against itself is the same as comparing the register to 0. Here, we see that the code executes a branch if the player’s team is set to 0, or the CLA team. The radar drawing operation should execute according to the value stored in the player’s structure, not a static value. Now we can move on to the next location:

Examining this code, we see that it is doing an operation similar to the previous code. After loading in the value of the player’s team to ecx, the code compares this value to 1, or the RSVF team with the test cl, 1 instruction. The same logic applies here as it does in the paragraph above, so let’s examine the next location:
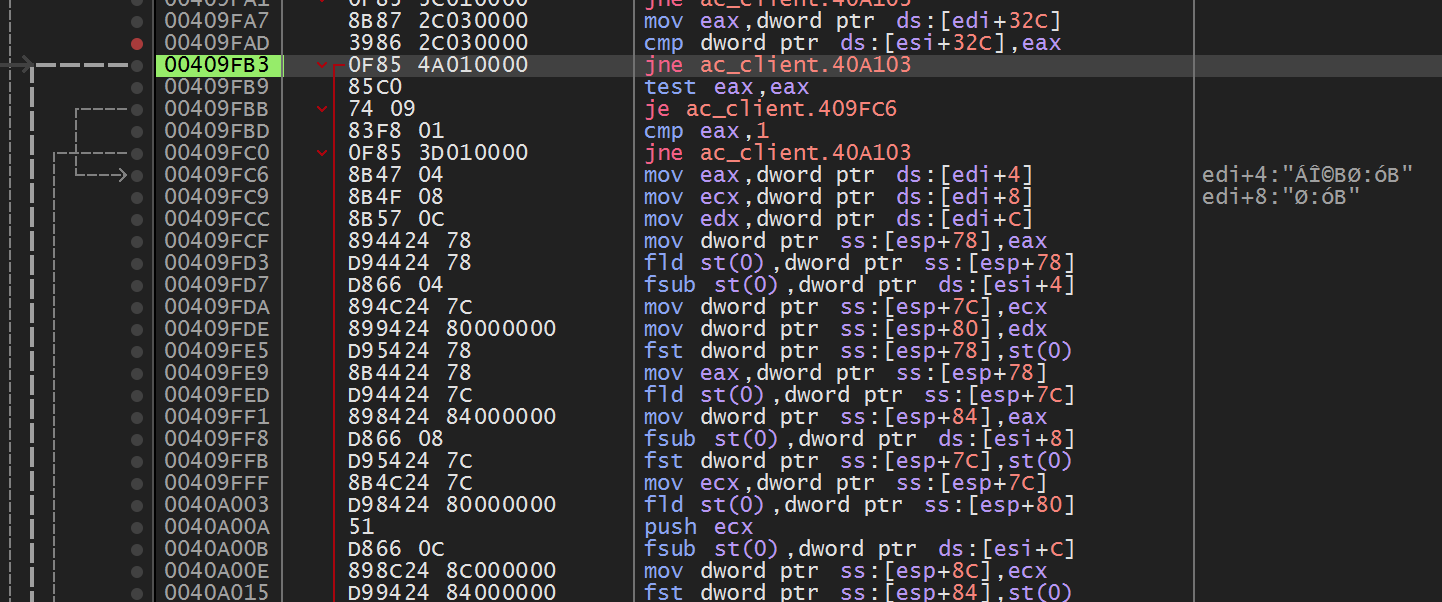
Like our first location, this looks like a promising candidate. The cmp instruction at the top compares our current player’s team against eax, which appears to be loading the same team offset from another data structure, potentially another player. We also see several floating point operations that may be responsible for placing the icon on the radar. Let’s see what happens if we nop out the jne instruction:
If you go back into Assault Cube, you should notice that you can now see every player on the radar, including the ones that are not on your team. We have found our responsible radar code.
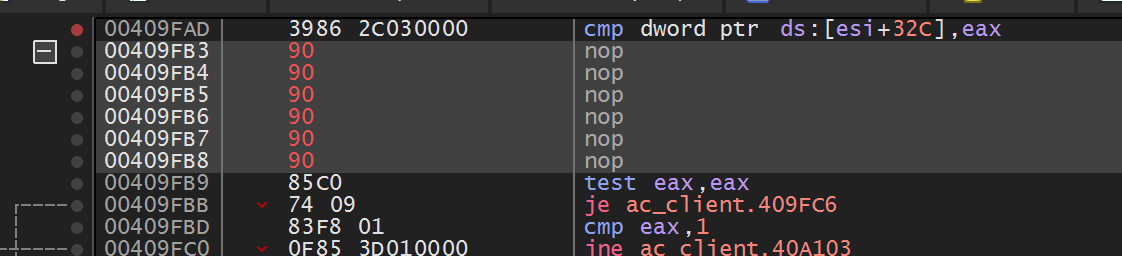
Changing the Code
Since this hack only requires us to write bytes to a memory address, we can use the same technique as discussed in the No Recoil lesson:
#include <Windows.h>

unsigned char new_bytes[5] = { 0x90, 0x90, 0x90, 0x90, 0x90 };

BOOL WINAPI DllMain(HINSTANCE hinstDLL, DWORD fdwReason, LPVOID lpvReserved) {
  DWORD old_protect;
  unsigned char* hook_location = (unsigned char*)0x409FB3;

  if (fdwReason == DLL_PROCESS_ATTACH) {
    VirtualProtect((void*)hook_location, 5, PAGE_EXECUTE_READWRITE, &old_protect);
    for (int i = 0; i < sizeof(new_bytes); i++) {
      *(hook_location + i) = new_bytes[i];
    }
  }

  return true;
}