Note: The version on Steam is no longer 5.0.1. You can retrieve the 5.0.1 binary on GitHub.
Target
In this lesson, we will switch our target to the game Wyrmsun, version 5.0.1. This is because Wesnoth, our target so far, does not support gameplay mechanisms (such as real-time control of building units) that would allow us to write a macro bot. Wyrmsun is free and similar to other traditional RTS games, such as StarCraft, WarCraft, or Command & Conquer.
Identify
A macro bot is a type of hack that will monitor our resources and automatically build worker units. In this lesson, we will create a macro bot that will automatically build a worker out of the currently selected structure when our money is over 3000.
Understand
To write a macro bot, we need to understand how RTS games handle unit creation. Typically, RTS games have a list of units associated with each player. When creating a unit, the game performs several operations and then adds the new unit to that list. The code may look something like:
recruit_unit(unit_type) {
  memory = initialize_memory(sizeof(unit))
  unit = create_unit(unit_type, memory)
  player->decrease_money()
  player->add_unit(unit)
  player->increase_population_counter()
}
To create units, we need to find this function and call it ourselves. To locate this function, we can use two different approaches, depending on how the game handles unit creation.
- If we create a unit and the game instantly decreases our money, we will locate our money and then set a breakpoint on write on our money value.
- If we create a unit and the game instantly increases our population, we will locate our population and then set a breakpoint on write on our current population.
When these breakpoints trigger, we will be inside of the hypothetical decrease_money or increase_population_counter functions in our example code above. We will therefore need to go up several functions. We will do this by executing the function until it returns and then stepping out.
Wyrmsun (our target in this lesson) loads code dynamically. As a result, the addresses you see in this lesson will be different when following along. However, the instructions and methods described will not change. We will discuss how to deal with this behavior when we create our DLL.
Locating the Create Unit Function
In Wyrmsun, money is decreased instantly when recruiting a unit, so we will use the first approach mentioned in the previous section. To find our money address for this new target, we can use the method discussed in the Memory Hack lesson.
Next, attach x64dbg to the game. Make sure that no operations are taking place that will alter your money, and set a hardware breakpoint on write on the money address. Recruit a worker and the breakpoint should instantly pop. Using execute until return/step over, go up several levels of code until you see the following string:

From this string, we can see that we are in the right place, as this logic is clearly related to recruiting and placing units.
From here, navigate up one more level to the parent calling function:
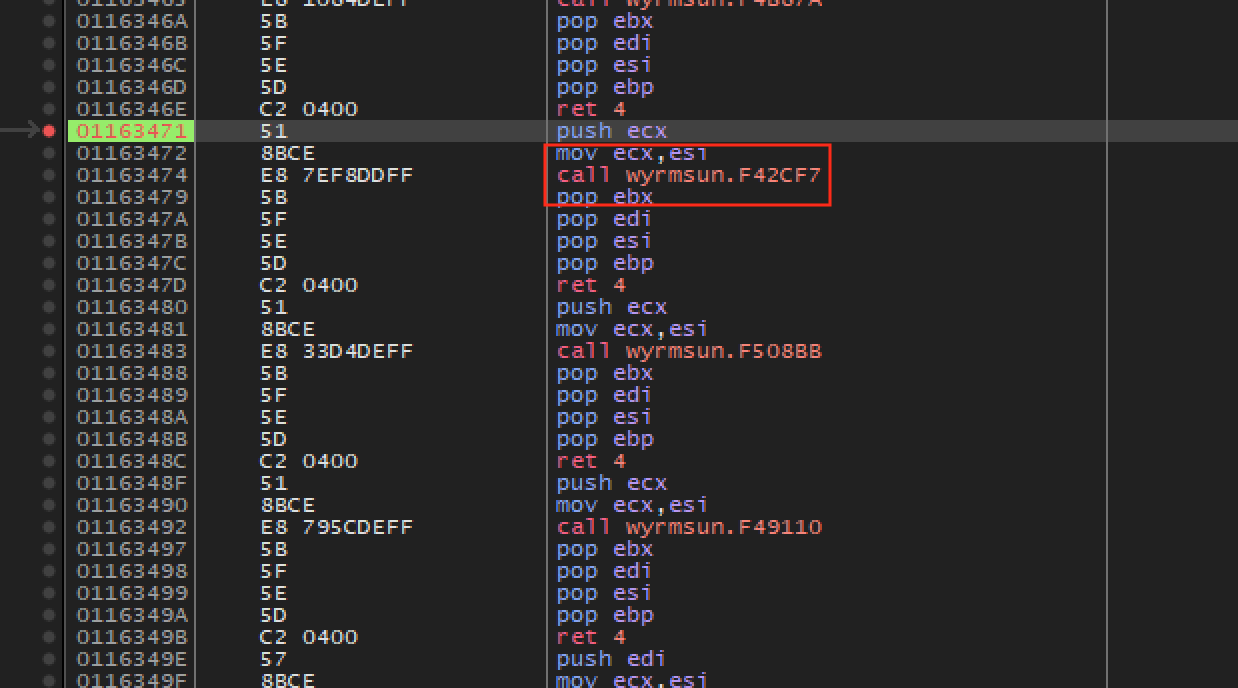
If we examine this code, we can see it is a series of very similar calls
that take a single parameter. If we set a breakpoint on the
call to 0xF42CF7, we can see that it is
called only when a unit is recruited. Next, place a breakpoint on the
call above the call to
0xF42CF7. With that set, do various actions in the game, such
as moving units, attacking, and building. When conducting a build action,
your breakpoint at the call above the unit recruitment
function should pop:
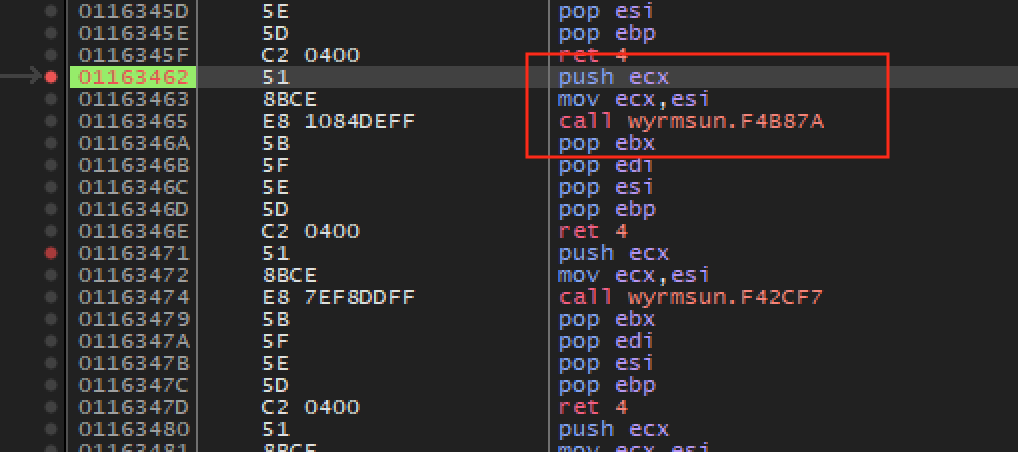
Given this behavior, we can guess that all these calls are related to functions in the unit card (the bottom-right of the screen). We can imagine the code may look something like:
switch(menu_event) {
  case BUILD:
    build_structure(event_data);
    break;
  case RECRUIT:
    recruit_unit(event_data);
    break;
  case MOVE:
    move_unit(event_data);
    break;
}
Therefore, we can assume the call to
0xF42CF7 (in our example) is responsible for recruiting
units. We can verify this by nop’ing out the following
instructions:
push ecx
mov ecx, esi
call 0xF42CF7
When nop’d out, clicking the recruit button on a structure no longer creates a unit.
Reversing Event Data Structure
Now that we have located the unit creation function, we need to reverse the data provided to it so that we can call it ourselves. We can see that there are two pieces of data potentially being passed to the function:
- A value in ecx, which is pushed on the stack
- A value in esi, which is moved into ecx
Let’s determine if both of these are necessary. First, replace the push ecx instruction with another register, such as push eax. If you try to recruit a unit in the game, you will notice the game will instantly crash, indicating that the push is important. Next, restart the game and nop out the mov ecx, esi instruction. You will notice that the game responds normally, indicating that this operation is not used by the unit creation event. As a result, we only need to reverse the value of ecx when pushed.
Set a breakpoint on the push ecx and recruit a worker. When the breakpoint pops, right-click on the value of ecx and choose Follow in dump:
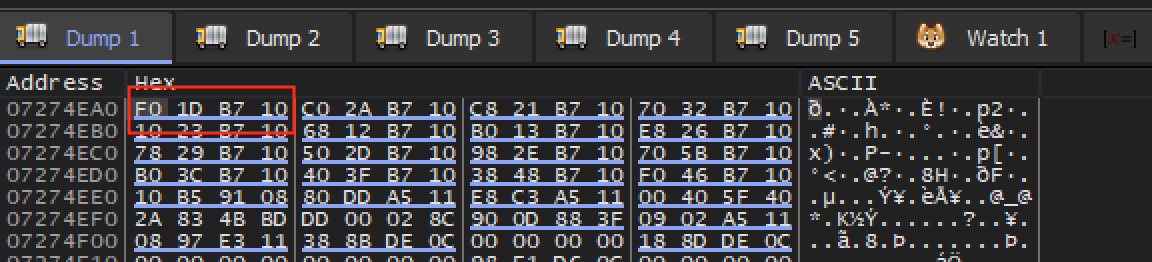
This data does not appear to contain all of the information we would
expect. The similar values of the data (the first three entries repeat
0xb710 at their end) indicate that this may be a pointer in a
table of pointers. To validate this assumption, select the 4 bytes
(0xf01db710) and choose Follow in dump. Your dump view
should change to 0x10b71df0, like so:
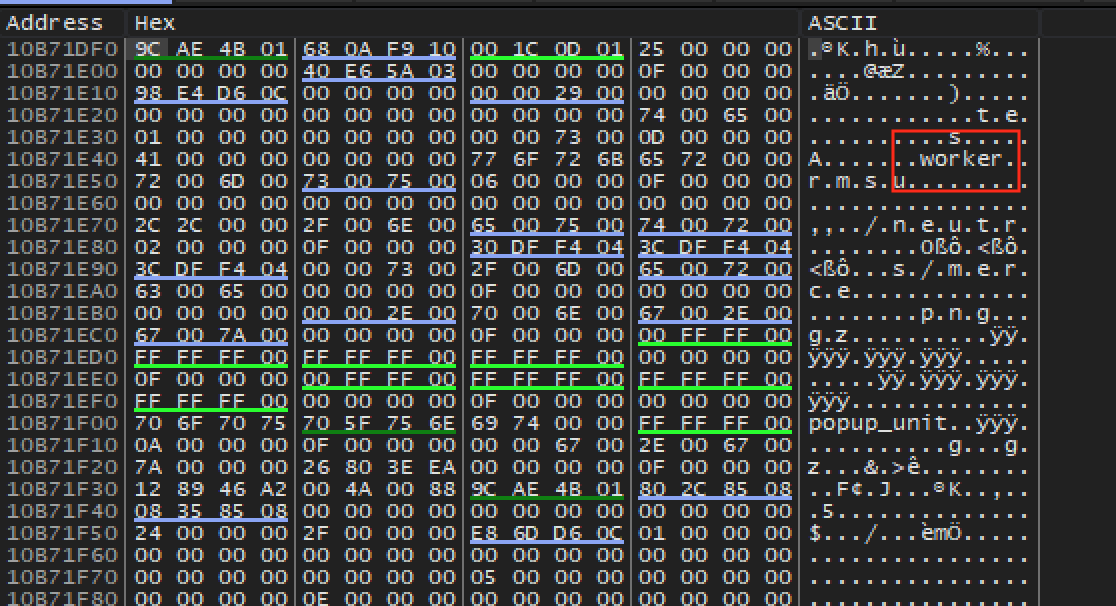
Immediately the text worker should jump out at you. It appears that
this structure contains data on the unit to be created. Back in game,
create another structure to create units (such as a War Hall, or
barracks-type building) and create an infantry unit. When the breakpoint
pops, examine the section of memory at 0x10b71df0 again:
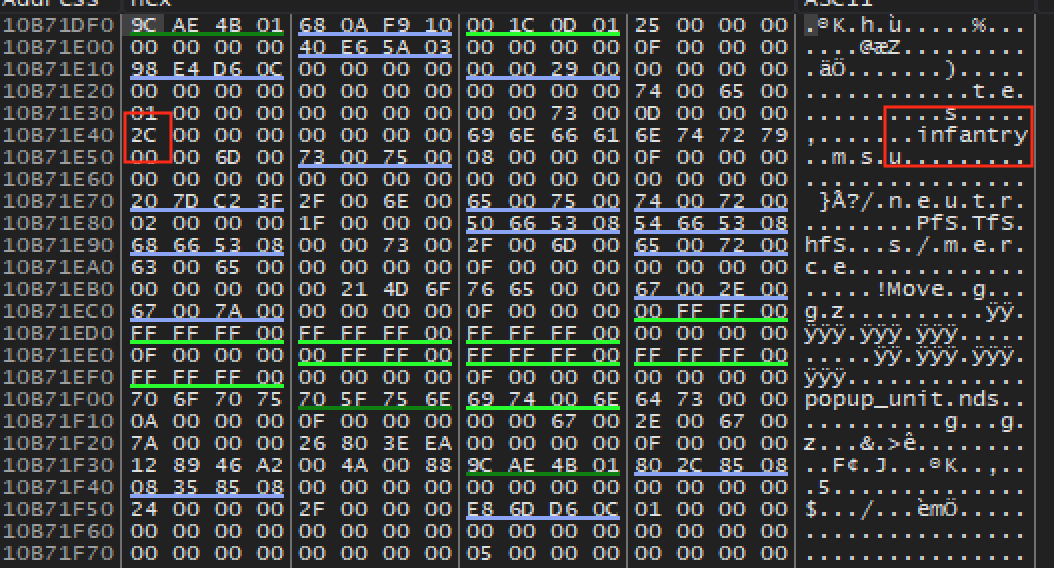
We can see two main pieces of data changed between a worker and an
infantry unit being recruited: the text (worker vs infantry)
and the number beforehand (0x41 vs 0x2c). We can
assume that this number may be the internal representation of the type of
unit.
Let’s verify that this works, as we are still guessing. First, set a
breakpoint on the push ecx and create an infantry unit.
Next, when the breakpoint pops, change 0x2C to
0x41 and infantry to worker. If you then resume
the execution and go back in game, you can see that despite clicking
infantry, we are now creating a worker out of the barracks structure.
There is also other data in this structure that changes but is not directly tied to the unit being created. While we could reverse the entire structure, we will instead copy the structure when a worker is created and use those values for our hack.
Locating the Main Game Loop
Now that we have located the function responsible for recruiting units and understand how to call it, we need to locate a place to call it from. For this lesson, we will choose to hook the main game loop. Finding the main game loop is easy in our case. First, place a breakpoint on the call to recruit a unit and create a unit in game so that the breakpoint will pop. Next, continue to step out of each function. Eventually, you will reach the following call:
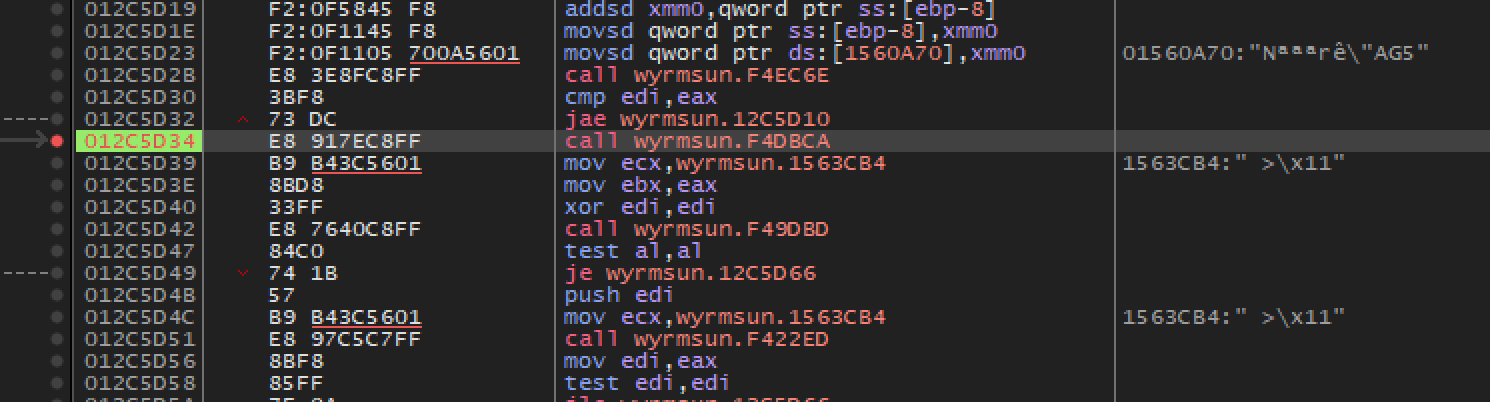
If you attempt to execute until return here, you will notice the game will begin and continue to execute. This is due to the fact that we are in a loop and no ret instruction is being encountered. We can verify this behavior by setting a breakpoint on this call. You will notice the breakpoint pops continuously. Both of these factors indicate that this code is part of the main game loop.
Locating the Player’s Money
Finally, we want to monitor our player’s money for our hack. Wyrmsun, like other games, allocates a player’s money dynamically, meaning it will be different for each game. In previous lessons, we have discussed methods to defeat DMA. For this lesson, we will use Cheat Engine’s pointer scan feature instead of reversing the target.
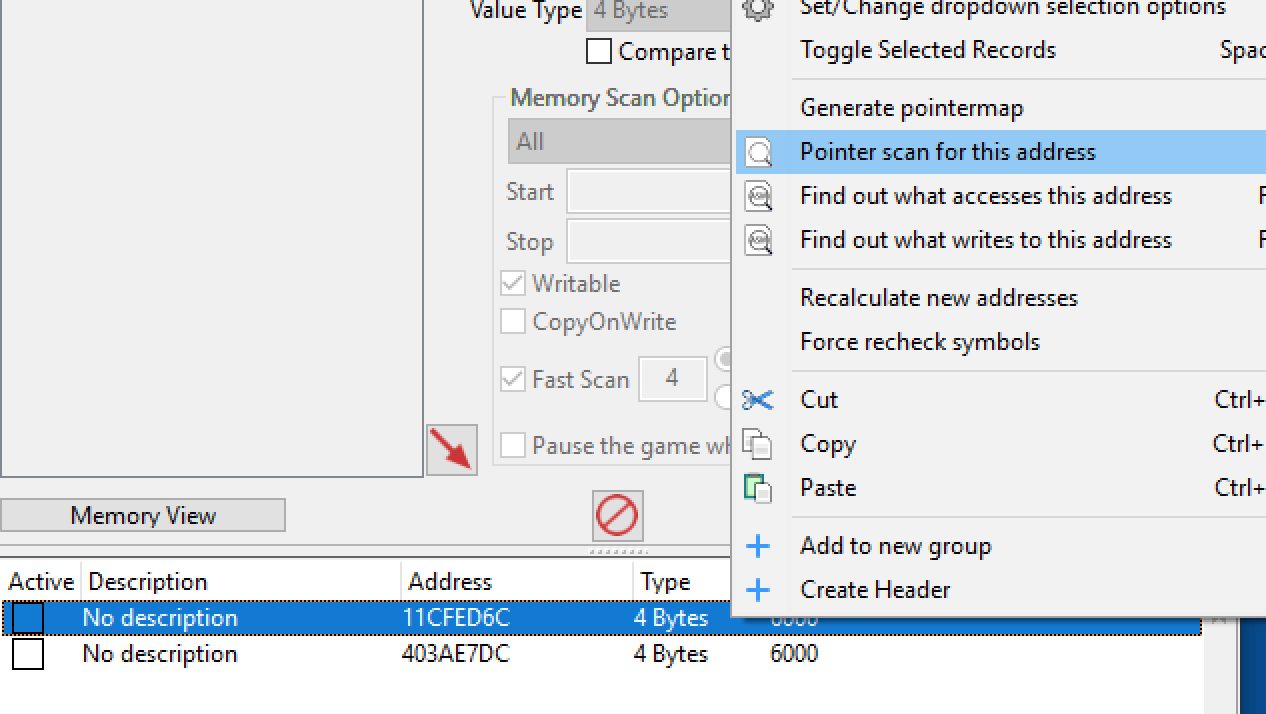
Cheat Engine’s pointer scan works similar to regular memory scanning. First, we need to locate our money address as usual. Then, right-click on the address and choose Pointer scan:
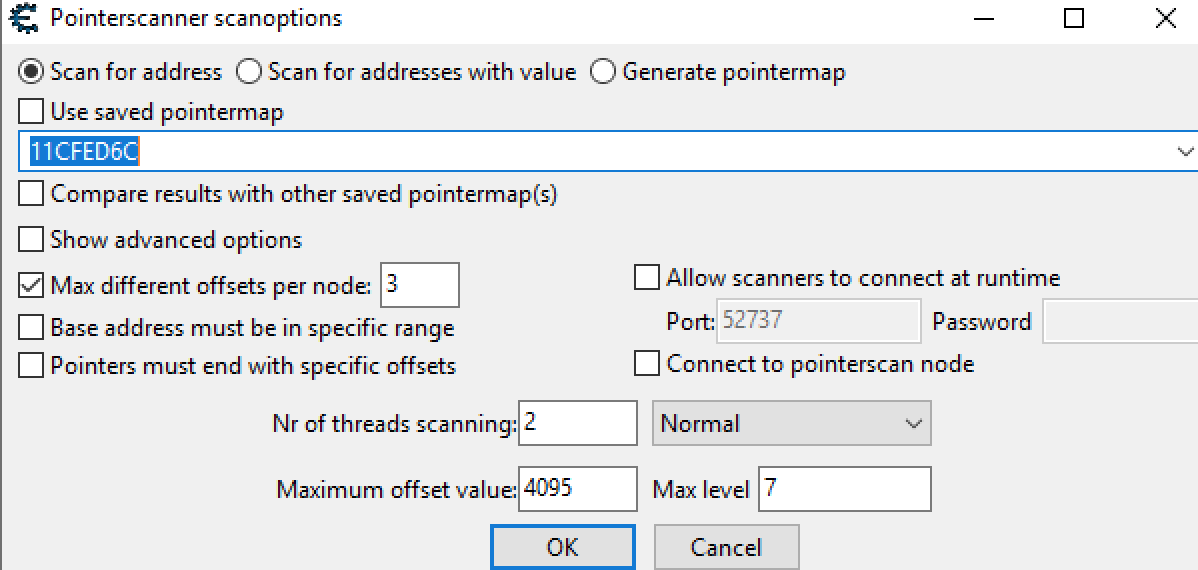
In the dialog that appears, keep all the default options and choose OK. When prompted, select a file anywhere:
Cheat Engine will now search the target for all pointers that point to the selected address in some way. When it is finished, you will get thousands of results back:
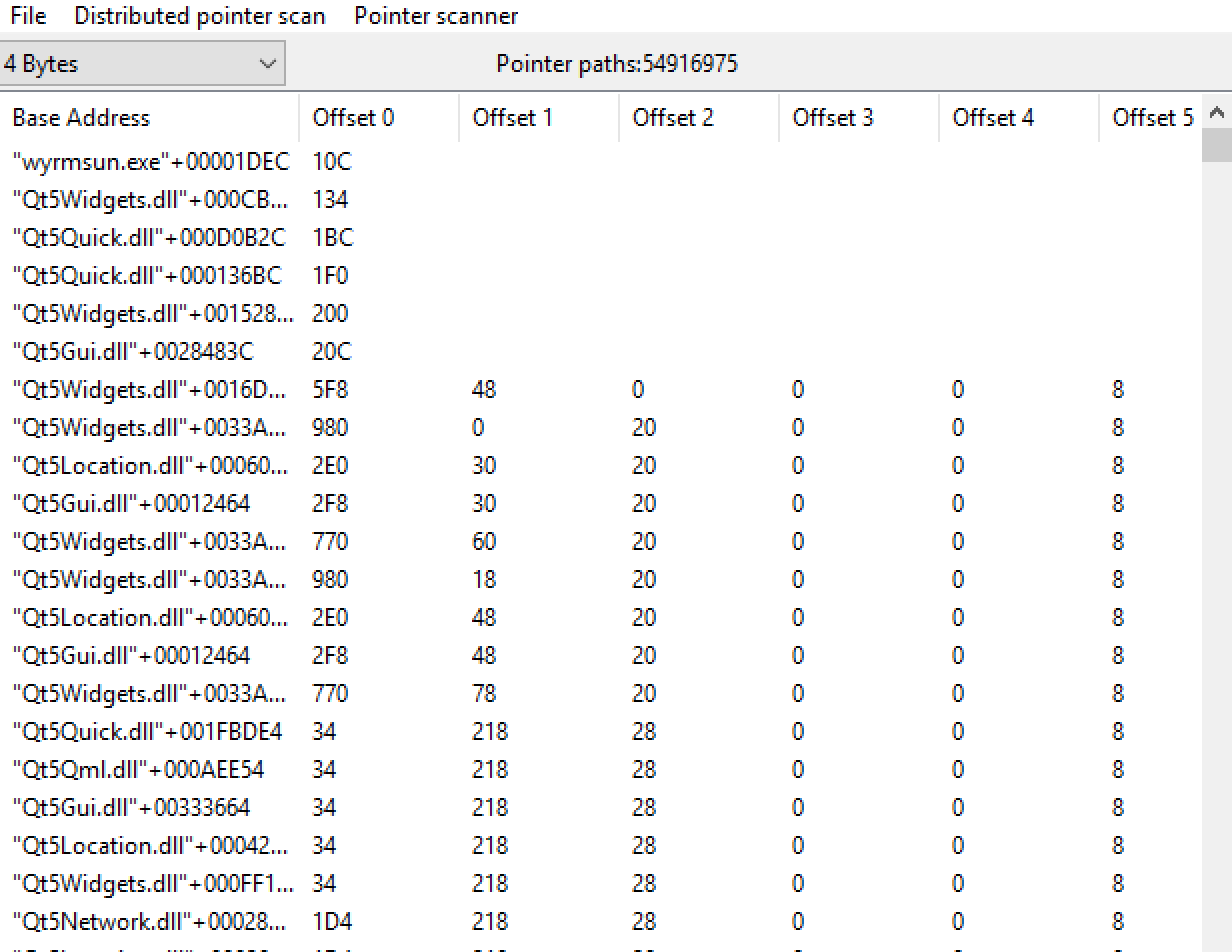
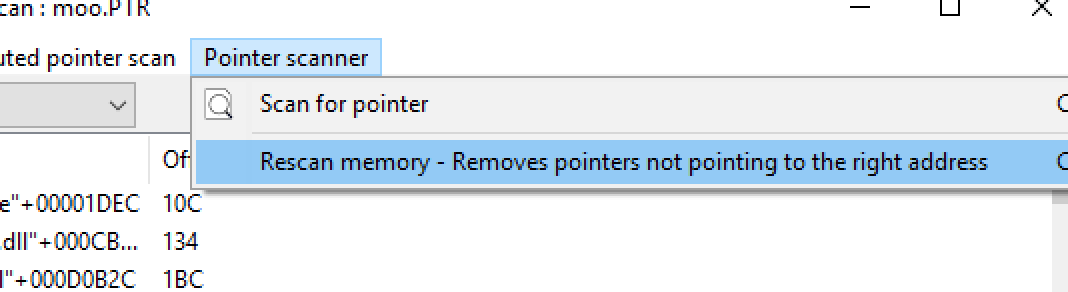
Like regular scanning, we now need to filter these addresses down. Restart your match so that your goal is moved to a new address. Next, find your money address again. Then, in the pointer scan window, choose Rescan Memory:
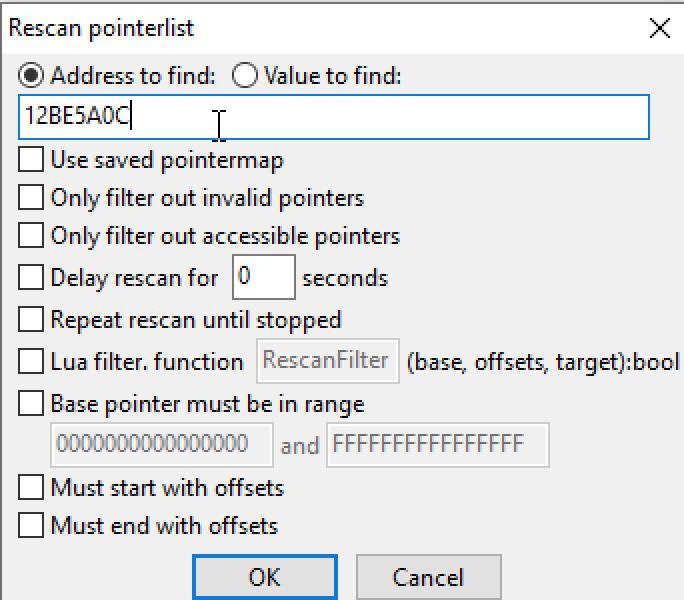
In the dialog that appears, enter your new address and hit OK:
Like regular filtering, Cheat Engine will now rescan all the previously identified pointers and see if they are still correctly pointing at your new address. Repeat this operation several times, and eventually you will find a few pointers that always correctly point to the player’s money value. For this lesson, we will use:
+0x14
[+0]
[+0x4]
[+0x8]
[+0x4]
[+0x78]
wyrmsun.exe + 0x0061A504
We will discuss how to use these values in our code, so feel free to substitute in whatever value you find.
Dealing with Dynamic Code
At the beginning of this lesson, we discussed how code was dynamically loaded and, as a result, addresses would not be consistent. You can verify this behavior by starting Wyrmsun, noting an address, restarting your VM, and opening Wyrmsun again. You will notice that the address no longer contains the same code.
Just like DMA, we know that the game must have some way to locate its
code. When dealing with dynamic code, generally games will offset all
addresses from the game’s module base address. We can observe this
behavior by looking at the creating unit call. While the
first byte will change, the call always ends in
0x2CF7 (e.g., 0xF42CF7 or
0x292CF7).
We can determine the base address of the main module by going into the Symbols tab in x64dbg:
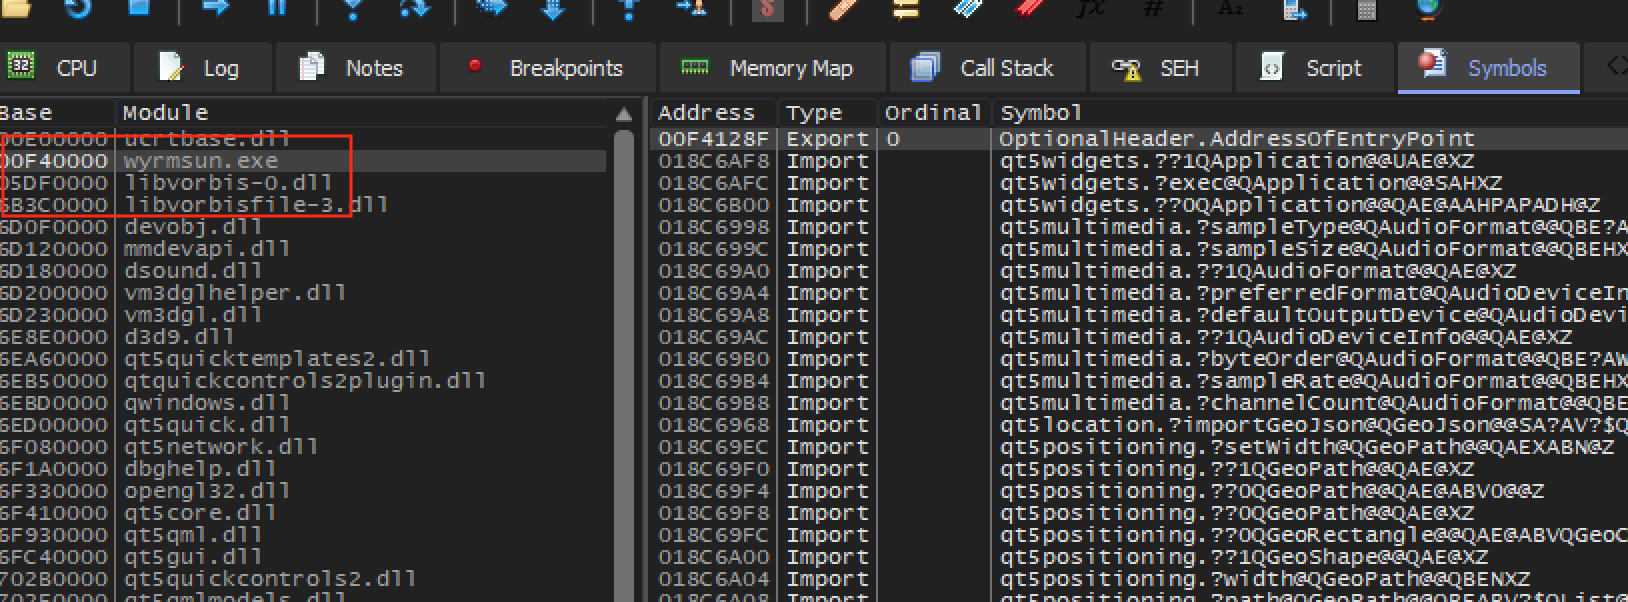
We can see here that our base address is 0x00F40000. As such,
we know that the create unit function will exist at the
base address + 0x2CF7. Likewise, we saw that in this lesson, the
call to create unit was at 0x01163471. If we
subtract this address from the base address, we get an offset of
0x223471. We can use these offsets when creating our DLL to
automatically calculate the addresses of functions we care about.
Creating our DLL
Like in previous lessons, we will create a DLL to inject into our target. First, we will start with our base:
#include <Windows.h>

BOOL WINAPI DllMain(HINSTANCE hinstDLL, DWORD fdwReason, LPVOID lpvReserved) {
  DWORD old_protect;

  if (fdwReason == DLL_PROCESS_ATTACH) {
    //hooking code here
  }

  return true;
}
Our DLL will have two code caves. First, we will create a code cave at the code responsible for creating a unit. In this code cave, we will retrieve the value of ecx and copy the structure it points to into our DLL’s memory. Our second code cave will hook the main game loop. In this code cave, we will check the current player’s money value and then call the create unit function.
Create Unit Code Cave
When we reversed the create unit function, we identified the structure that was pushed as an argument to the function. While we identified several components of this structure, we did not fully reverse it. Since this structure does not change when creating worker units, we will use a code cave to copy a valid form of the structure. We will then use this copied form in our main game loop code cave.
First, we will hook the address for creating a unit and direct it to our code cave, as we have done in previous lessons. Since the code’s addresses change, we will determine the address based on the base address of the module. We will also use this base address to calculate the recruit unit call location:
HANDLE wyrmsun_base;

DWORD recruit_unit_ret_address;
DWORD recruit_unit_call_address;

...

wyrmsun_base = GetModuleHandle(L"wyrmsun.exe");

unsigned char* hook_location = (unsigned char*)((DWORD)wyrmsun_base + 0x223471);
recruit_unit_ret_address = (DWORD)hook_location + 8;
recruit_unit_call_address = (DWORD)wyrmsun_base + 0x2CF7;

VirtualProtect((void*)hook_location, 8, PAGE_EXECUTE_READWRITE, &old_protect);
*hook_location = 0xE9;
*(DWORD*)(hook_location + 1) = (DWORD)&recruit_unit_codecave - ((DWORD)hook_location + 5);
*(hook_location + 5) = 0x90;
*(hook_location + 6) = 0x90;
*(hook_location + 7) = 0x90;
In our recruit unit code cave, we will first retrieve the value of ecx and place it in a variable:
DWORD* base;

__declspec(naked) void recruit_unit_codecave() {
  __asm {
    pushad
    mov base, ecx
  }
With this pointer now stored in the base variable, we can dereference this pointer to retrieve the location of the structure. With the pointer dereference, we can then copy the entire structure into another variable to use in our other code cave. We can retrieve the size by observing the size of the structure in x64dbg. Additionally, we will create an init variable to track whether this has occurred yet:
DWORD* unitbase;

unsigned char unitdata[0x110];
bool init = false;

...

unitbase = (DWORD*)(*base);
memcpy(unitdata, unitbase, 0x110);
init = true;
Finally, we will restore our registers and the original instructions:
  _asm {
      popad
      push ecx
      mov ecx, esi
      call recruit_unit_call_address
      jmp recruit_unit_ret_address
    }
}
Game Loop Code Cave
With our data copied into a buffer, we can now create our game loop code cave. Like before, we will begin by hooking the address that we identified earlier:
DWORD gameloop_ret_address;
DWORD gameloop_call_address;

hook_location = (unsigned char*)((DWORD)wyrmsun_base + 0x385D34);
gameloop_ret_address = (DWORD)hook_location + 5;
gameloop_call_address = (DWORD)wyrmsun_base + 0xDBCA;

VirtualProtect((void*)hook_location, 5, PAGE_EXECUTE_READWRITE, &old_protect);
*hook_location = 0xE9;
*(DWORD*)(hook_location + 1) = (DWORD)&gameloop_codecave - ((DWORD)hook_location + 5);
In our game loop code cave, we will first check the value of our player’s money. We will use the pointer and offset that we received from Cheat Engine to do this:
DWORD *gold_base, *gold;
...
__declspec(naked) void gameloop_codecave() {
  __asm {
    pushad
  }

  gold_base = (DWORD*)((DWORD)wyrmsun_base + 0x0061A504);
  gold = (DWORD*)(*gold_base + 0x78);
  gold = (DWORD*)(*gold + 4);
  gold = (DWORD*)(*gold + 8);
  gold = (DWORD*)(*gold + 4);
  gold = (DWORD*)(*gold);
  gold = (DWORD*)(*gold + 0x14);
Next, we will check to see if our unit buffer has been initialized and if the player’s money is over 3000. If so, we copy our buffer for the worker into the buffer pointed to by the game, and move the base into ecx before calling the recruit unit function:
if (init && *gold > 3000) {
  memcpy(unitbase, unitdata, 0x110);
  __asm {
    mov ecx, base
    push ecx
    call recruit_unit_call_address
  }
}
Once again, we need to restore the original instructions:
  __asm {
      popad
      call gameloop_call_address
      jmp gameloop_ret_address
    }
  }
Finally, we can build this DLL and inject it into our game. In game, recruit a unit to copy our buffer and then start collecting money. You should notice that workers begin to get recruited instantly.
The full source code for this lesson is available on github.