Target
Our target in this lesson will be Wesnoth 1.14.9.
Identify
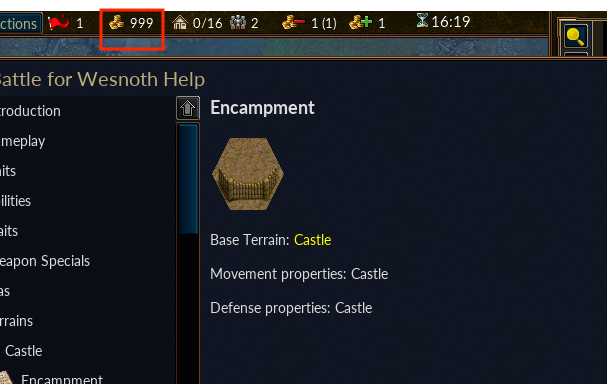
Our goal in this lesson is to create a code cave inside Wesnoth. This code cave will be executed whenever we select Terrain Description. The code cave will give us 999 gold before bringing up the terrain description box.
Understand
To create a code cave, we will first need to find two locations: the location to redirect and the location to place the cave skeleton. We will then create a cave skeleton at the second location. With that created, we will redirect the first location to jump to the skeleton.
Locating Gold
Since we will be modifying our gold with this hack, we need to find our gold address. Our first step is opening up Wesnoth and creating a local game. Then we’ll follow the steps in the Memory Hack lesson to find our gold address. Like we discussed in the Changing Game Code lesson, our gold address will be at a different address than in previous lessons. Once we have found our new gold address, we will close down Cheat Engine but keep Wesnoth open. In this lesson, we will use the value of 0x05F3B85C as our gold address.
Locating Code Cave
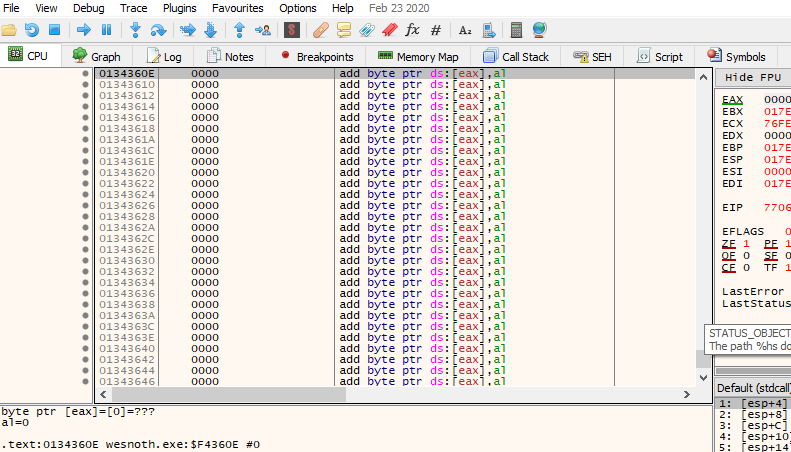
First, we will locate where to place our code cave. While there are many places where we can find empty sections of memory, the quickest and easiest approach is to scroll to the end of the Wesnoth module. At the end of most executable modules, there is a large section of empty data that can be modified. In our example, this memory is around 0x0134360E.
Hooking Location
Next, we need to identify the address to hook. In this lesson, we will be hooking the method that displays the terrain description. To find this address, we can use the same method and address we identified in the Reversing Code lesson. This call is at 0xCCAF90.

Redirection
With our code cave and hooking locations identified, we can now create the code cave. When modifying a game’s code in a debugger, it’s important that the game is in a paused state. This prevents the game’s normal execution from accidentally entering our code cave before we have finished it. If it does, the game could jump to non-existent code and crash. To pause the game, we can use the Pause button next to the Continue button.

We can now redirect the hooking location to jump to our code cave. In the first lesson, we covered the idea of opcodes. Each instruction has a different opcode and also a different opcode length. This is because certain instructions require additional pieces of data to execute. For example, the pushad instruction is represented by the 1 byte opcode 0x60. This is due to the instruction not requiring any additional data to execute. As a contrast, the instruction mov al, 1 is represented by the 2 byte opcode 0xB0 01. This is because the mov instruction requires the data to be moved (in this case, the value 1) to be encoded somewhere inside the opcode.
The jmp instruction’s opcode is 5 bytes long. This is because the opcode encodes the address that will be jumped to. Because of this, we will need to find a location of at least 5 bytes to place our jmp instruction. To do this, let’s examine the method for displaying the terrain description:
opcode      instruction
----------------------------------------
8B01        mov eax, dword ptr ds:[ecx]
8D7426 00   lea esi, dword ptr ds:[esi]
FF50 28     call dword ptr ds:[eax+28]
B0 01       mov al,1
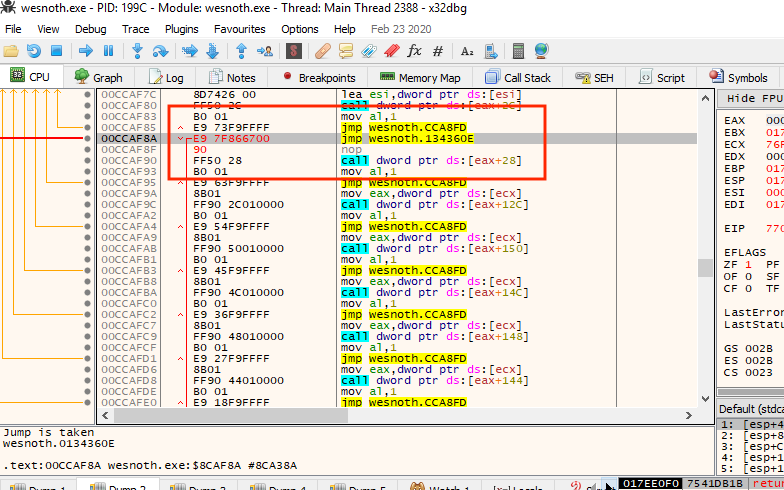
Unfortunately, there is no instruction in this method that has a 5 byte opcode. In this case, we will need to replace the first two instructions. When writing our code cave, we will need to remember to replace both of these. However, the opcodes of these first two instructions (0x8B01 and 0x8D742600) combine to 6 bytes total. When we replace the first 5 bytes with our jump, the last byte (0x00) will stay and potentially be executed. To ensure that our change does not cause the game to crash, we will replace the last byte with a nop instruction. x64dbg will automatically do this when assembling instructions.
With all of this out of the way, we can finally make our code change. Navigate to the first mov instruction at 0x00CCAF8A and change the instruction to jmp 0x0134360E. Make sure that the Fill with NOPs option is checked when assembling this instruction. This jump will be responsible for jumping to our code cave.
Cave Skeleton
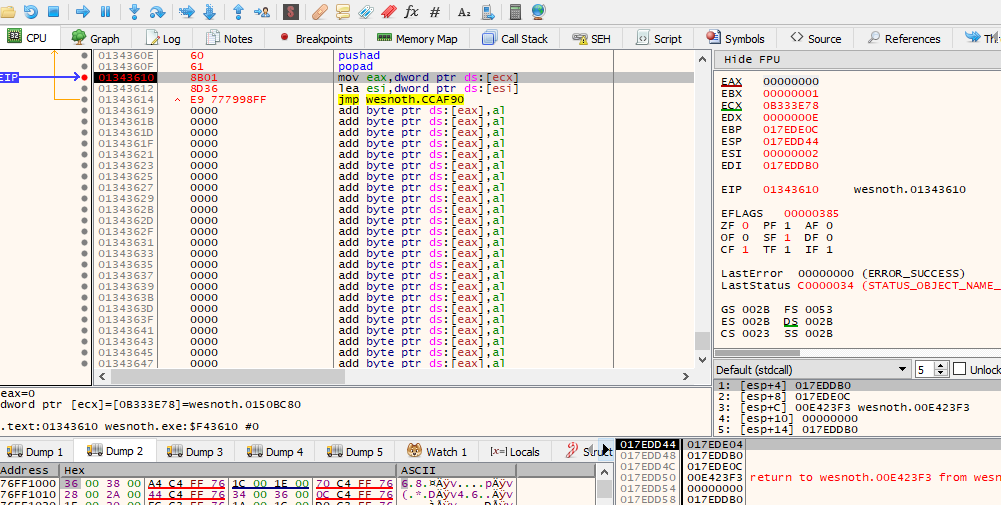
Next, we can write our cave skeleton. For now, our cave skeleton will just save and restore the registers, replace the original instructions, and then jump back to the original code. This will execute identically to the original code and will allow us to verify that our redirection was successful. Navigate to 0x0134360E and insert the following code:
pushad
popad
mov eax, dword ptr ds:[ecx]
lea esi, dword ptr ds:[esi]
jmp 0xCCAF90
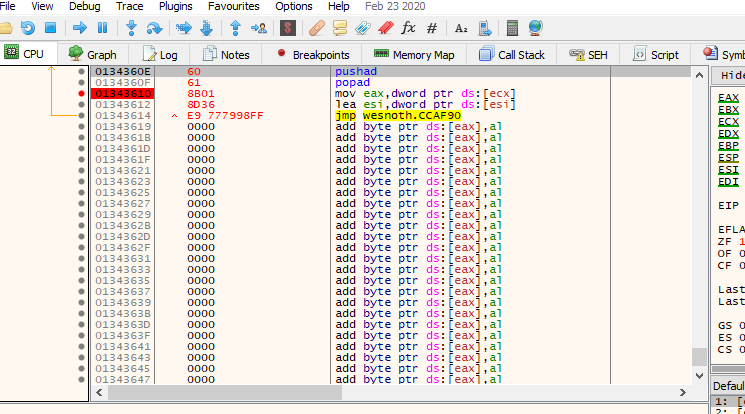
To verify that this code cave is being called, place a breakpoint at 0x01343610 and then continue execution of the program. When you bring up the terrain description, the breakpoint in our code cave should pop.
Change
With a working skeleton, we can now change our gold. In between the pushad and popad instructions, we will insert our instruction to modify our gold. To do this, we will move the value of 999 into the address holding the gold value. This instruction will look like:
mov dword ptr ds:[0x5F3B85C], 0x3E7
With this instruction, our final code cave will look like so:
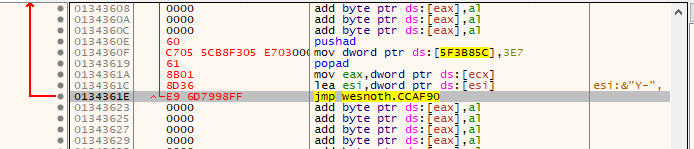
If we go back into Wesnoth and select Terrain Description on a tile, our gold will change to 999 before the terrain description box appears.