Target
Our target for this lesson will be Assault Cube 1.2.0.2.
Identify
Our goal in this lesson is to create an ESP hack, a type of hack that displays player information above their heads. This information includes the player’s health, name, or current weapon in use, and it is also displayed through walls.
Understand
In the Aimbot lesson, we created an aimbot, which worked by calculating the angle between our player and an enemy and then setting our player’s current view angle to that calculated angle. For games where a camera is always bound to our player’s view, such as an FPS, we can use these same angles to create an ESP.
Instead of setting our player’s view angle, we will use the difference in these angles to convert the enemy’s 3D location in the world to a 2D position relative to our player’s view. We will then draw text at this position.
The method discussed in this lesson has several drawbacks, but it demonstrates the basic concepts used in an ESP. A more accurate approach is to use the game’s viewmatrix.
Viewports
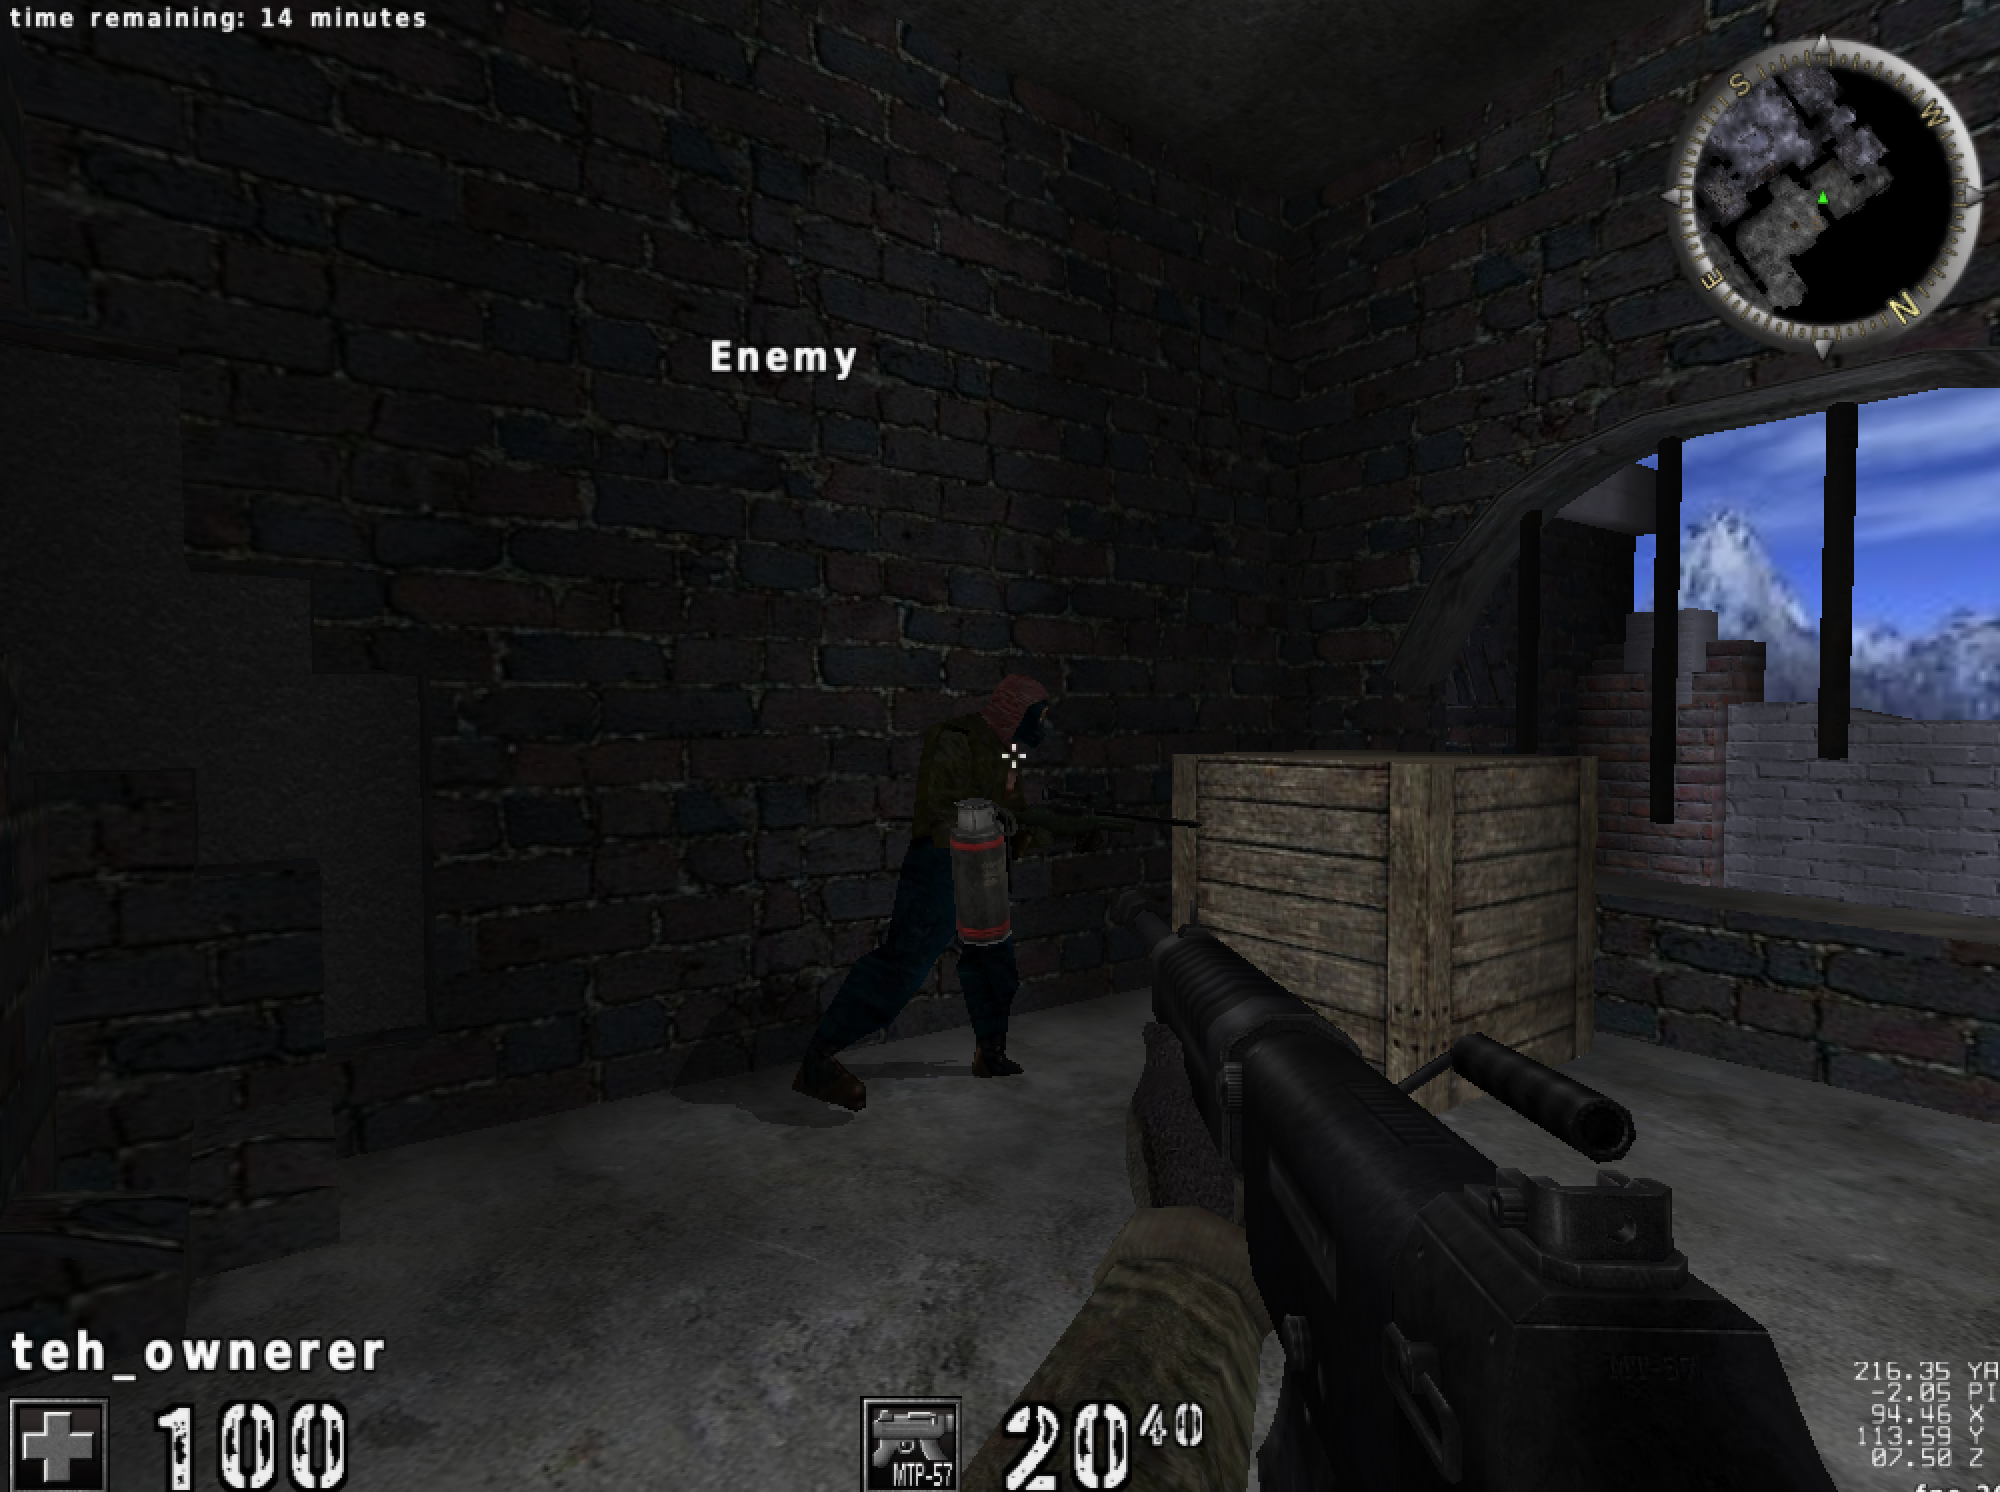
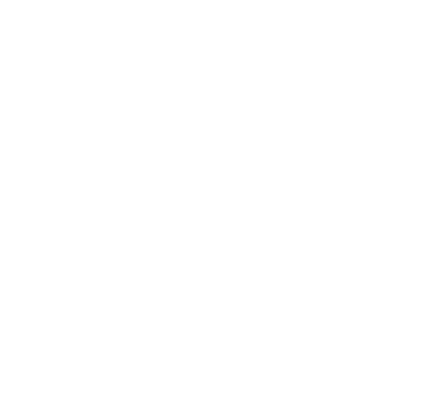
Take the following scene from Assault Cube:
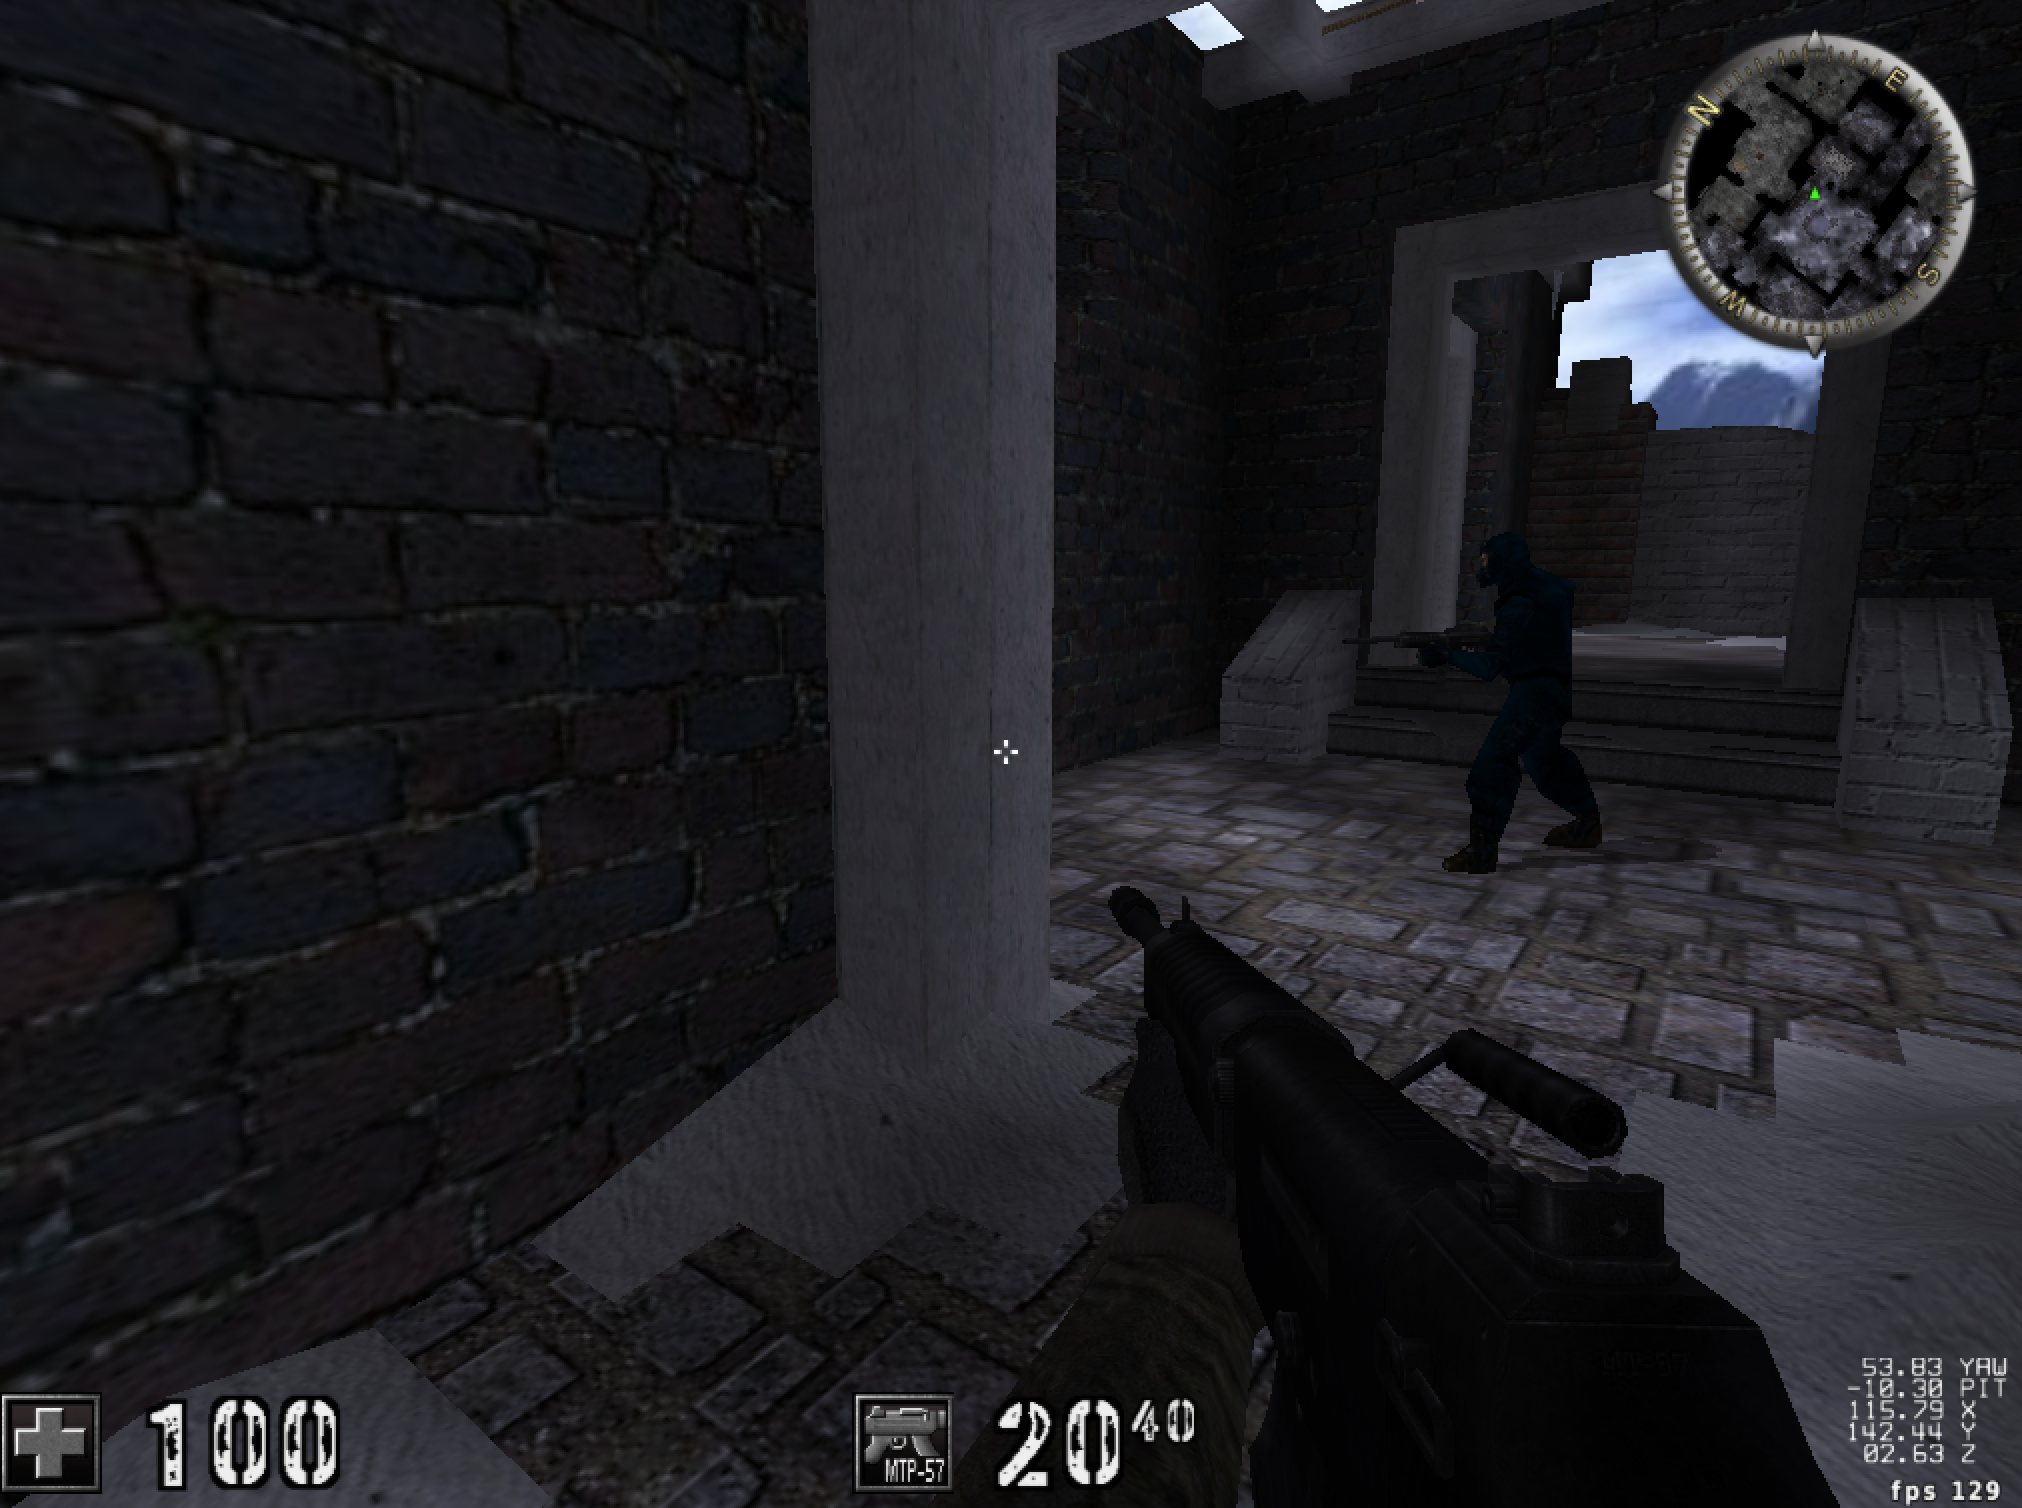
We know from the previous lesson that the enemy we see in the scene above has a 3D position in the world represented by X, Y, and Z coordinates. However, when we are playing Assault Cube, the game needs to display this enemy on a monitor, which is two-dimensional. To do this, the game will choose a static view of the world, called a viewport. In this case, the viewport is tied to the player model that we are controlling. The game will then use this viewport to determine where 3D objects in the world should be displayed.
A good way to visualize a viewport is to imagine a movie set. When filming a movie, the set has actors, sound fixtures, lighting fixtures, and people and fixtures responsible for practical effects. However, none of this extra information is shown when you watch the movie, as the only view of this 3D world (the set) that you can access is the camera filming a specific section. In this analogy, the camera is acting as your viewport into the movie set’s 3D world.
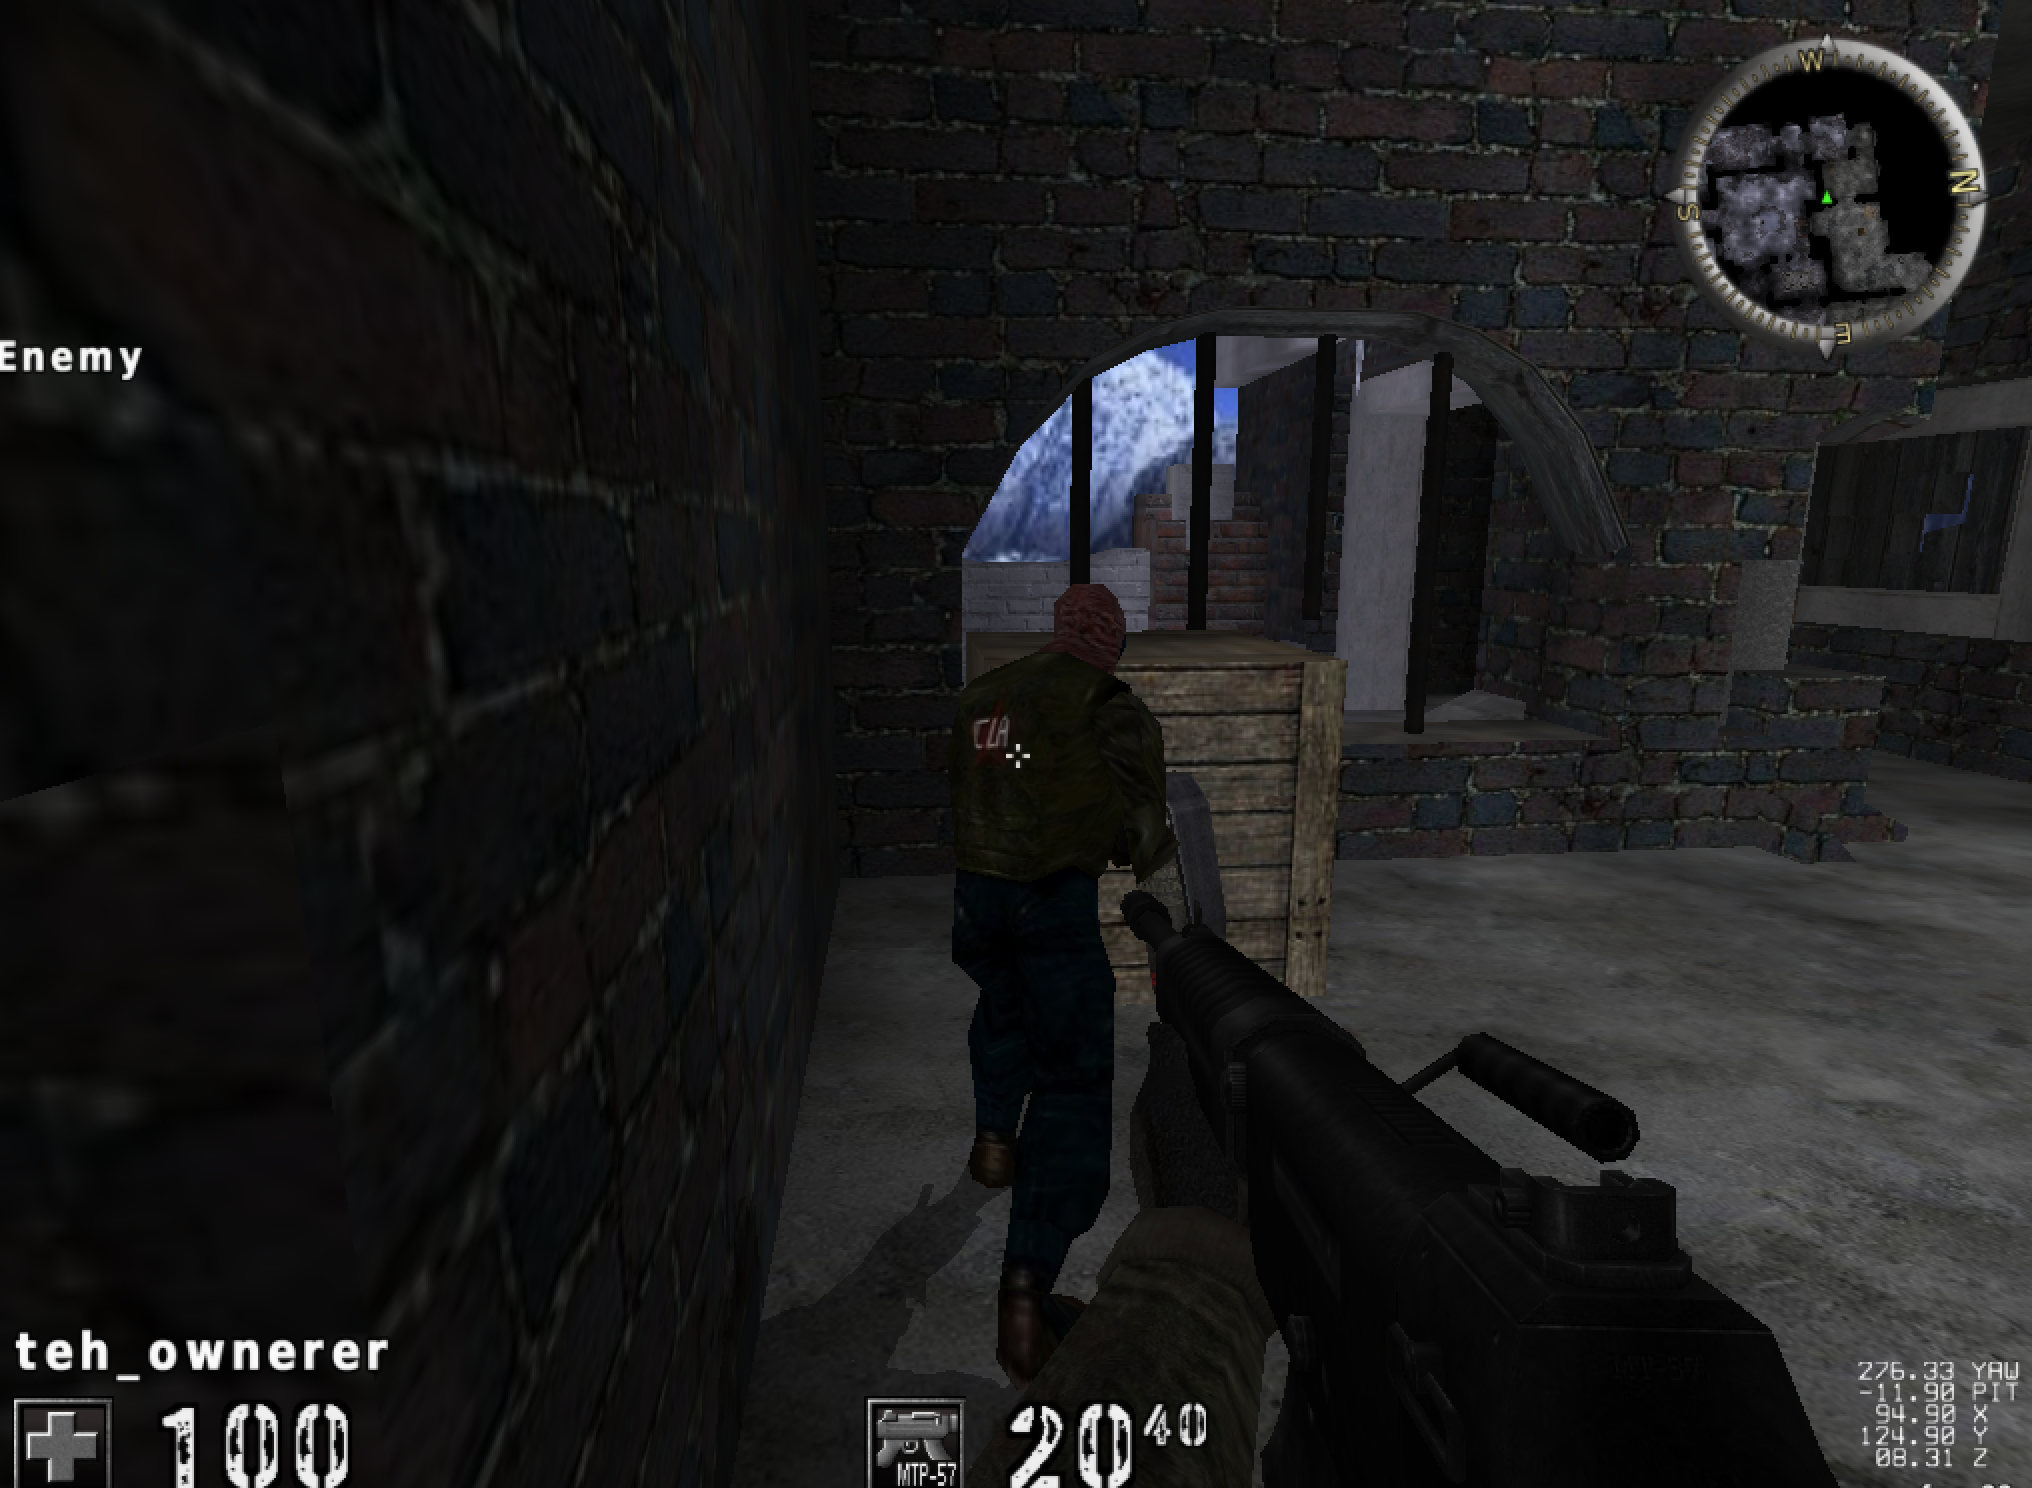
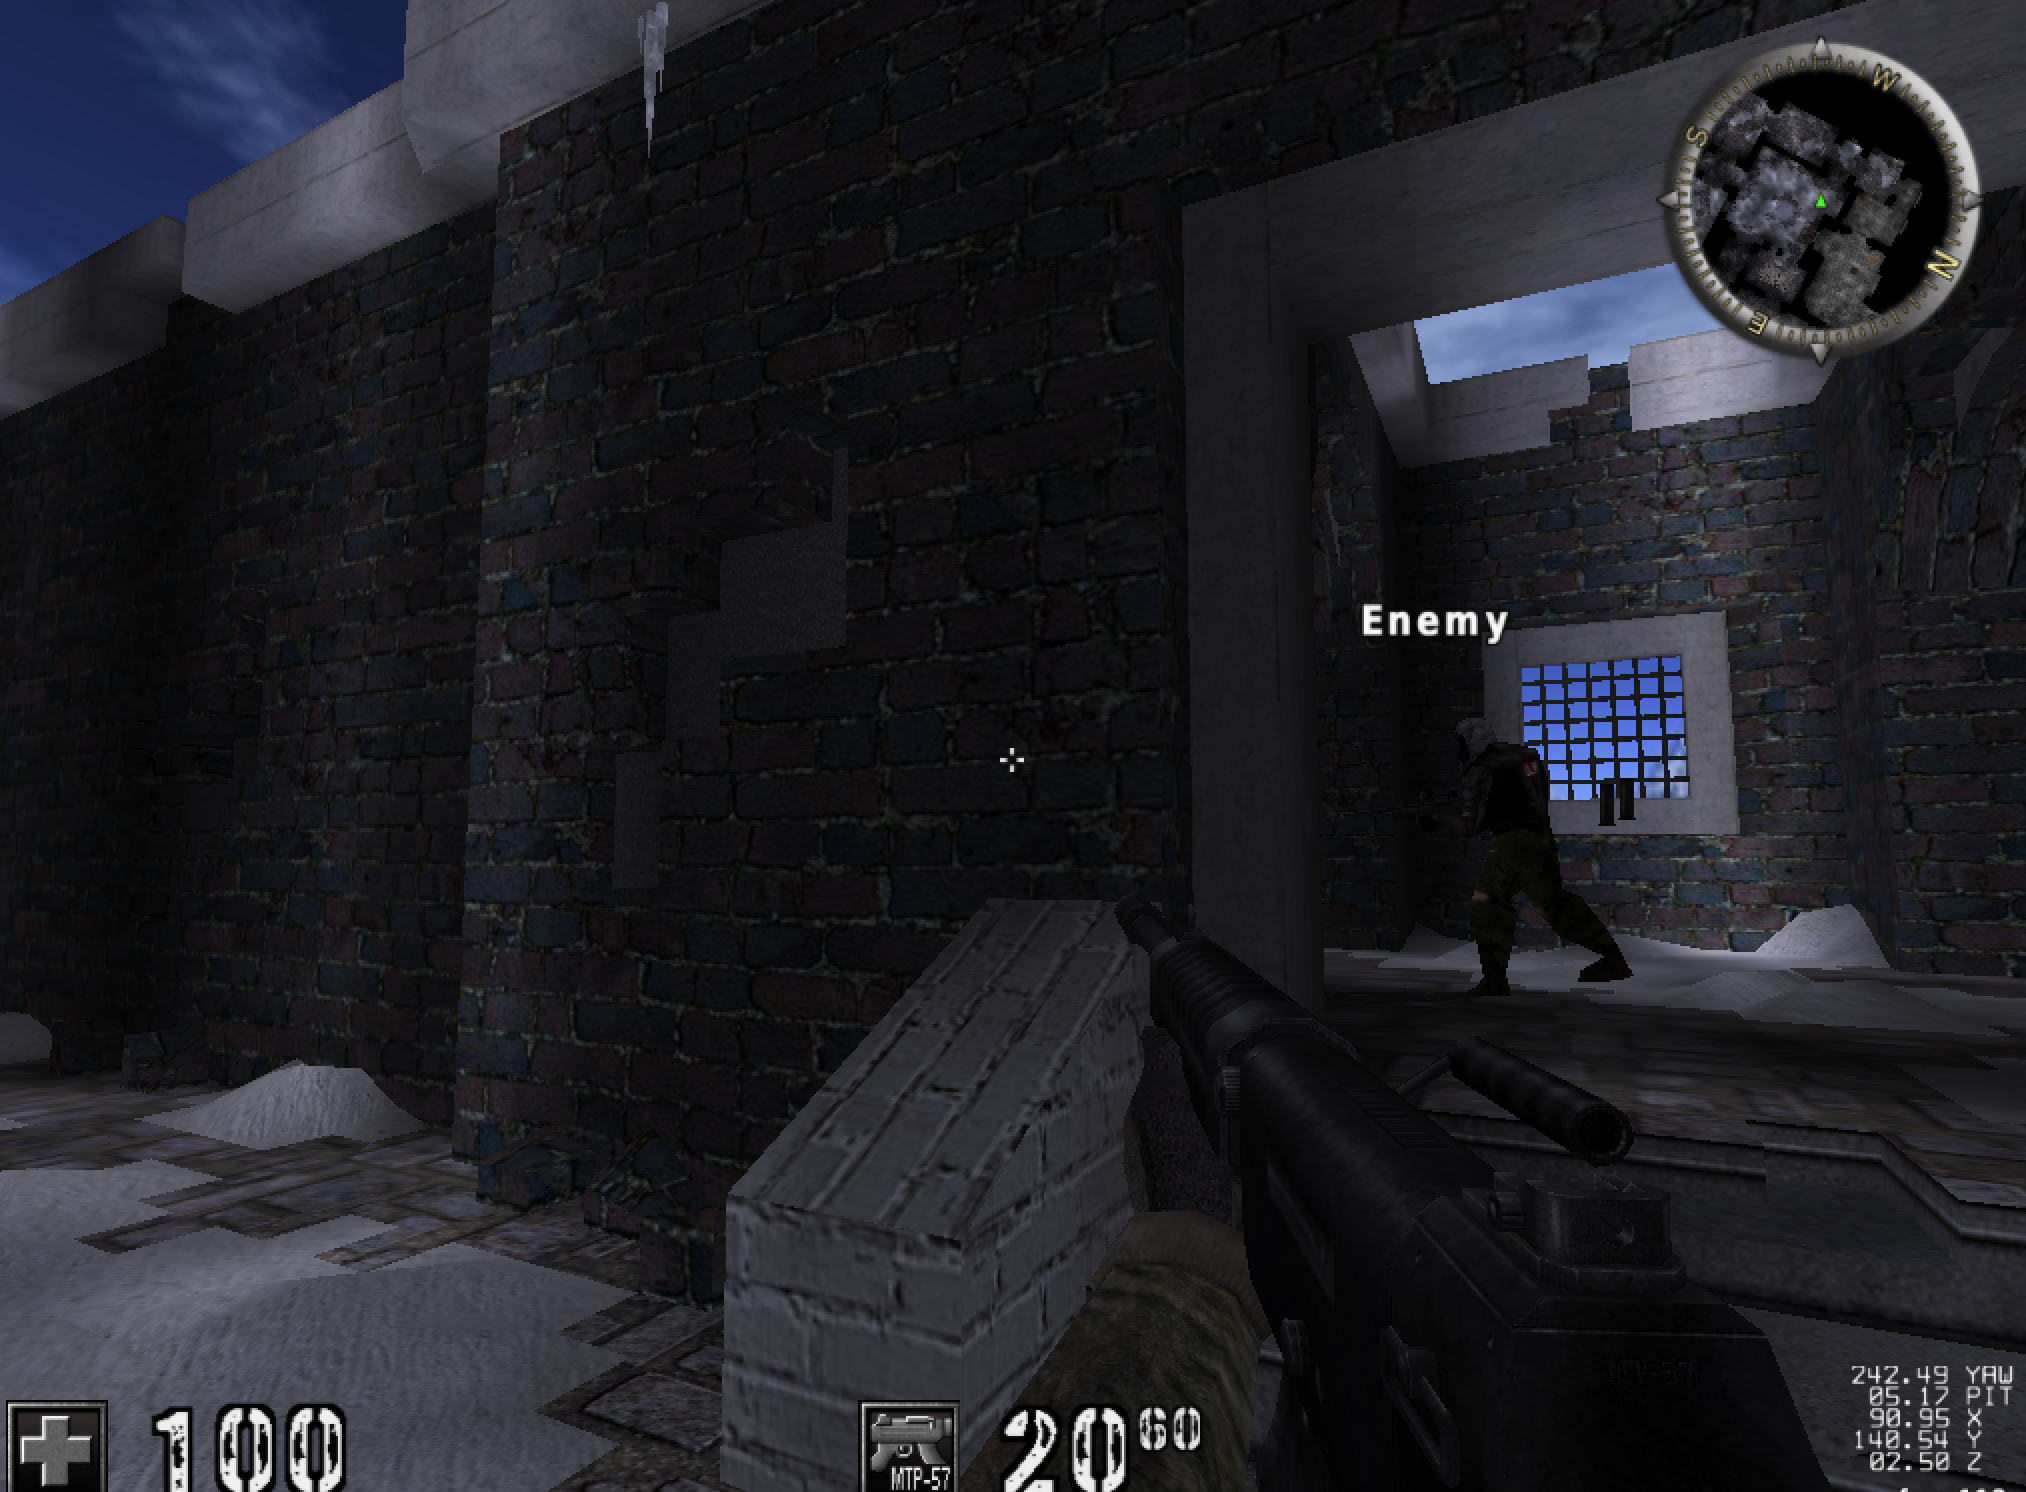
By moving around in the world, we are adjusting our viewport’s position. For example, by moving to the right of the position shown in the scene above, we have the following scene:
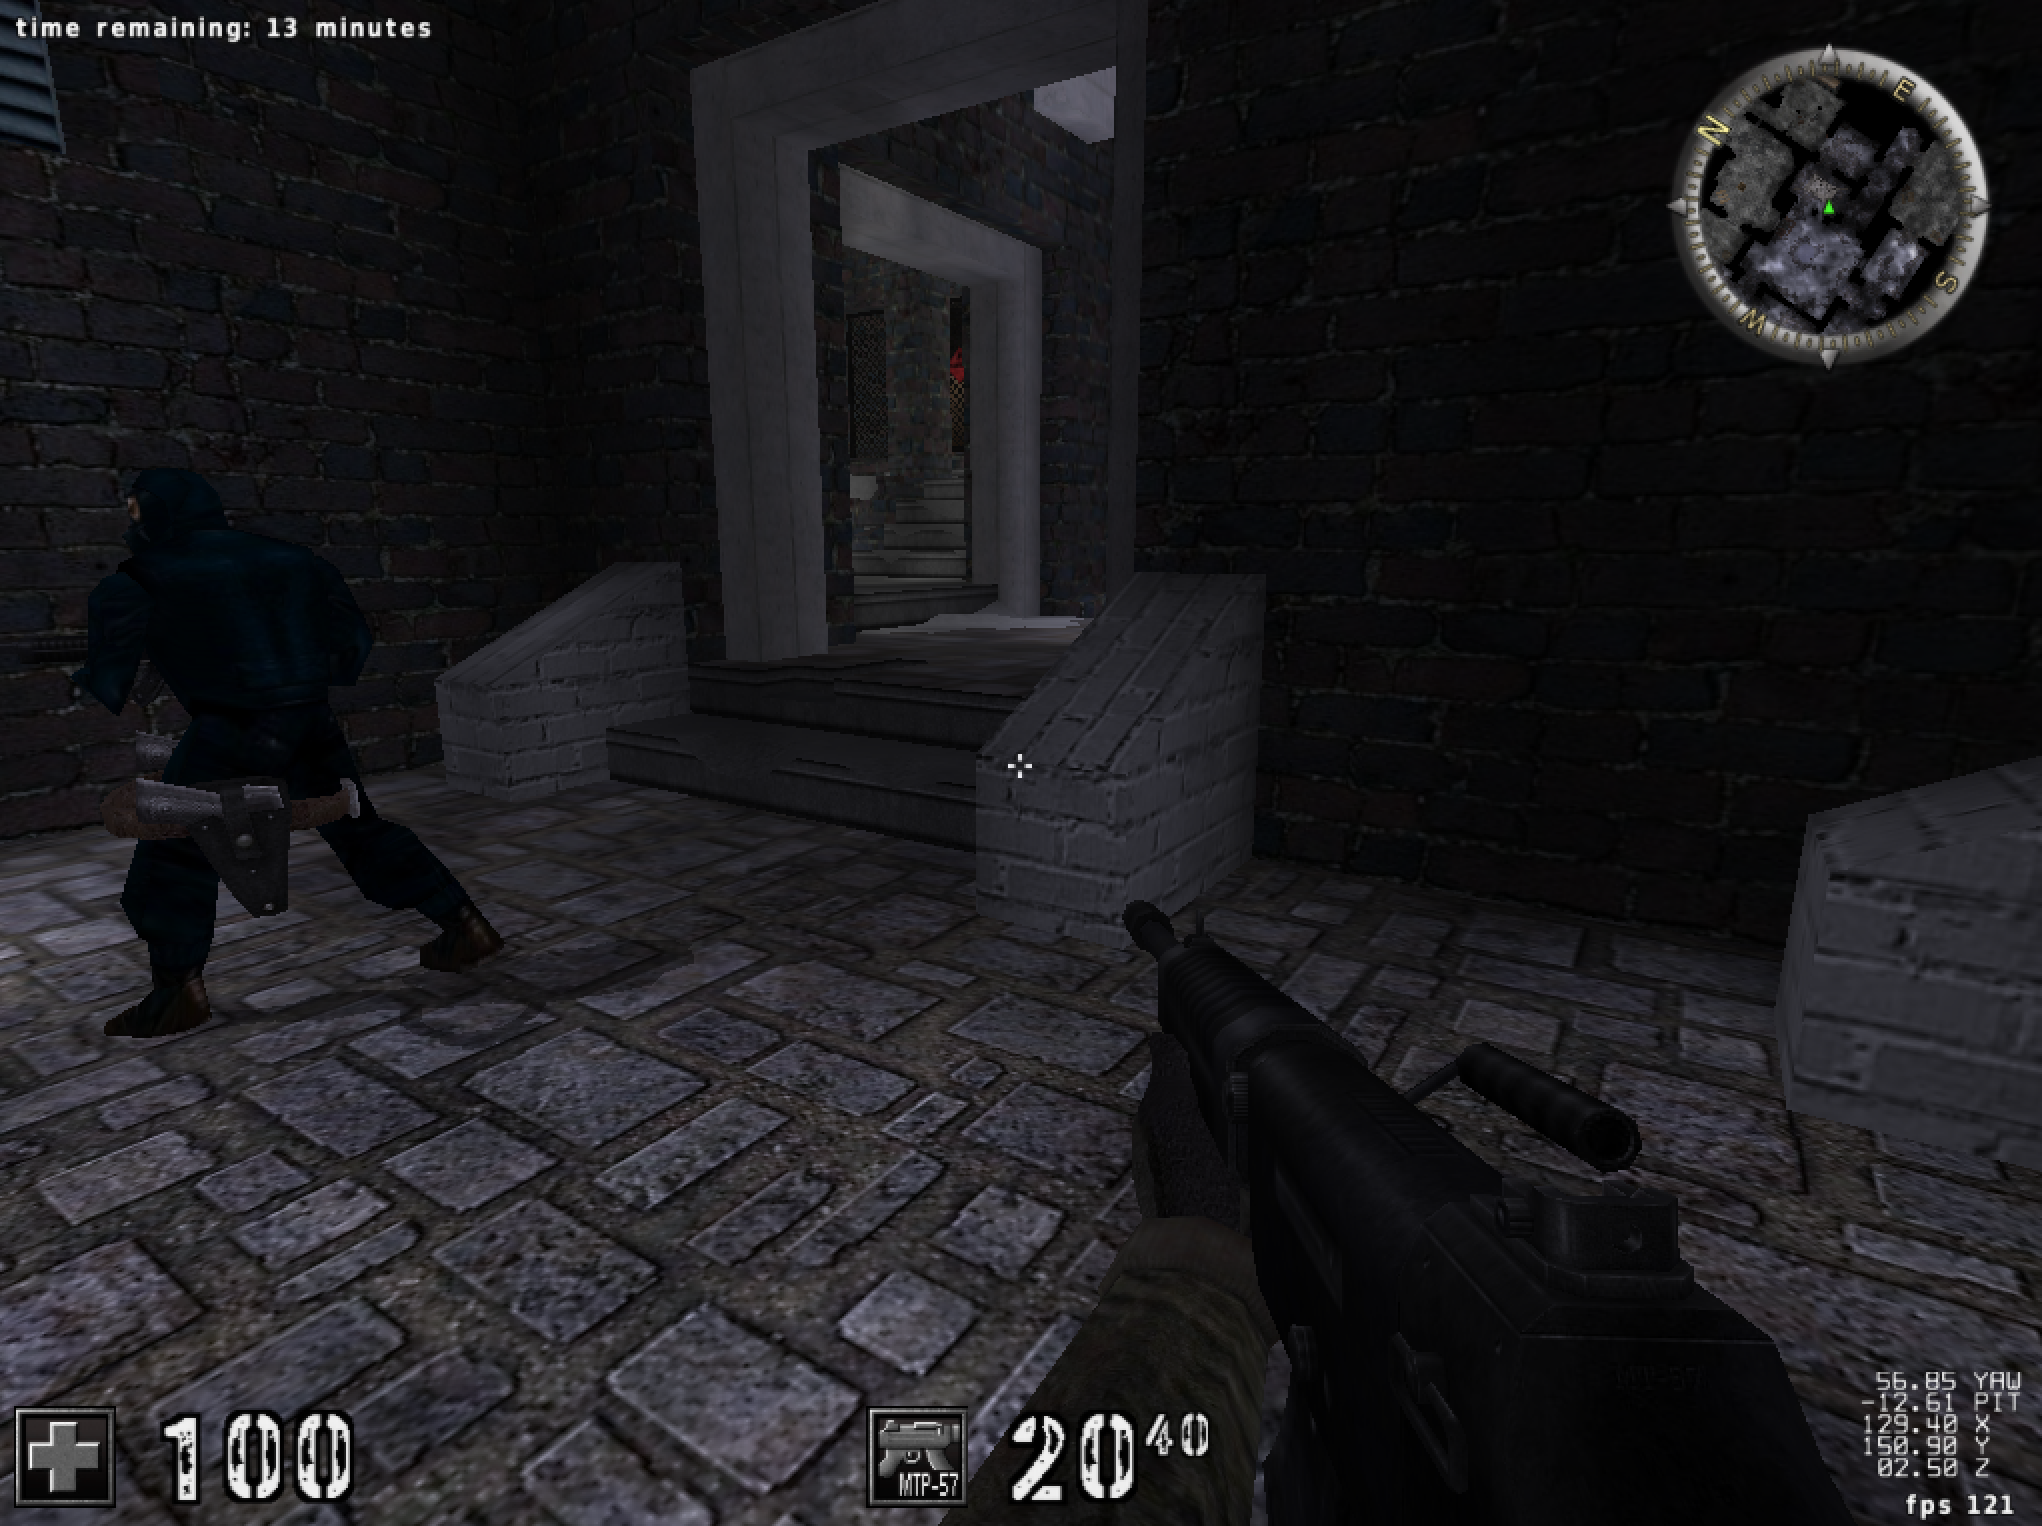
We can see that the enemy has not moved, but his model is now being displayed on the left side of our screen. This is because when we moved our player, we also moved our viewport into this world to a different position.
World to Screen
Like we did when developing our aimbot, we will simplify our ESP development by first isolating the X (or left and right) value. After we have figured out how to calculate this value, we can add our Y (up and down value). We will also develop our hack for a single enemy and then add support for multiple enemies.
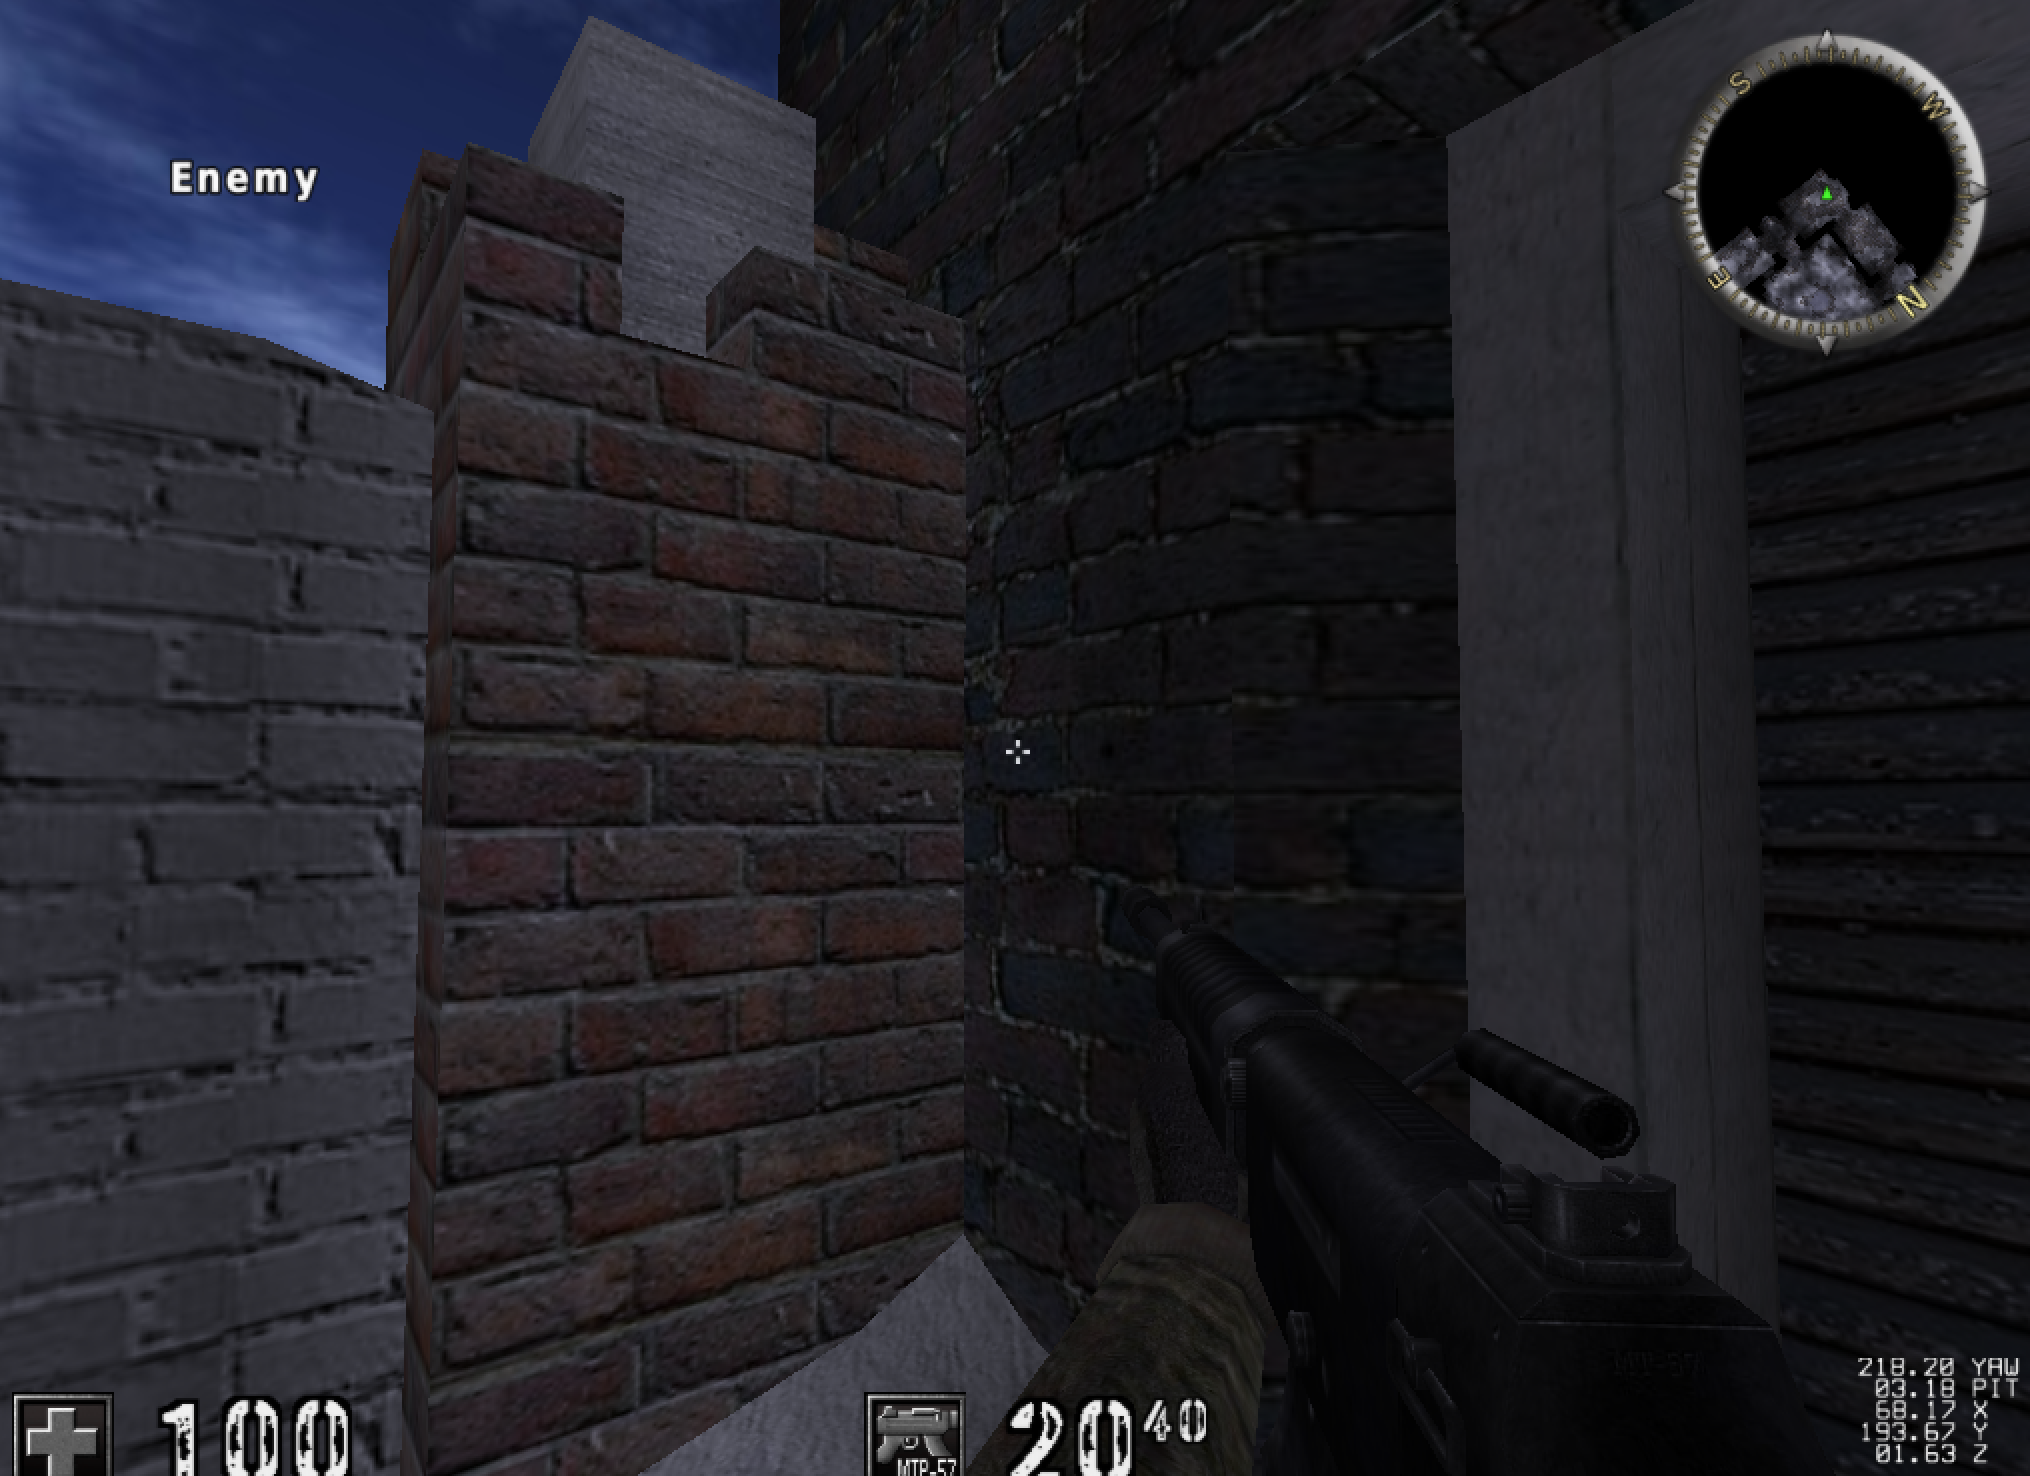
In this lesson, we will assume that you are running Assault Cube in a window of 1024x768. This means that our window is 1024 pixels wide and 768 pixels high. Depending on where your viewport is in the world, the enemy will appear at certain pixel values when the scene is rendered. For example, take the following scene where we are looking at the enemy:
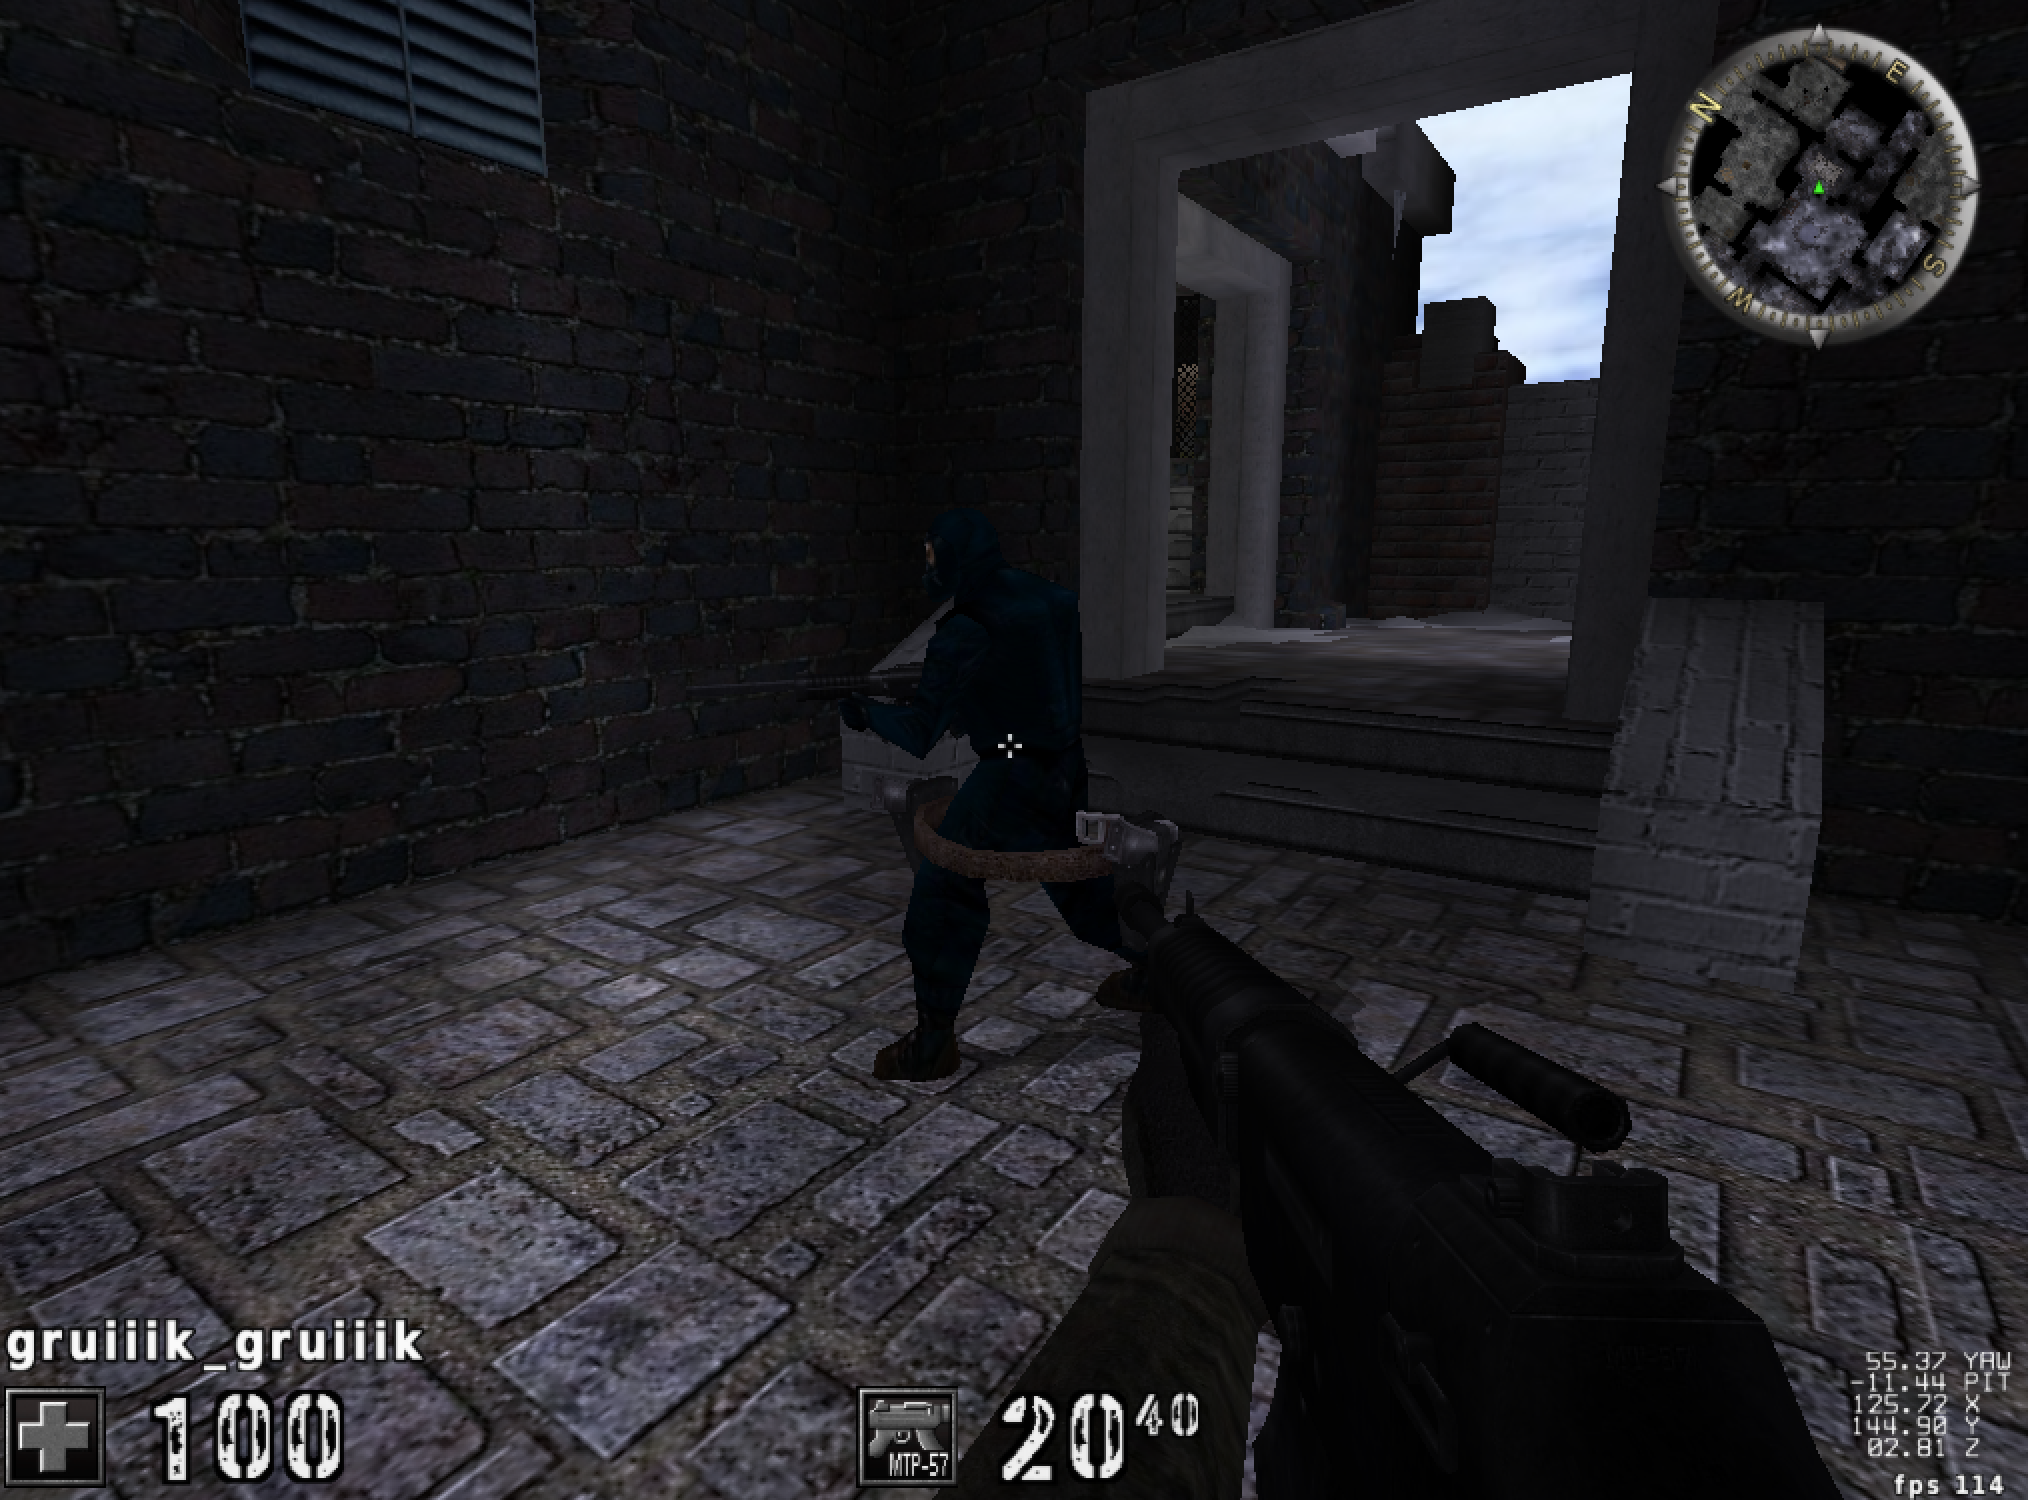
In this case, the enemy is in the middle of our screen, or 1024 / 2. This means that the enemy is at (roughly) the 512th pixel. When we move our player left, the enemy will now appear on the far right of our screen:
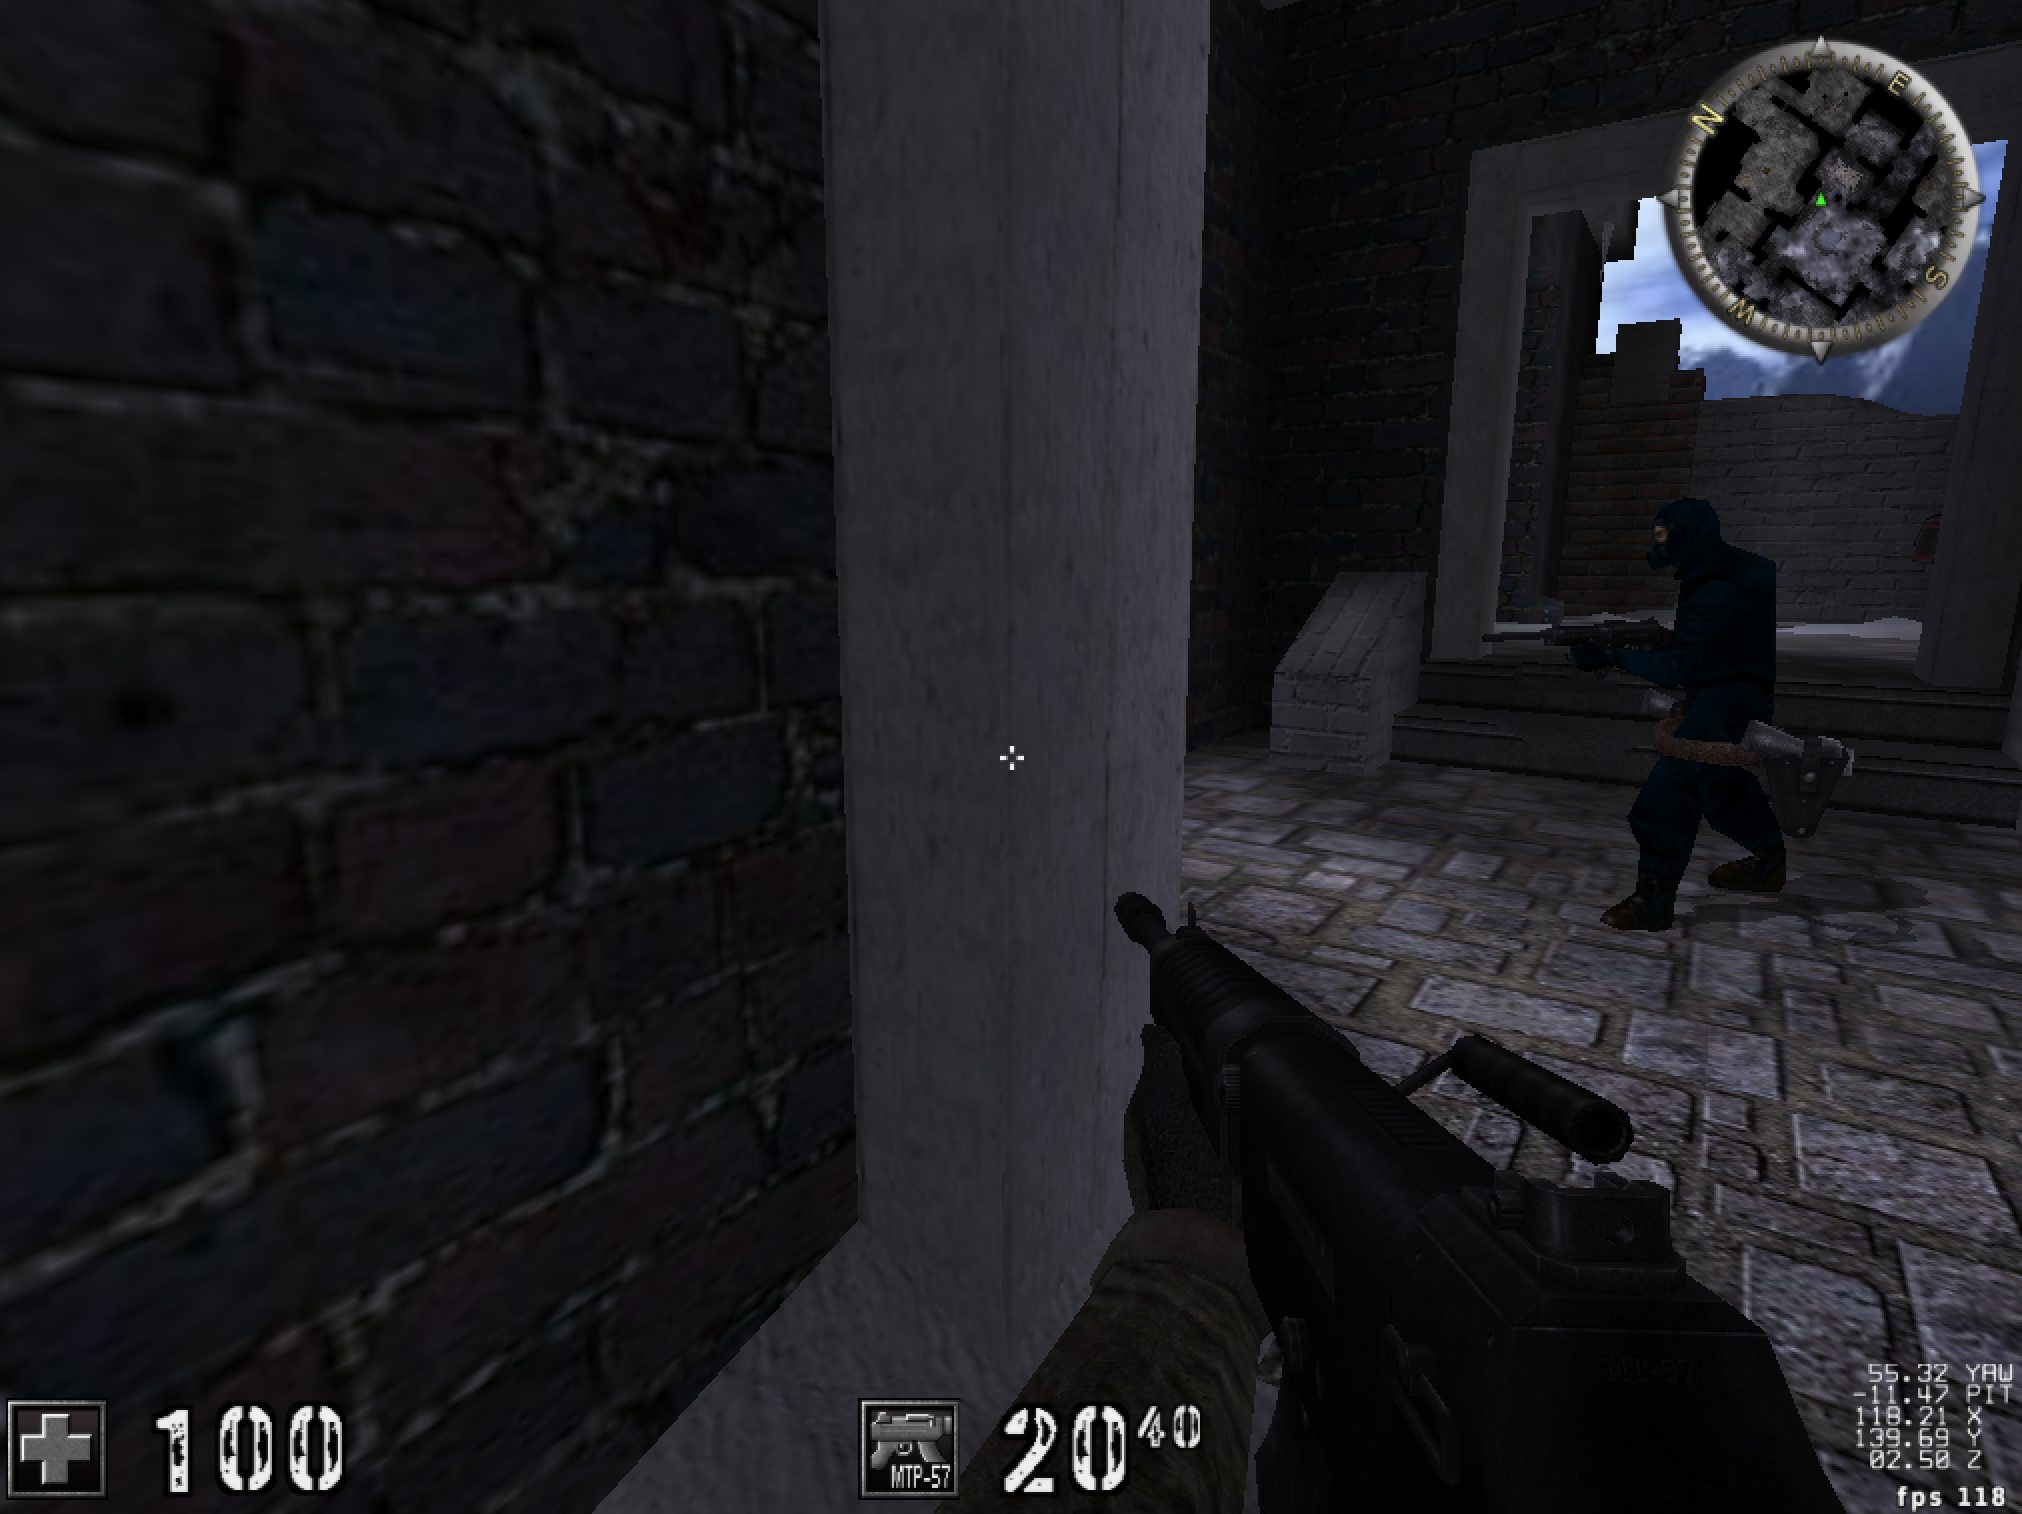
It is hard to identify the exact pixel that the enemy is at here, but we can assume it is roughly 1000. Likewise, if we move right, the enemy will appear on the far left of our screen:
Here the enemy starts at roughly 100 pixels.
We can represent these different scenarios in a series of equations. Since the default view has the middle of our viewport lining up to the middle of our screen, we want to find a value S such that all these equations below will be satisfied:
512 = 512 + S
100 = 512 + S
1000 = 512 + S
There is no constant value of S that will make all these equations true. We need a way for S to be both negative and positive and represent values from roughly -400 to 0 to 400. To achieve this, we can expand S out into a multiplication of two values, as shown below:
512 = 512 + (A * F)
100 = 512 + (A * F)
1000 = 512 + (A * F)
In these equations, A will be tied to how far the enemy is from our viewport’s center, and F will be a static scaling value. If we are looking directly at the enemy, A will be 0, making our first equation true. If we are looking to the right of the enemy, (A * F) will produce a negative value to subtract from 512. Likewise, if we are looking to the left, (A * F) will produce a positive value to add to 512.
Scaling Values
Next, we need to determine the values of A and F. When writing our aimbot, we determined our current player’s yaw as well as the yaw needed to aim at an enemy. In that case, we then set our current player’s yaw to the latter yaw. However, for this hack, we can use the difference between these values as a value for A above. The larger the difference between these values is, the farther away the enemy is from the center of our screen.
We can use our aimbot code to determine what these values look like in the game. In our aimbot code, we calculated the yaw via:
float abspos_x = enemy->x - player->x;
float abspos_y = enemy->y - player->y;

float azimuth_xy = atan2f(abspos_y, abspos_x);
float yaw = (float)(azimuth_xy * (180.0 / M_PI));
yaw += 90;
Unlike in the aimbot, where we set player->yaw = yaw, we will instead calculate the difference between these yaws:
float yaw_dif = player->yaw - yaw;
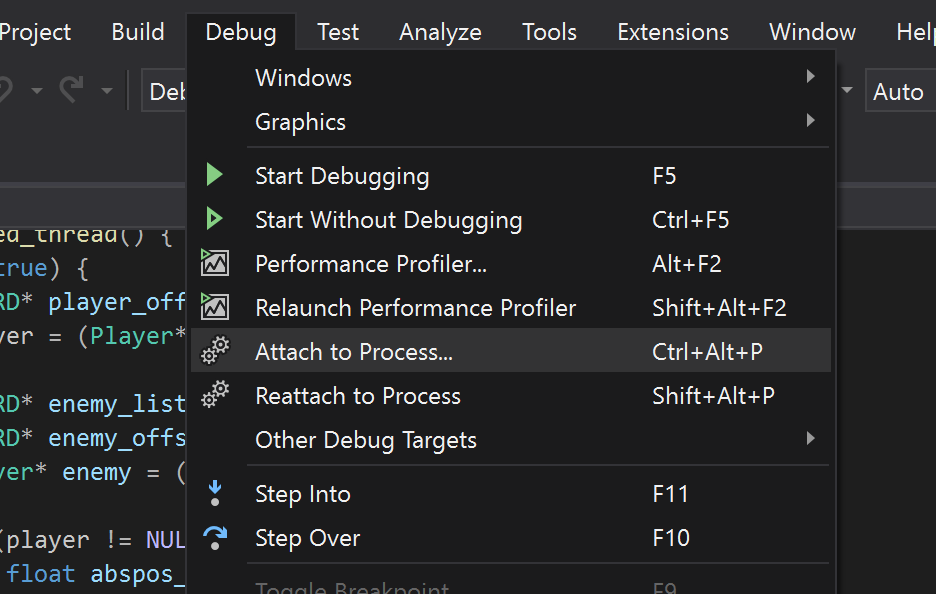
We can use Visual Studio’s built-in debugger to see what this value is. First, build your DLL as normal. Then, open up Assault Cube, create a two-player game just like we did in the Aimbot lesson, and inject the DLL with a DLL injector. With our DLL injected, go into Visual Studio and choose Debug -> Attach to Process:
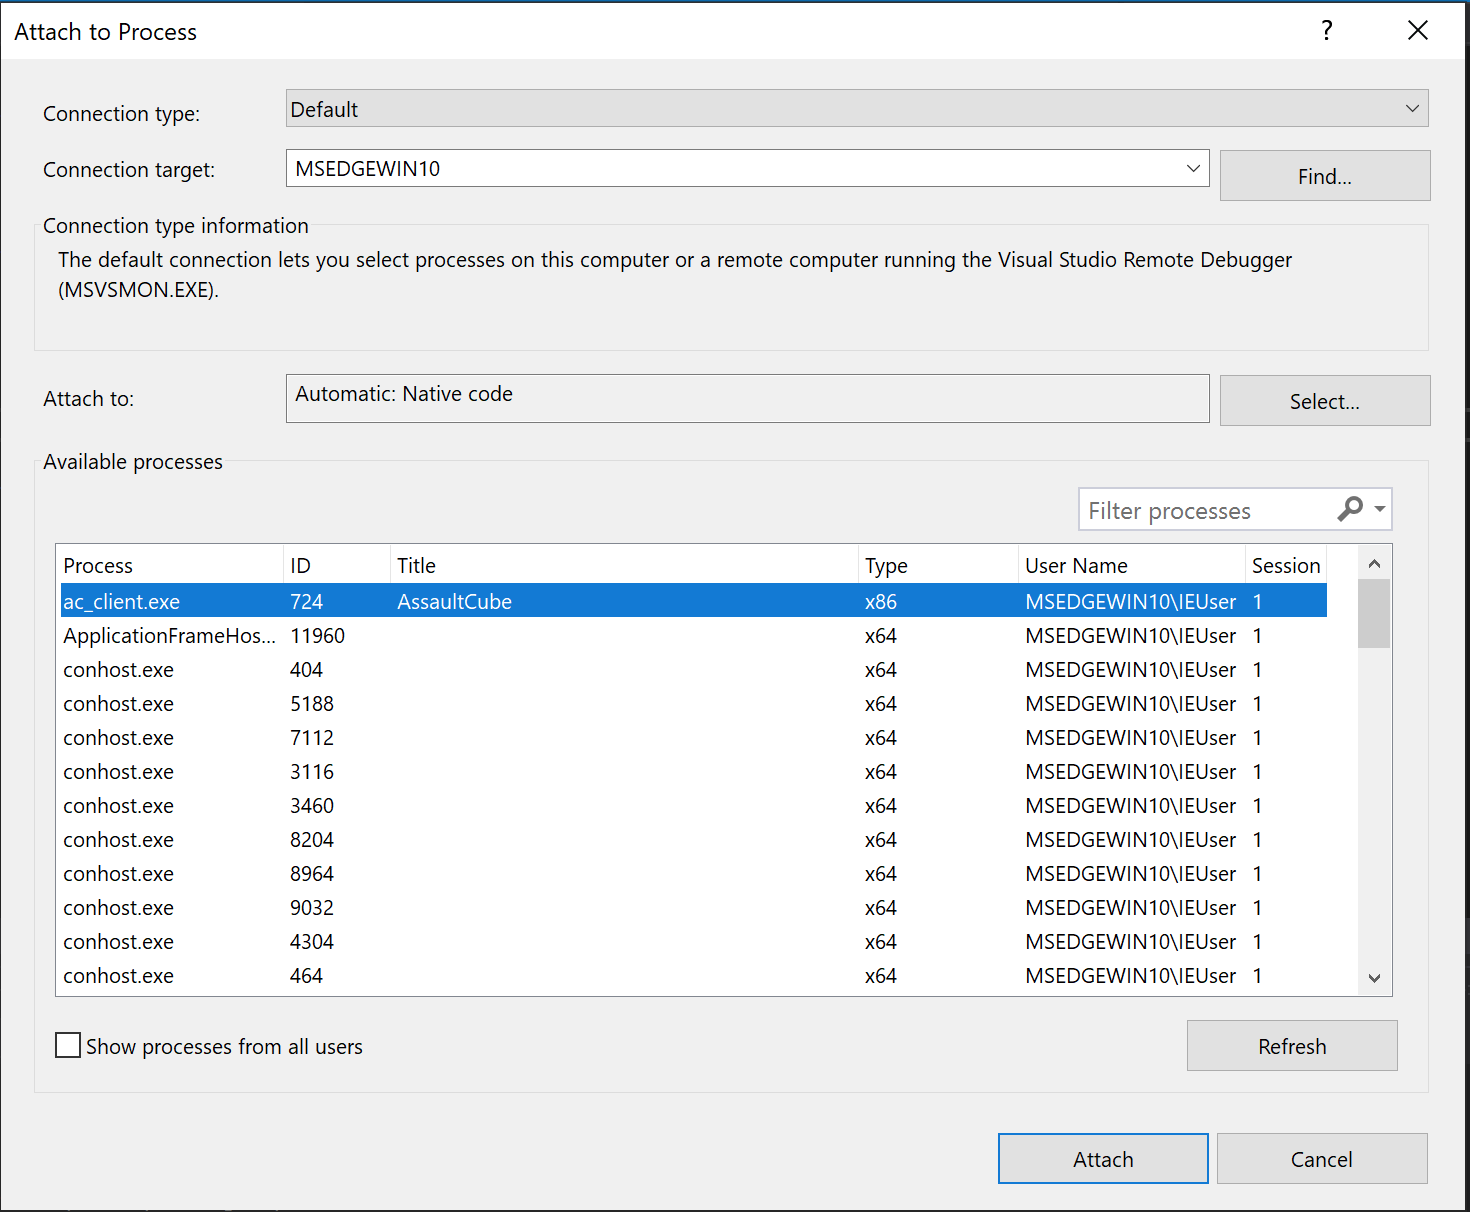
Next, choose the Assault Cube process, ac_client:
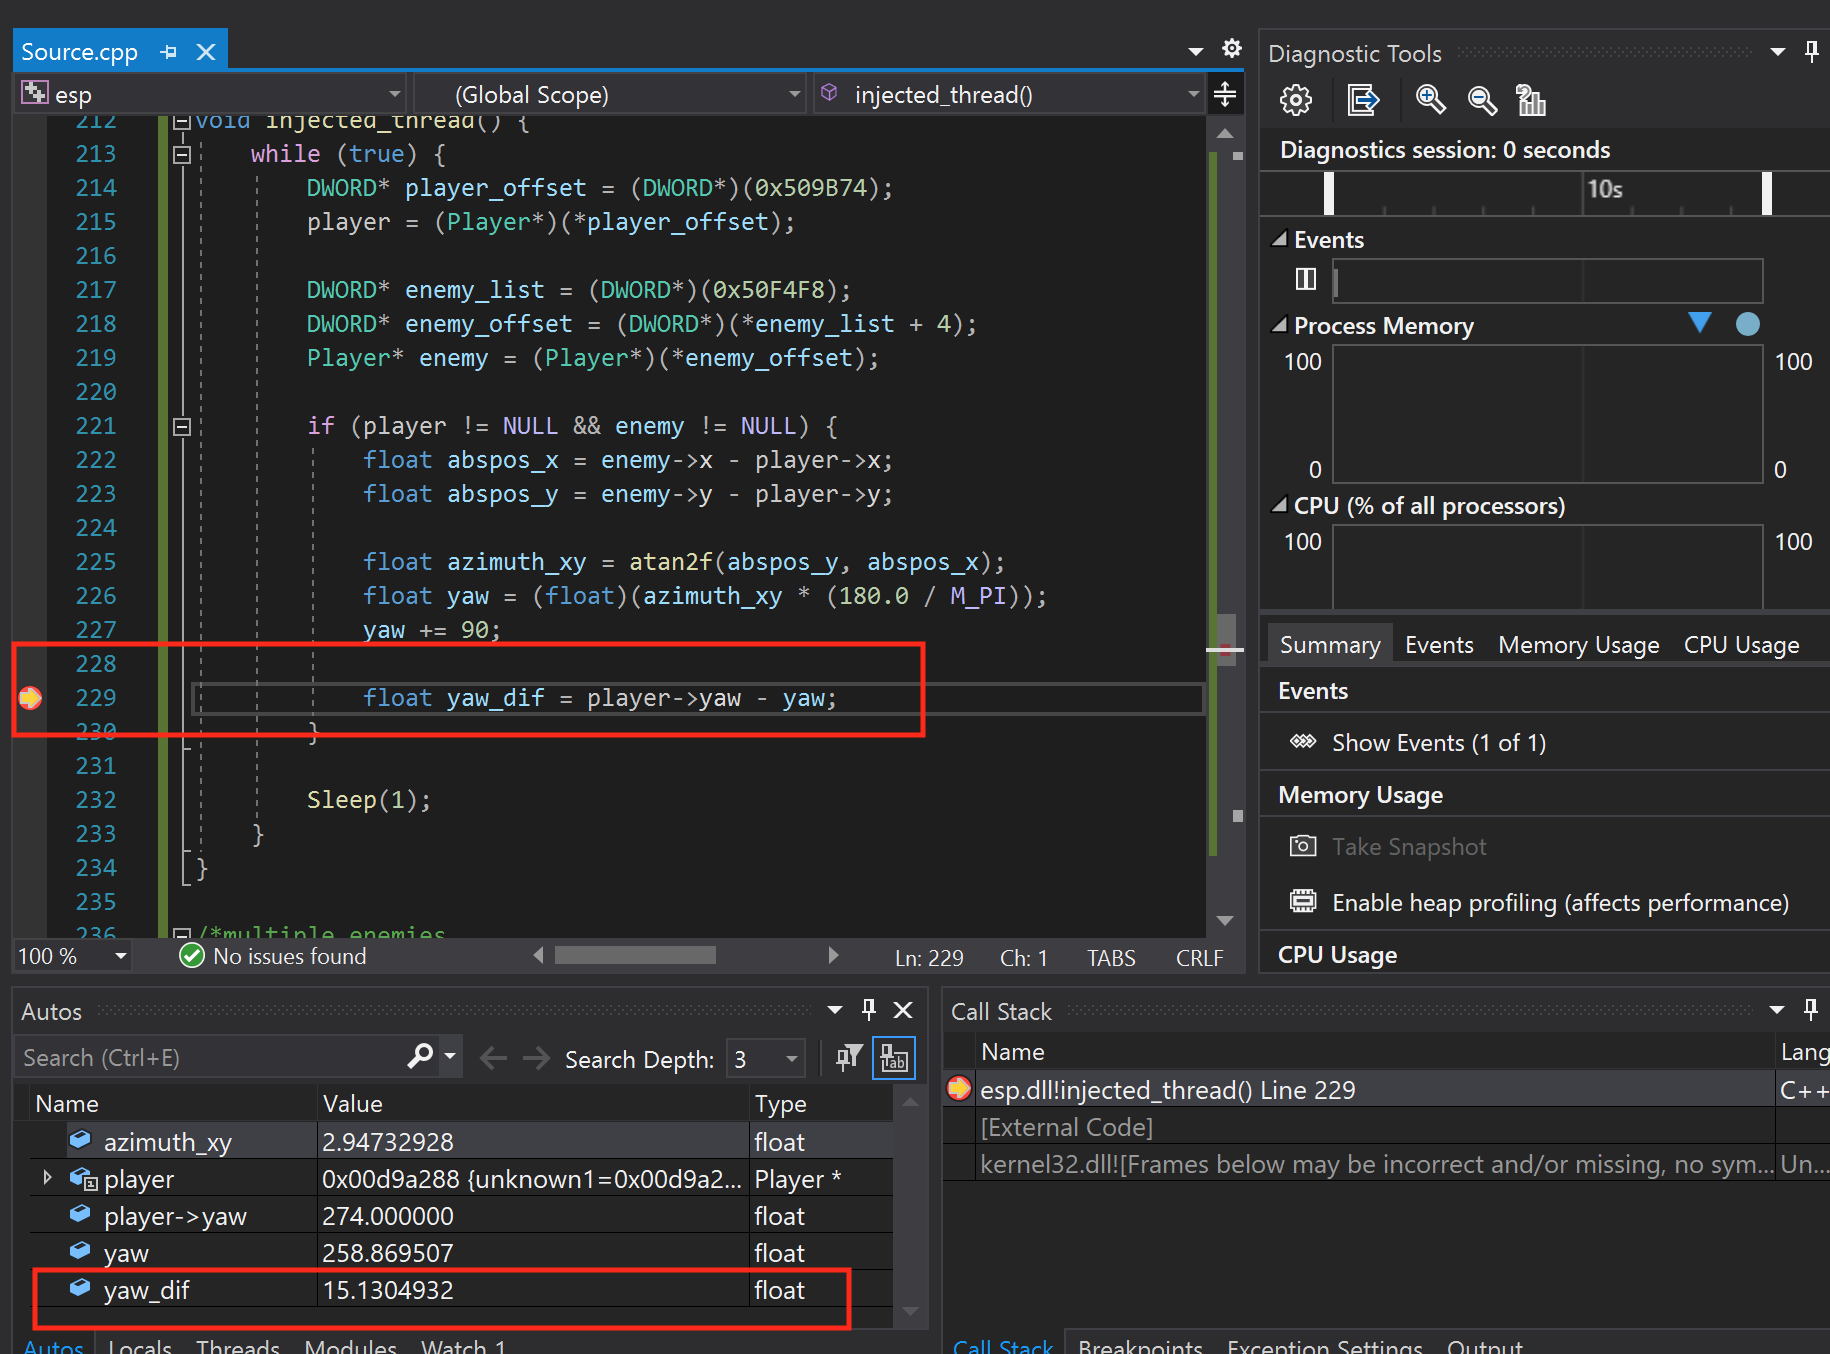
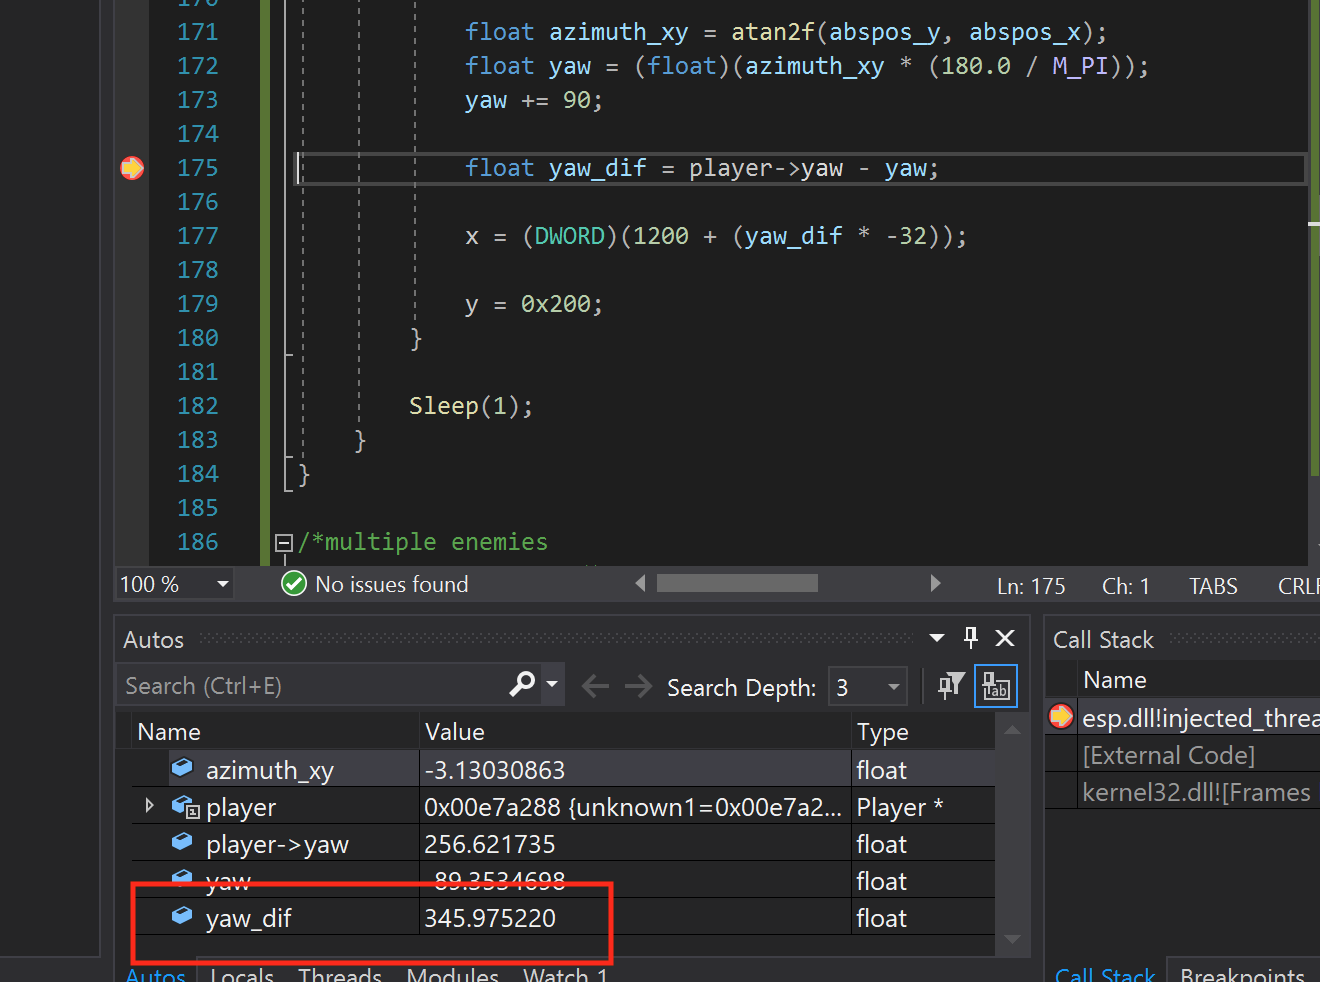
With this done, you can set breakpoints on your DLL code in an identical manner to how we did previously for regular executable code. If you put a breakpoint on the line assigning yaw_dif, you can see its value in the Autos window at the bottom of Visual Studio:
With this set up, we can now get our yaw_dif values. Repeat the same scenarios that we discussed above (looking at, far left, and far right) and get the corresponding yaw_dif values for each:
Looking at enemy:
  yaw_dif	-0.307769775

Enemy on far left of screen:
  yaw_dif	34.9015427

Enemy on far right of screen:
  yaw_dif	-39.5185280
Depending on where you stand in the map, your values may be different. For the sake of this lesson, we will use the values above for our equations. Let’s plug these values into our equations as the value for A:
Looking at enemy:
  512 = 512 + (-0.307769775 * F)

Enemy on far left of screen:
  <100 = 512 + (34.9015427 * F)

Enemy on far right of screen:
  >950 = 512 + (-39.5185280 * F)
Since we are roughly estimating, we will round these values to the closest whole number:
Looking at enemy:
  512 = 512 + (0 * F)

Enemy on far left of screen:
  100 = 512 + (35 * F)

Enemy on far right of screen:
  1000 = 512 + (-40 * F)
We can see that yaw_dif will satisfy our first equation regardless of the value we choose for F. Using some basic algebra, we can solve for F using the far left and far right equations:
Enemy on far left of screen:
  F = -11.771428571

Enemy on far right of screen:
  F = -12.2
Since these were approximations, we will take the loose average and choose -12 as our value for F. Our initial equation to convert an enemy’s position to a 2D screen coordinate for the X dimension is:
screen_x = 512 + (yaw_dif * -12)
We will have to make adjustments to this equation, but it gives us a good starting point.
Locating Print Text
To continue testing our equation, we need to find a way to print text on the screen. We talked about how to find and hook a text printing function in the Printing Text lesson. We will use a similar approach here.
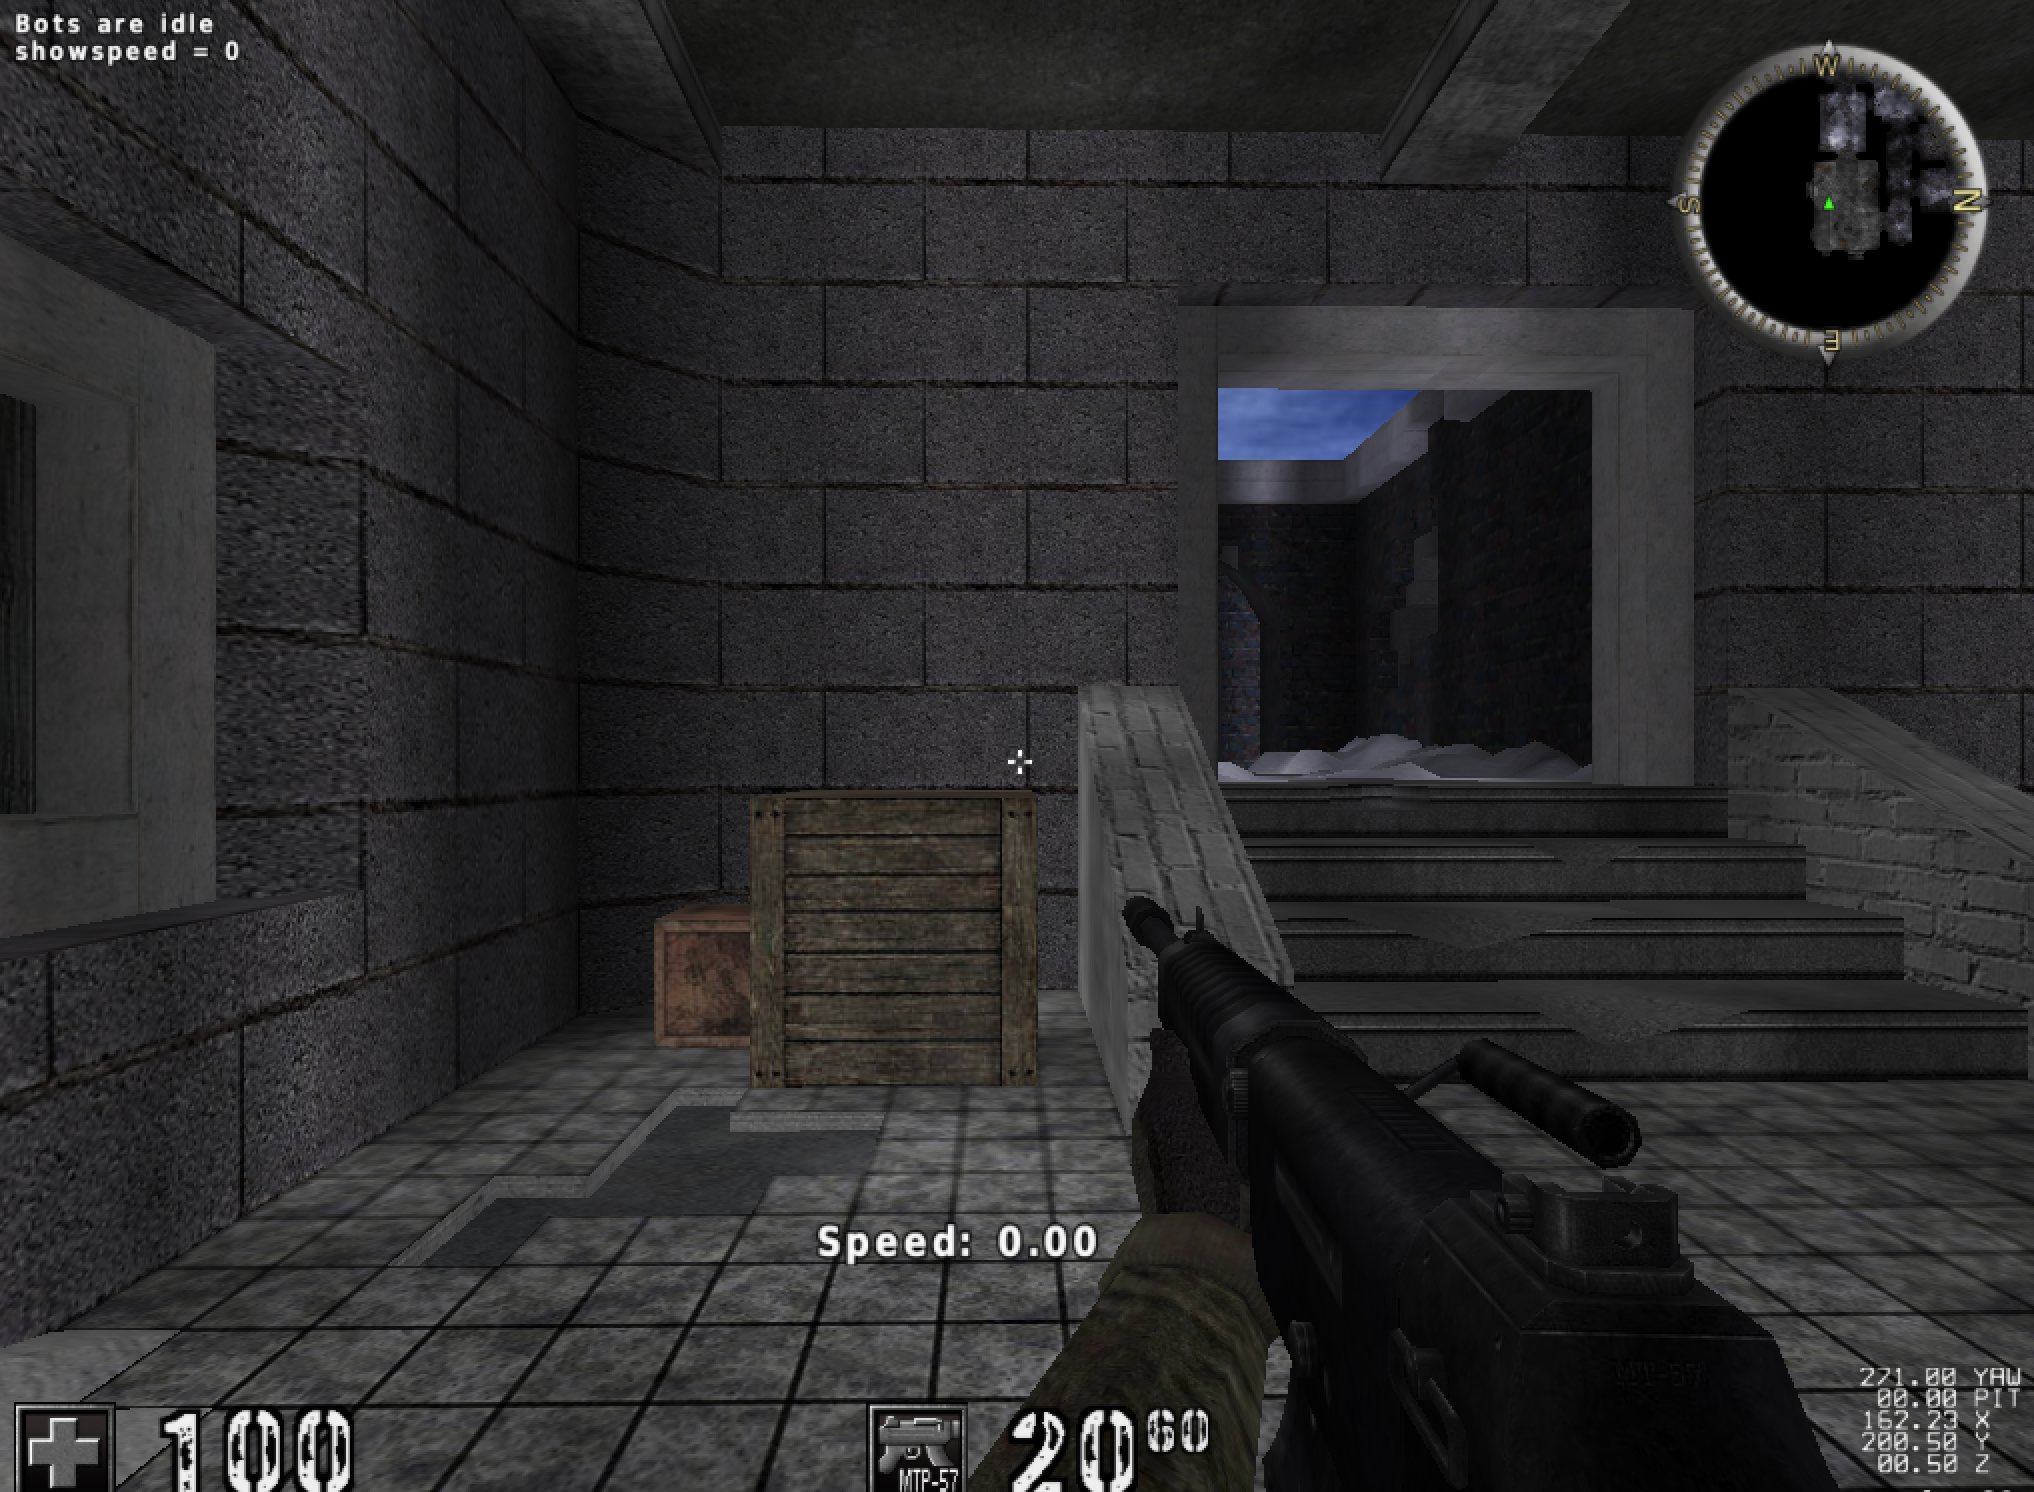
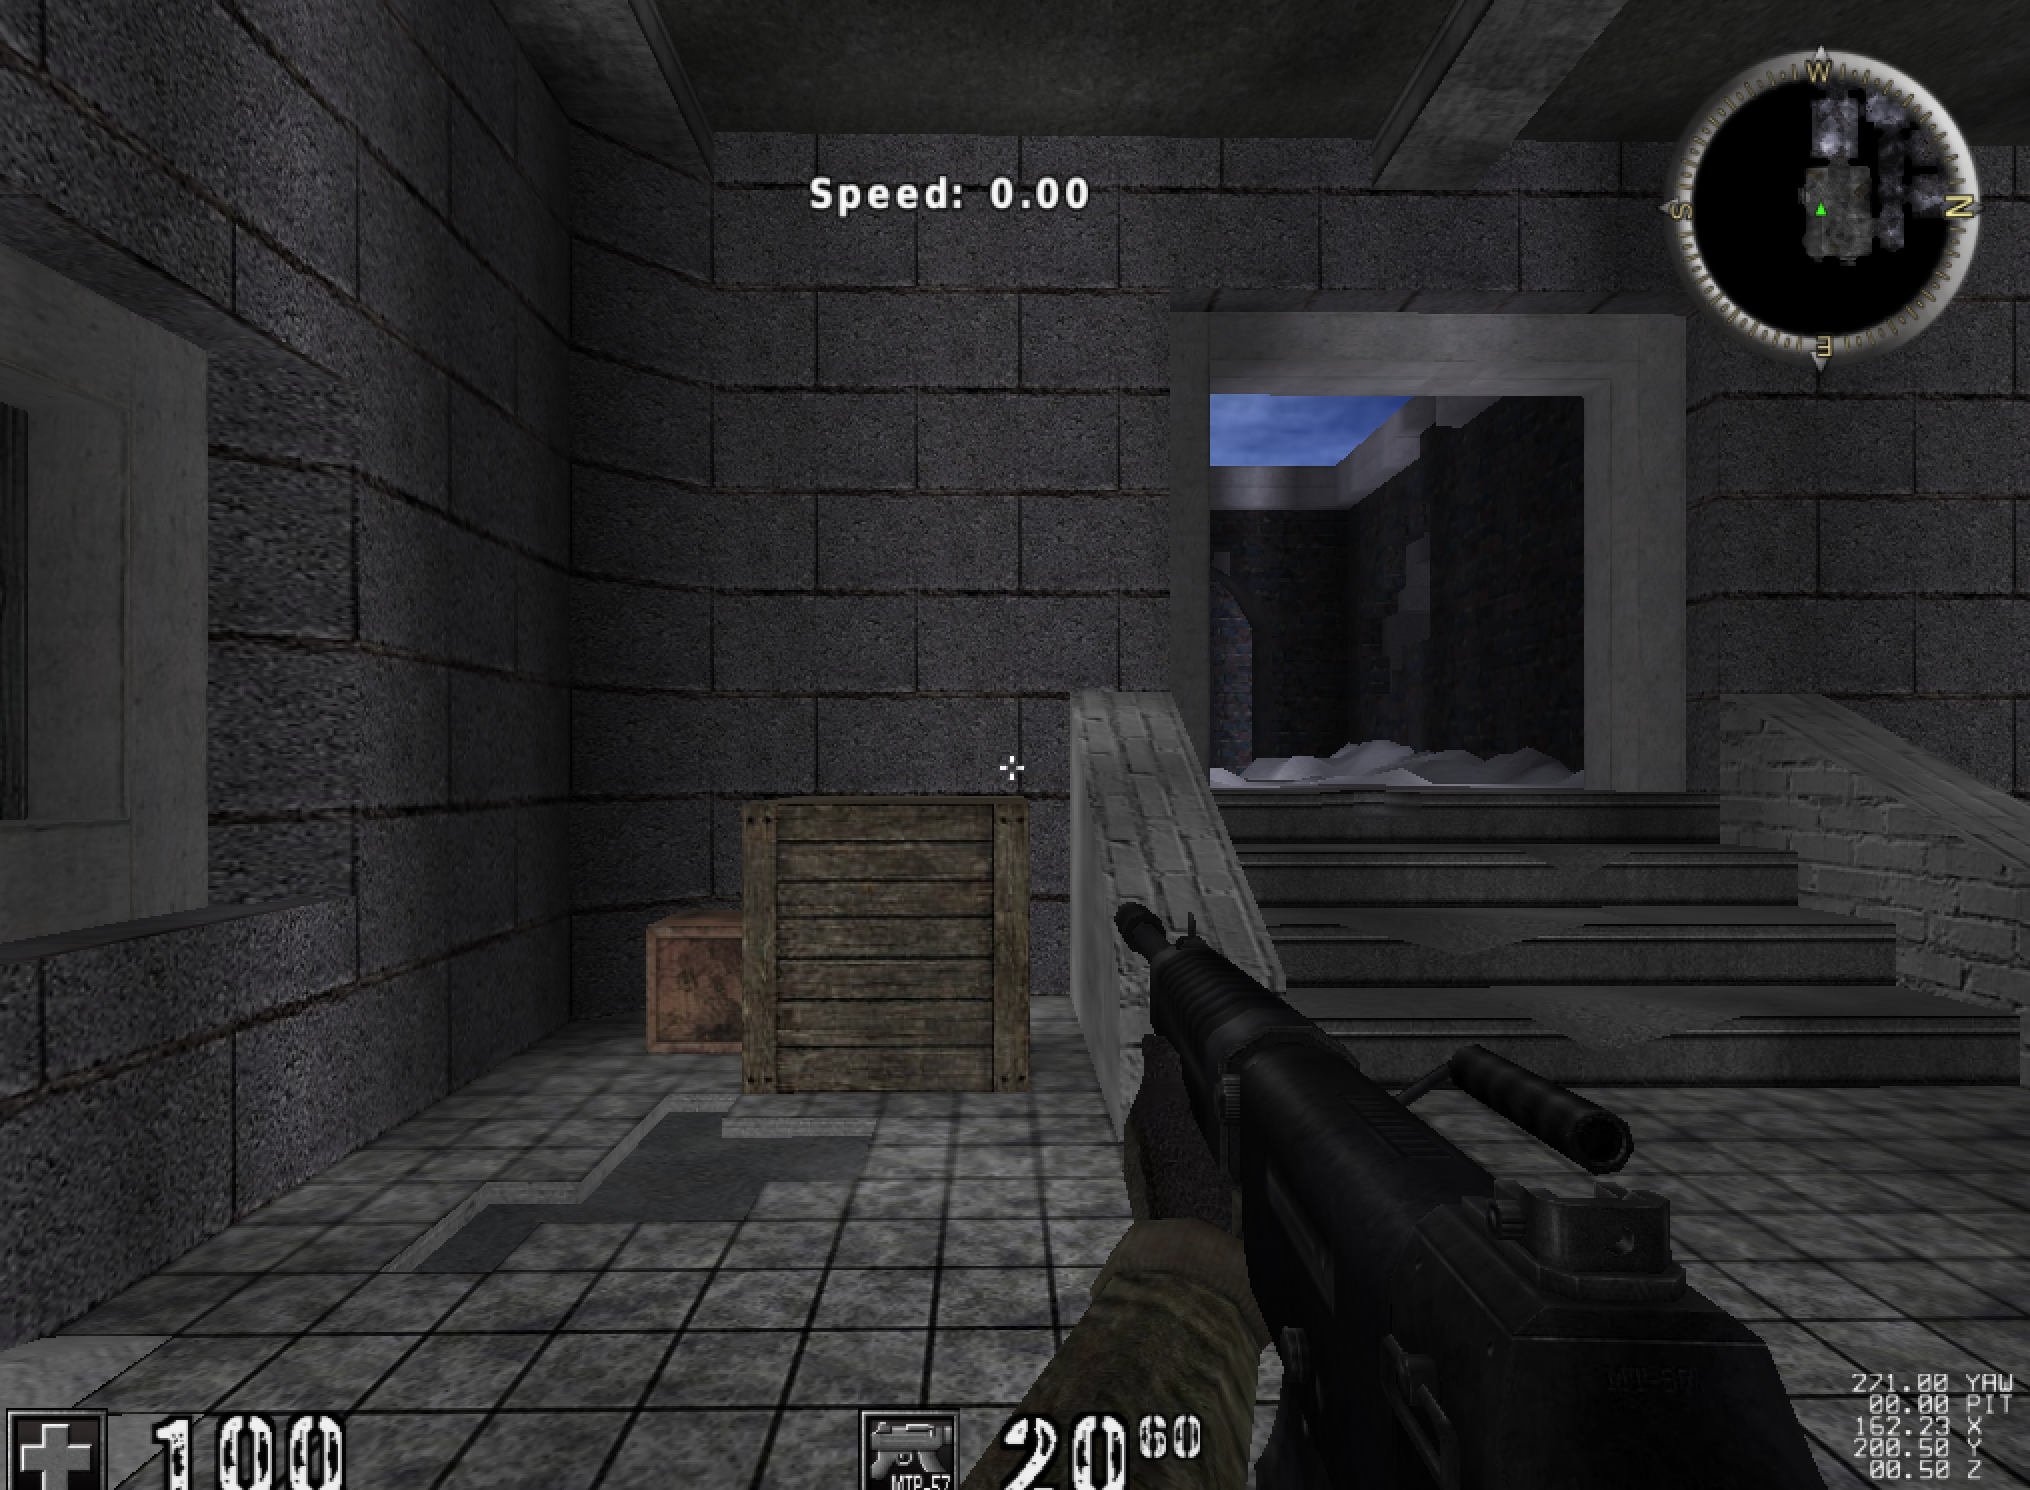
We want to identify some text that looks like it can be easily displayed anywhere on the screen. After investigating some of the documentation, we can determine that the showspeed command text is a good candidate, as it displays in the exact middle of the screen:
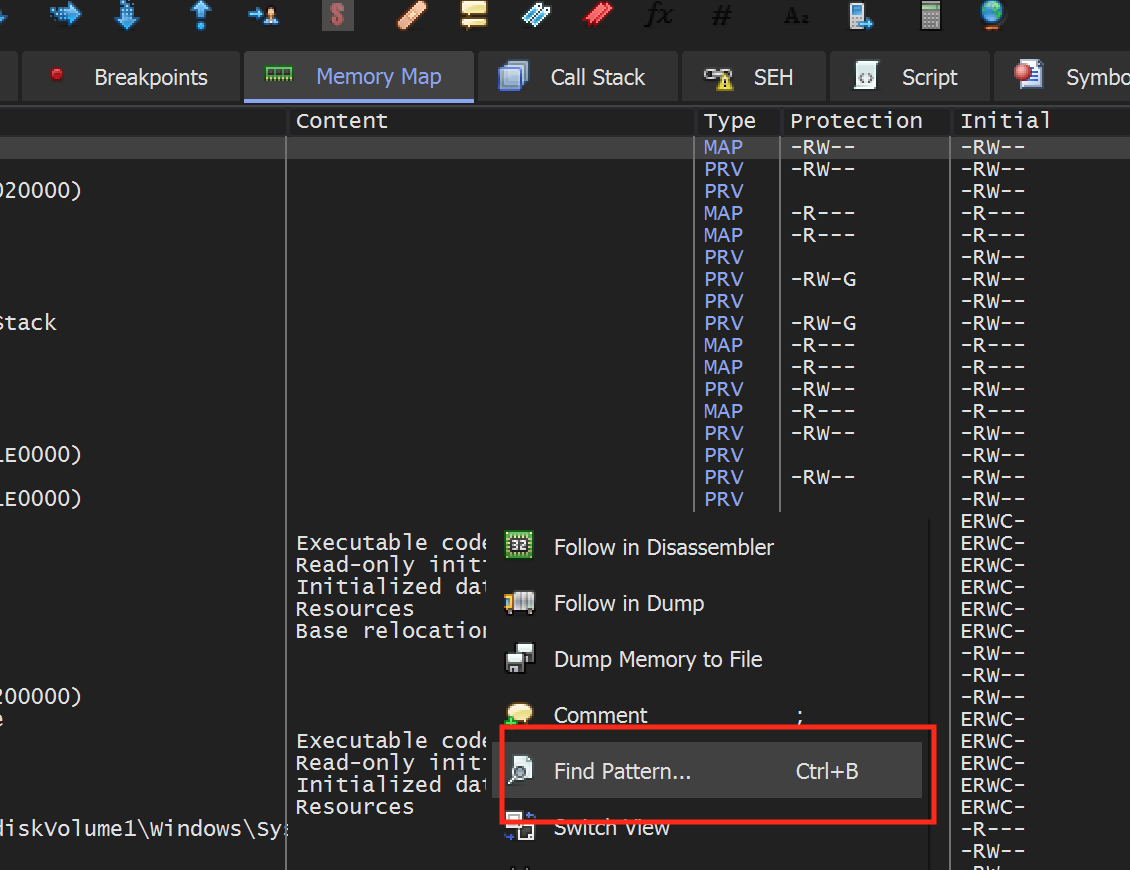
Since this text is static, we can search for its pattern in x64dbg and find where it resides in memory. Attach x64dbg to Assault Cube, then navigate to the Memory Map tab and right-click. Choose Find Pattern:
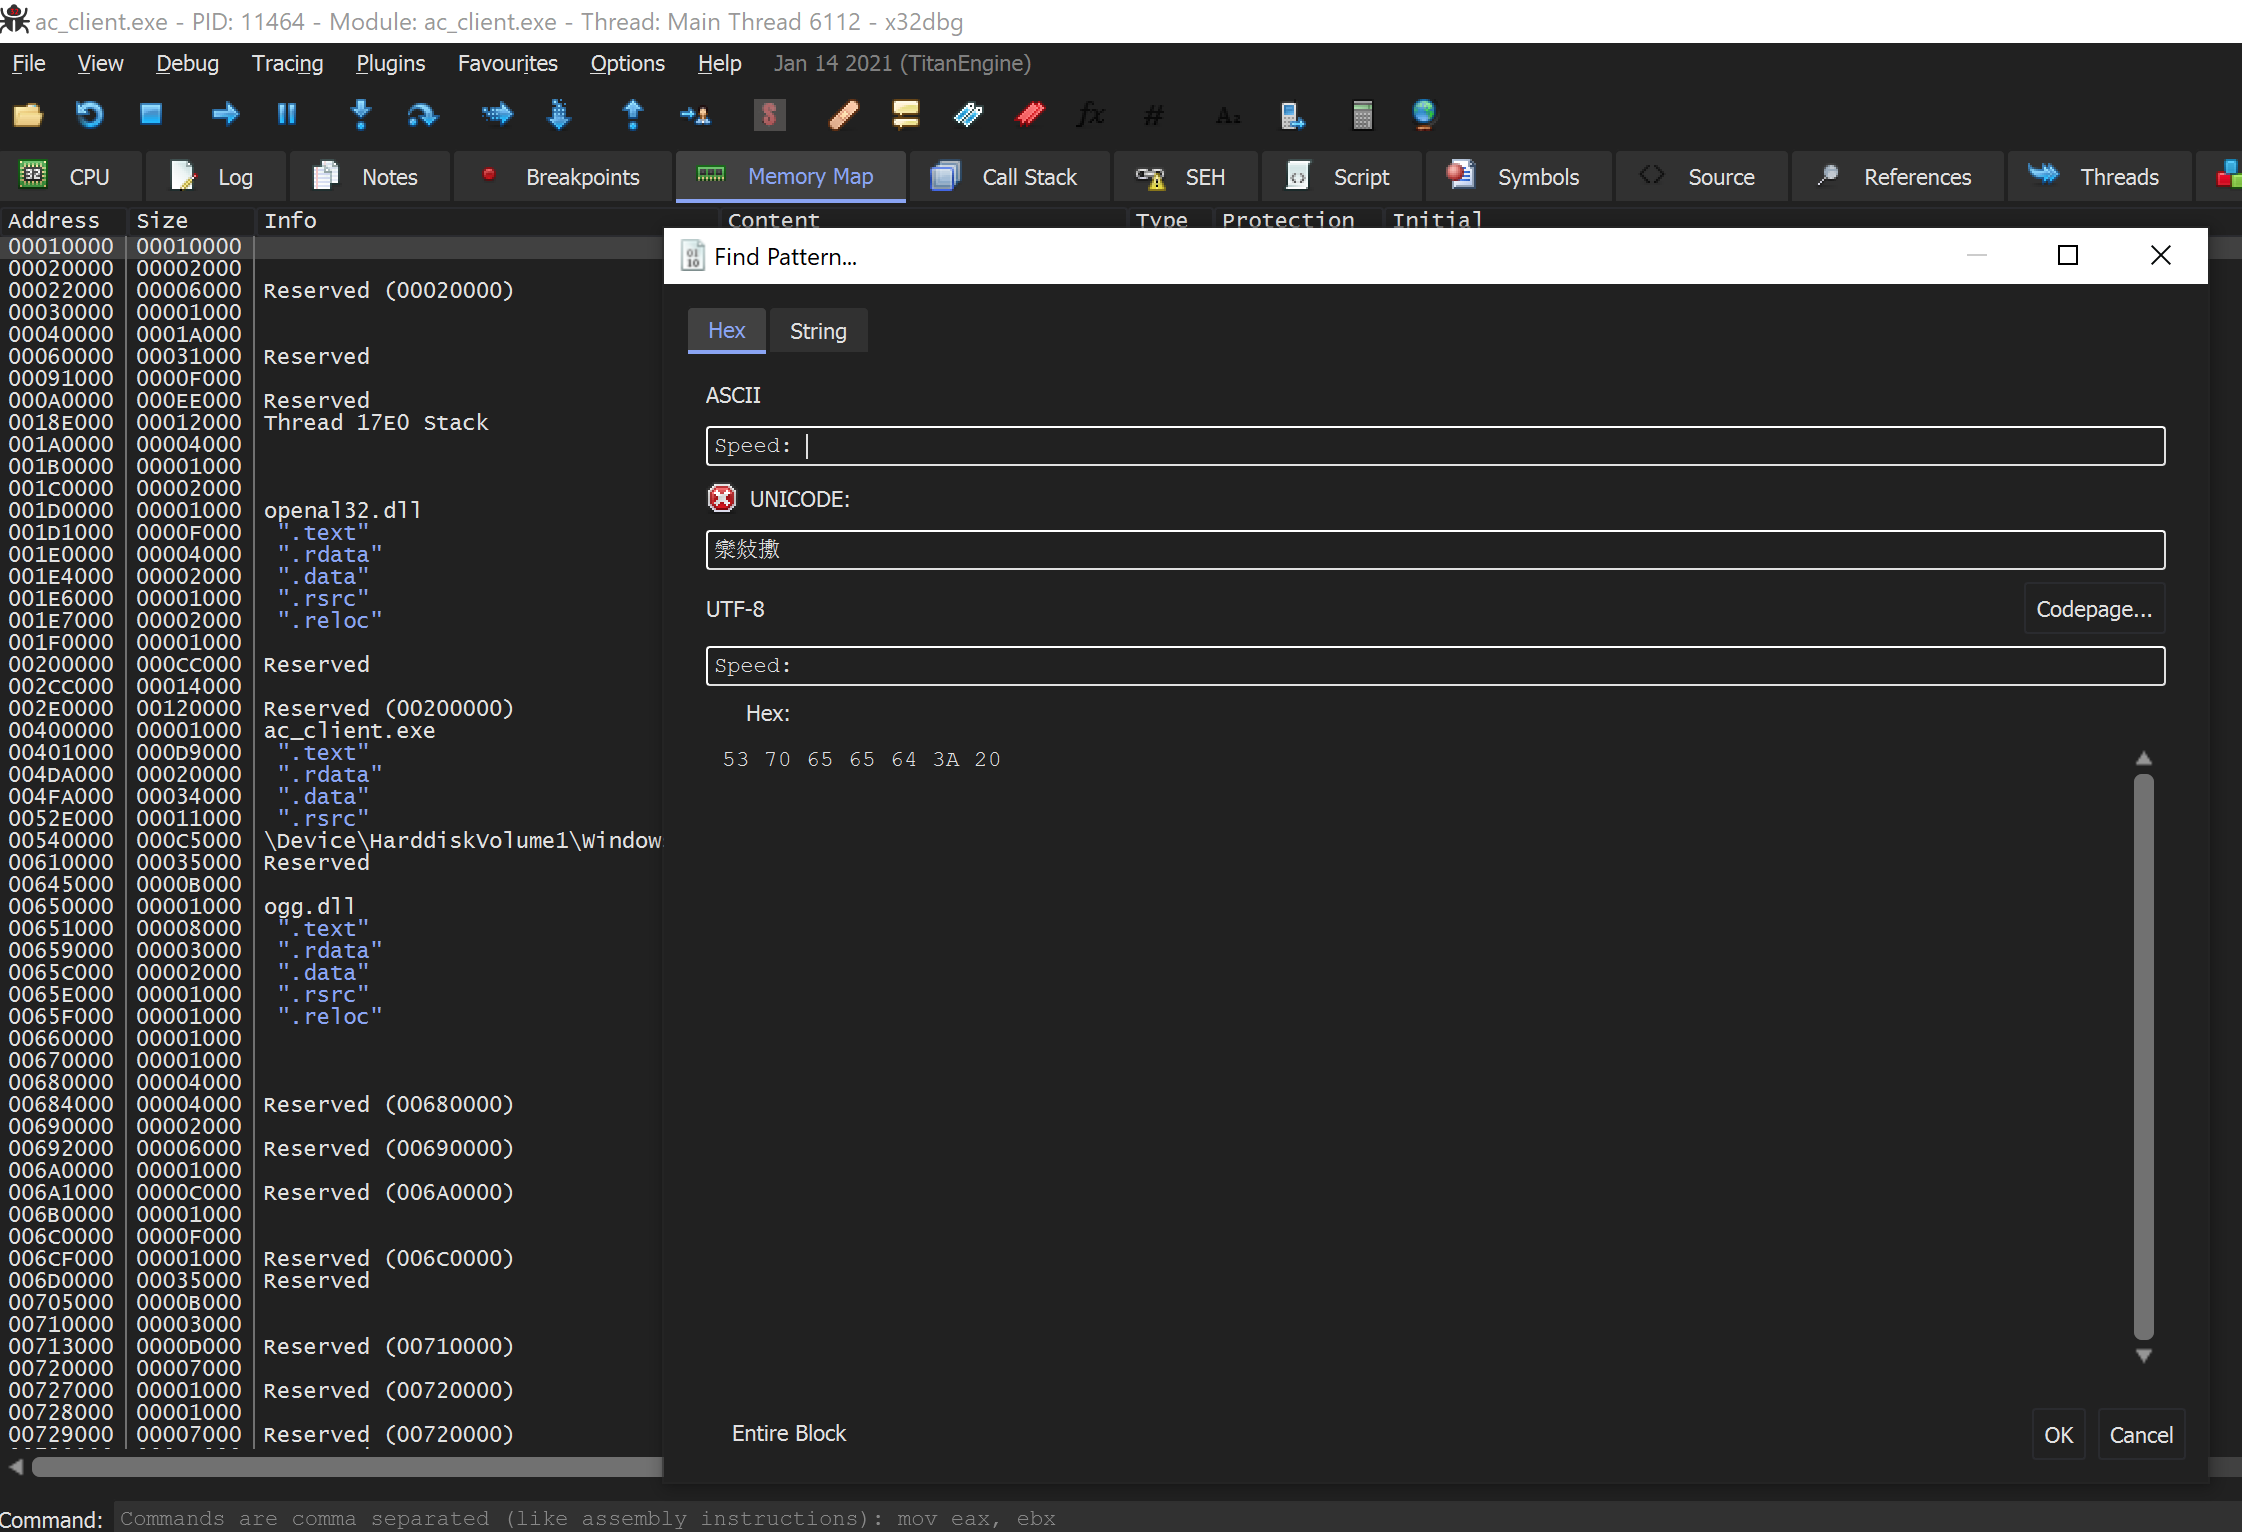
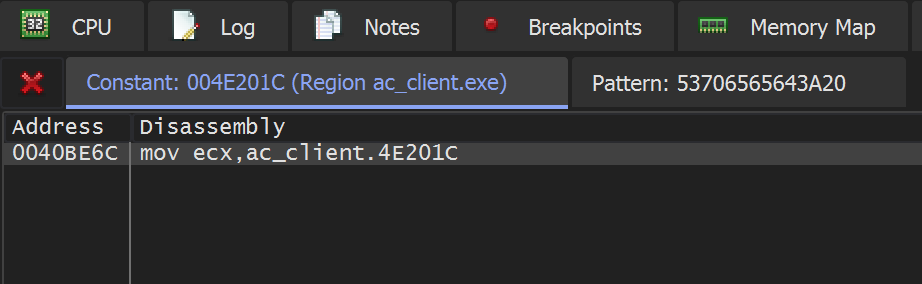
This will allow us to search all the active memory in the game for whatever pattern of bytes we specify. In this case, we will search for the start of this text, Speed::
The search should find a single pattern:
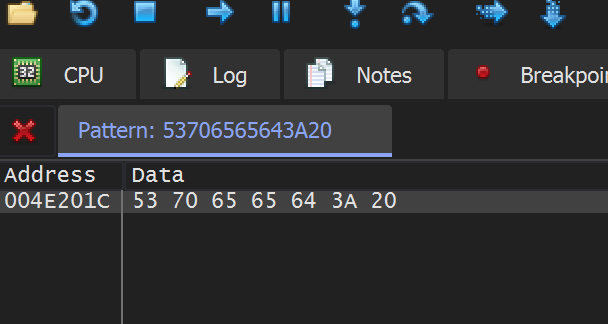
Double-click on it to show the address in the dump. Next, we want to see where this memory address is referenced in code. Select the first letter and right-click. Choose Find references:
This will return a single reference, or place where this address was referenced by the code of the game:
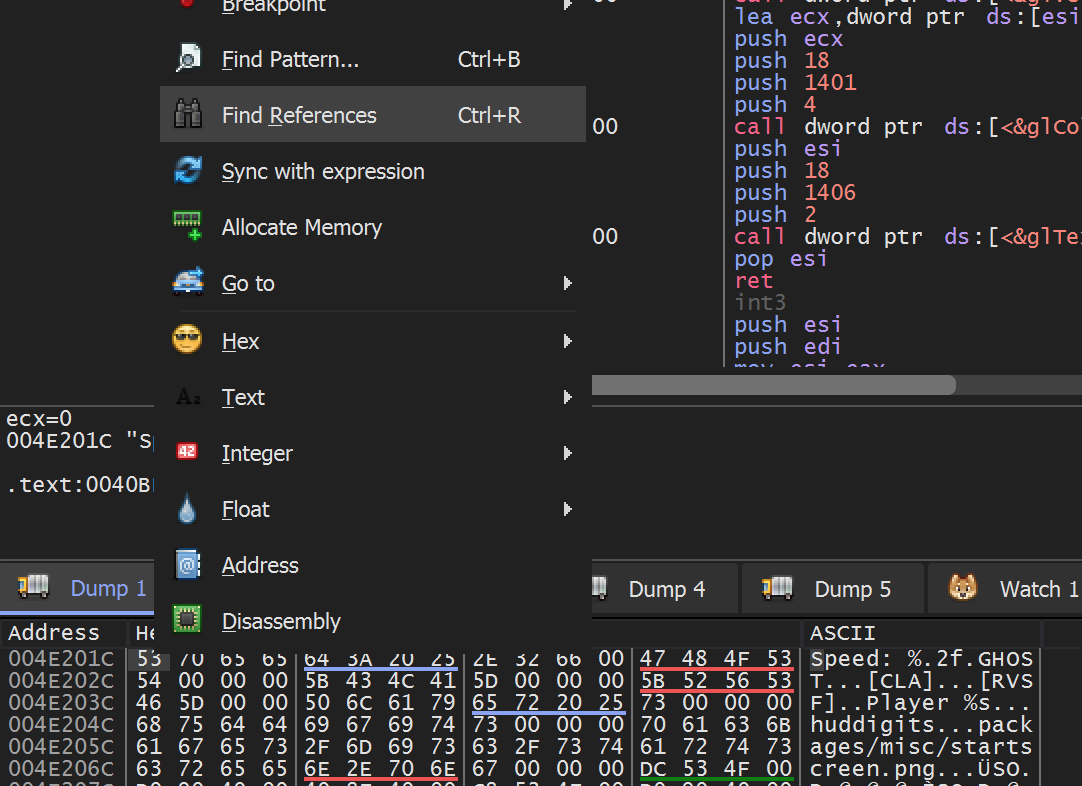
Double-click again on this reference to be brought to the code responsible for accessing this memory:

Quickly analyzing this code, we see that we move a text string into
ecx (in this case, our Speed: string) and then
push two values on the stack before calling 0x419880. We can
see one value is 0x708, or 1800 decimal. If we set a
breakpoint on the call, we can see the value of
eax:
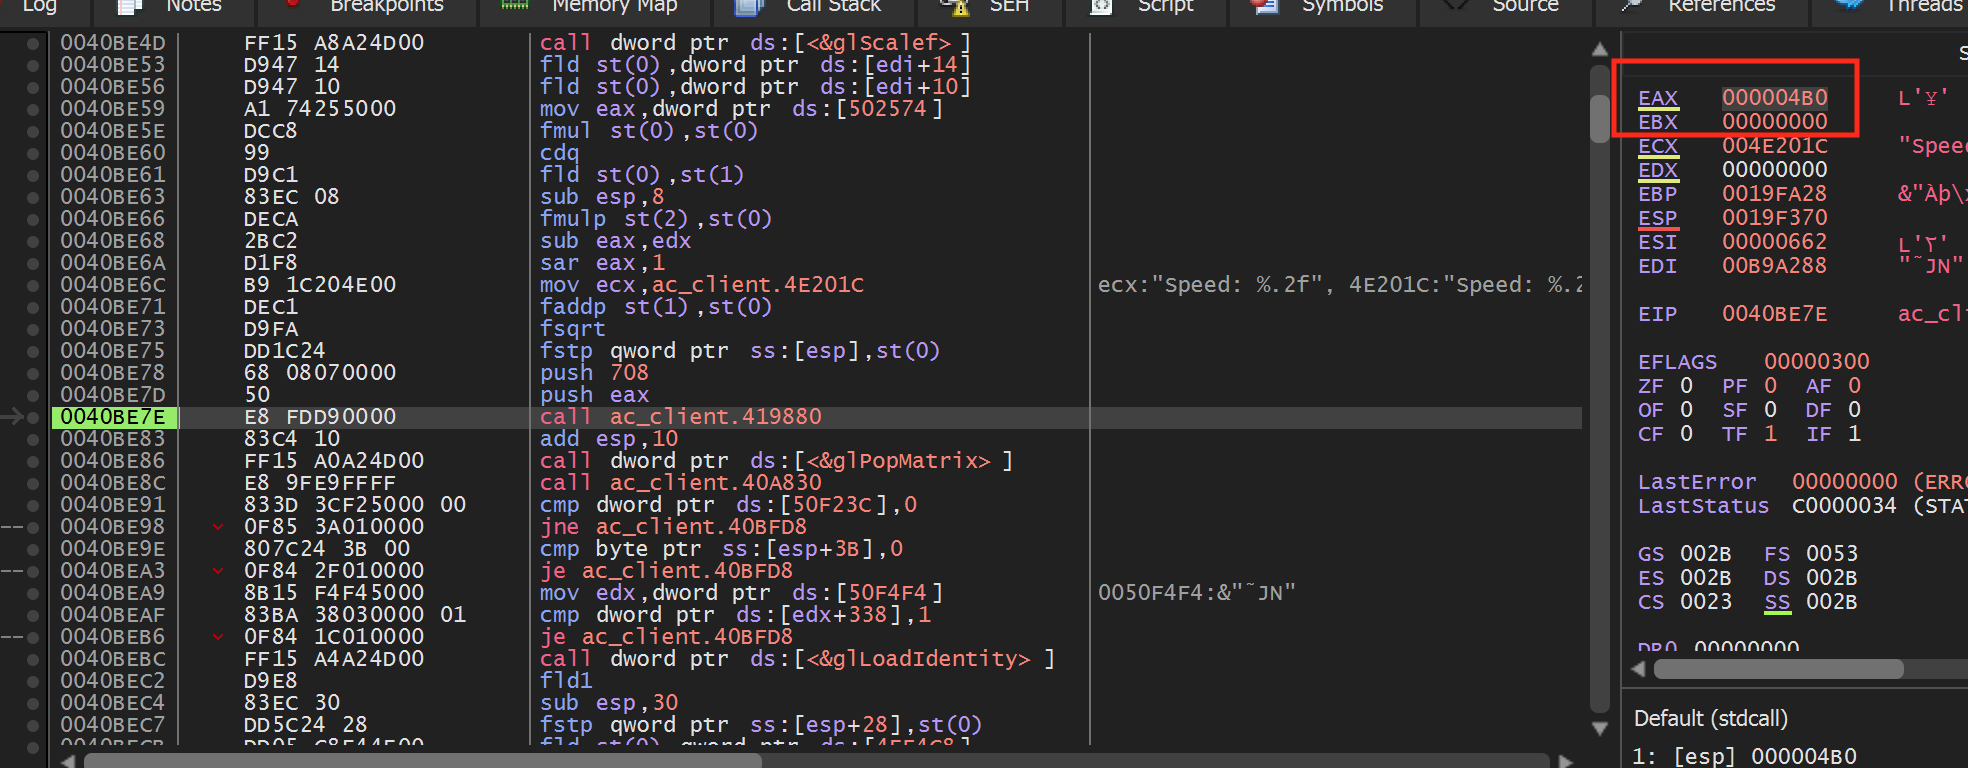
0x4B0, or 1200, and 1800 seem like reasonable X and Y values.
Combined with a text string in ecx, this function is most
likely responsible for printing the Speed: text. We can verify
this behavior by modifying the push 0x708 to another
value, like push 0x100:

Upon doing this, our Speed: text will appear near the top of the screen:
From this, we can see that the method responsible for printing text expects Y to be pushed first, followed by X.
Print Text Code Cave
To nail down our equation, we will use a code cave that will modify the showspeed print text call to draw our enemy text. We will hook at the first push so we can push our desired values on the stack:
BOOL WINAPI DllMain(HINSTANCE hinstDLL, DWORD fdwReason, LPVOID lpvReserved) {
  DWORD old_protect;
  unsigned char* hook_location = (unsigned char*)0x0040BE78;

  if (fdwReason == DLL_PROCESS_ATTACH) {
    CreateThread(NULL, 0, (LPTHREAD_START_ROUTINE)injected_thread, NULL, 0, NULL);

    VirtualProtect((void*)hook_location, 5, PAGE_EXECUTE_READWRITE, &old_protect);
    *hook_location = 0xE9;
    *(DWORD*)(hook_location + 1) = (DWORD)&codecave - ((DWORD)hook_location + 5);
    *(hook_location + 5) = 0x90;
    ...
Our code cave itself will push our currently assigned X and Y values on the stack, as well as move some generic Enemy text into ecx. After we do this, we will jump back to the original call to have it print out our text:
DWORD ret_address = 0x0040BE7E;
const char *text = "Enemy";

DWORD x = 0;
DWORD y = 0;

__declspec(naked) void codecave() {
  __asm {
    mov ecx, text
    push y
    push x
    jmp ret_address
  }
}
We can verify that this code is working by setting our X and Y to
0x100 in our thread, after we calculate the
yaw_dif:
x = 0x100;
y = 0x100;
If we go into a game and show the speed, you will see our text appearing in the upper-left corner of the screen:
For now, we can use this to nail down our ESP. We will come back later and adjust this approach so that we can write multiple text strings for multiple players.
Refining Equation
With a text function, we can now start working on the ESP. However, we
first need to adjust our equations. When we initially modeled the screen,
we assumed that center would be 512. However, from the speed function, we
saw that center was 0x4B0, or 1200. Games will often make use
of a “virtual” screen that will always be an identical size regardless of
the resolution. That way, developers only have to convert the resolution
into the virtual screen size once, but they can use consistent coordinates
in the rest of the code.
In this case, it looks like the game’s virtual screen is 2400x1800. We can go back to our original equations and update them with these new numbers:
Looking at enemy:
  1200 = 1200 + (0 * F)

Enemy on far left of screen:
  100 = 1200 + (35 * F)

Enemy on far right of screen:
  2400 = 1200 + (-40 * F)
Calculating with these new values, we will get a different value for F:
Enemy on far left of screen:
  F = -31.428571429

Enemy on far right of screen:
  F = -30
Since these are again approximations, we will choose a value of -30 as our value for F, making our new equation:
screen_x = 1200 + (yaw_dif * -30)
We can implement this equation in our main thread like so:
float yaw_dif = player->yaw - yaw;

x = (DWORD)(1200 + (yaw_dif * -30));
y = 0x200;
If you go into a game, the Enemy text will appear on the same X axis as the enemy from certain angles, as we expect:
However, depending on what angle we are looking at, the text will appear far off to the side:
If we attach a debugger, we can see that when the text is not correct, the yaw_dif value is over 180:
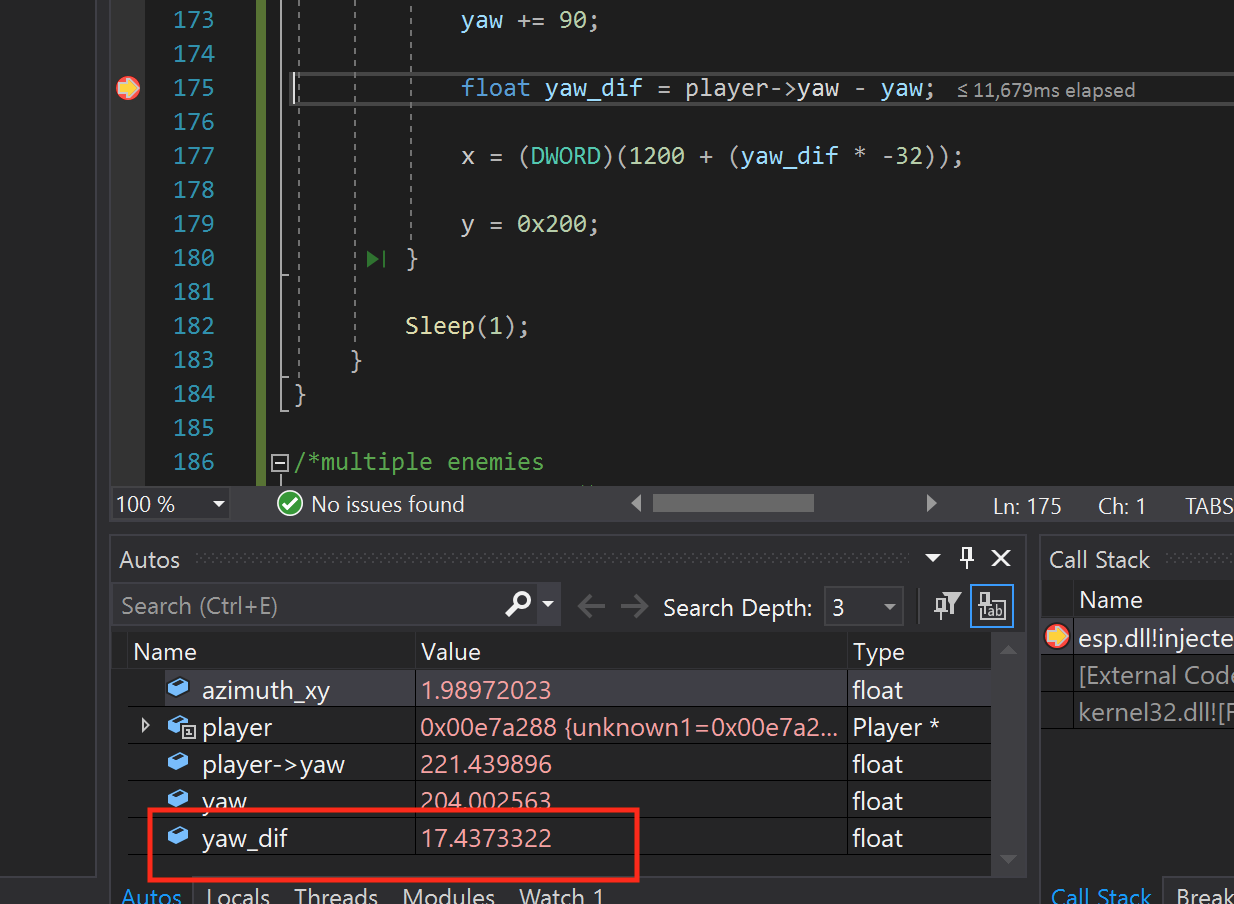
Just as a contrast, we can see that correct text values always have a yaw_dif value under 180:
This situation appears to occur when our player’s yaw and the calculated yaw for the enemy are between 275 and 360/0. When subtracting to get our difference, the equations produce artificially high values that do not work with our scaling factor. For example, if our yaw difference is 5, our text will be correctly displayed. Likewise, if our difference is -5, the text will be displayed correctly in the opposite direction. However, if our difference is -355, the text will be displayed incorrectly, as the equation’s result will now be 11,850, causing the text to wrap over to the other side of the screen.
Regardless of the viewport we choose, our viewport can never show more than 180 degrees of the screen. Any more would result in us seeing behind our player.
To fix the case of -355 that we described above, we can subtract (or add, in the case of negative) 360:
if (yaw_dif > 180)
  yaw_dif = yaw_dif - 360;

if (yaw_dif < -180)
  yaw_dif = yaw_dif + 360;

x = (DWORD)(1200 + (yaw_dif * -30));
With this in place, our text will always correctly display, regardless of the angle.
Up and Down
To calculate the Y dimension for our aimbot, we had the following code:
float abspos_z = enemy->z - player->z;
...
if (abspos_y < 0) {
  abspos_y *= -1;
}
if (abspos_y < 5) {
  if (abspos_x < 0) {
    abspos_x *= -1;
  }
  abspos_y = abspos_x;
}
float azimuth_z = atan2f(abspos_z, abspos_y);
float pitch = (float)(azimuth_z * (180.0 / M_PI));
We can use the same approach as above to calculate our Y dimension. We
learned from the speed function that 0x708, or 1800, was the
bottom of the virtual screen. We can perform the same series of equations
as above to get the scaling factor for Y:
looking above the enemy (enemy at 1800)
  pitch_dif	25.4983654
  F = 35.4
looking at enemy, 1800/2
  pitch_dif	-4.36527729
  F = 0
looking below the enemy (enemy at 100)
  pitch_dif	-41.1258888
  F = 19.464720195
From these values, we will choose a value of 25 as our scaling factor:
float pitch_dif = player->pitch - pitch;
y = (DWORD)(900 + ((pitch_dif) * 25));
With this in place, text will now correctly display in the Y axis:
Final Adjustments
Right now, our text will always display, even if the enemy is behind us. To prevent this, we will add a check into our print text code cave. In this check, we will set our string to empty if the enemy is not visible in our viewport:
__declspec(naked) void codecave() {
  if (x > 2400 || x < 0 || y < 0 || y > 1800) {
    text = "";
  }
  else {
    text = "Enemy";
  }
We can also resolve the issue of text always appearing slightly to the left of the enemy. For this, we will simply always add 200 to whatever X value we calculated:
else {
  text = "Enemy";
}

x += 200;
Our text is now displaying correctly for a single enemy.
Enemy Name
With our coordinates nailed down, we can work on getting the enemy’s name to display above their head. Like before, we can find the player’s name in the game’s Player structure and add it to our code’s Player structure. Looking at the player structure in memory, we see the player’s name a bit after the yaw element we identified before:

If we try to change our own player’s name, we find that this can be a maximum of 16 characters. Subtracting the offset from our yaw value, we can create padding with an unknown element, like we did in the Aimbot lesson. Our player structure with the name now looks like:
struct Player {
  char unknown1[4];
  float x;
  float y;
  float z;
  char unknown2[0x30];
  float yaw;
  float pitch;
  char unknown3[0x1DD];
  char name[16];
};
We can now modify our code to use this enemy name instead of the generic Enemy text. First, remove the else condition in the code cave which set the text to Enemy:
const char* text = "";
...
__declspec(naked) void codecave() {
  if (x > 2400 || x < 0 || y < 0 || y > 1800) {
    text = "";
  }

  x += 200;
  ...
Next, after we calculate our X and Y, we want to set the text member to the enemy’s name by assigning the pointer:
text = enemy->name
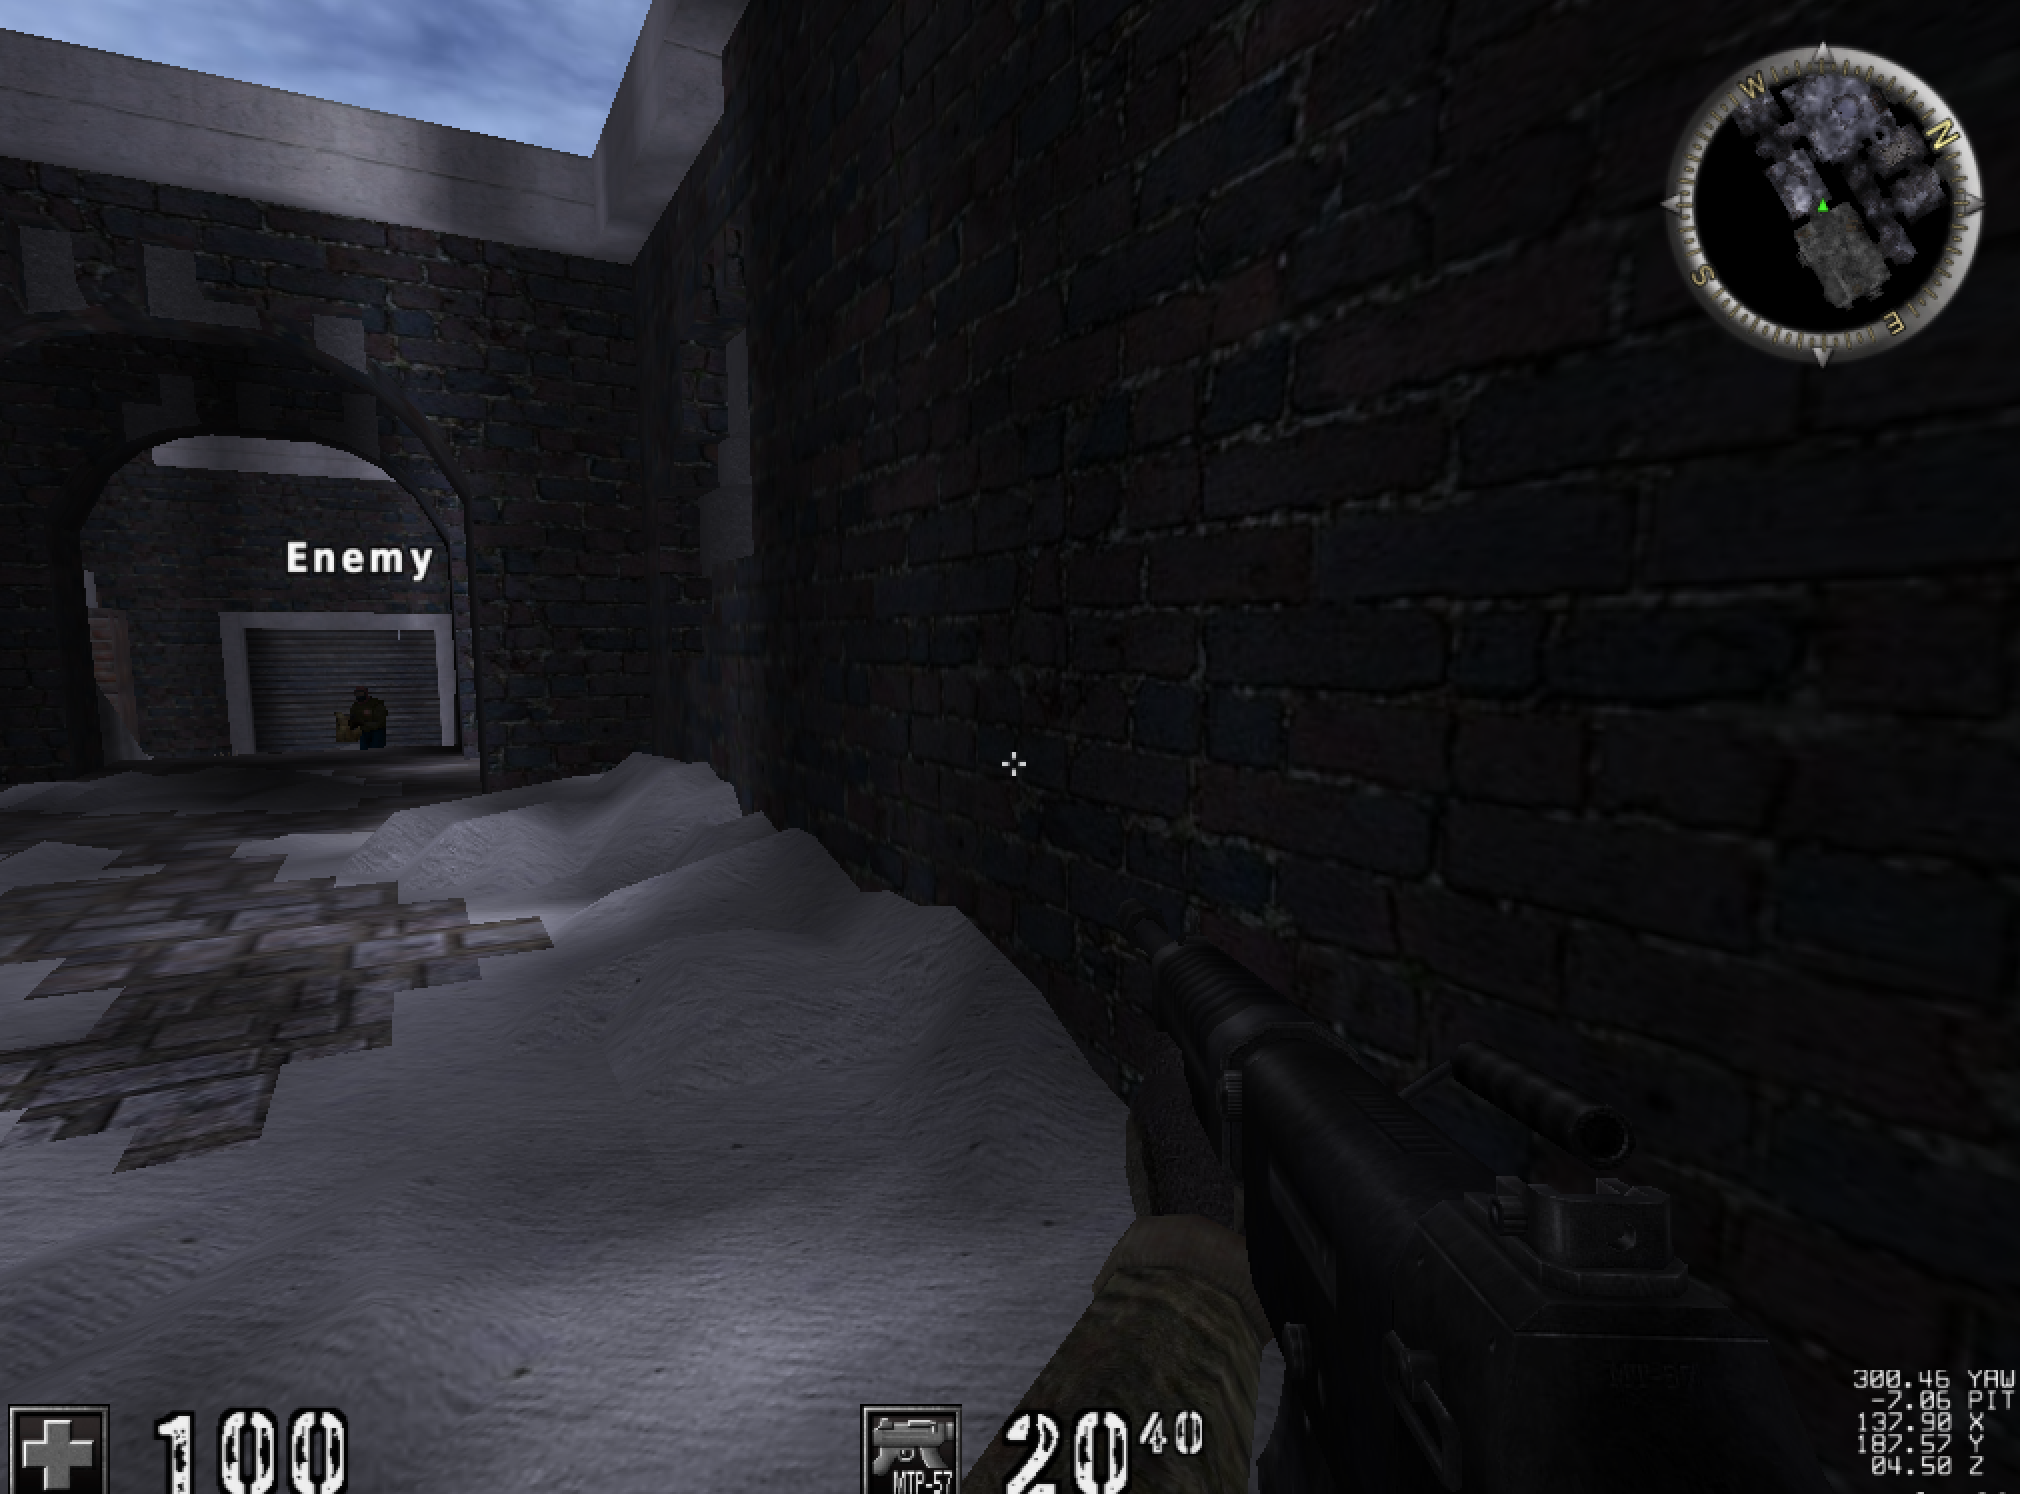
With this change, enemy names will now appear above their head:
In this lesson, we will only display the enemy’s name. A similar approach can be used to display the enemy’s weapon, health, and other information.
Multiple Enemies
Now that we have a working ESP for a single enemy, we can expand it to include multiple enemies. Like we did when creating our aimbot, we can use the same code we nailed down above and include it in a loop.
First, instead of one X, Y, and name value, we will create an array. The maximum amount of players in an Assault Cube game is 32, so we will use this as the size of our array. For our loops, we will use the current number of players we identified previously, so any extra array elements will not cause an issue. Since we will need to use this current player element in both our calculation loop and draw loop, we will create a global variable for it as well:
#define MAX_PLAYERS 32

DWORD x_values[MAX_PLAYERS] = { 0 };
DWORD y_values[MAX_PLAYERS] = { 0 };
char* names[MAX_PLAYERS] = { NULL };

int* current_players;
Next, we will modify our thread to iterate over all enemies in an identical manner to the aimbot. When we calculate the X and Y values, we will store these values in an array instead of a single element:
current_players = (int*)(0x50F500);

for (int i = 1; i < *current_players; i++) {
  DWORD* enemy_list = (DWORD*)(0x50F4F8);
  DWORD* enemy_offset = (DWORD*)(*enemy_list + (i*4));

  ...
  x_values[i] = (DWORD)(1200 + (yaw_dif * -30));
  ...
  y_values[i] = (DWORD)(center_y + ((pitch_dif) * 25));
  ...
  names[i] = enemy->name;
Finally, we need to redo our text printing function so that we can print multiple enemy names. We will use the same location, but instead of replacing the pushed parameters, we will hook the call itself. In our code cave, we will replace the call with empty text, and then create a loop to call the print text function several times.
First, we will change our hook location to hook the call:
unsigned char* hook_location = (unsigned char*)0x0040BE7E;

if (fdwReason == DLL_PROCESS_ATTACH) {
  CreateThread(NULL, 0, (LPTHREAD_START_ROUTINE)injected_thread, NULL, 0, NULL);

  VirtualProtect((void*)hook_location, 5, PAGE_EXECUTE_READWRITE, &old_protect);
  *hook_location = 0xE9;
  *(DWORD*)(hook_location + 1) = (DWORD)&codecave - ((DWORD)hook_location + 5);
}
We can then delete our previous code cave and create a new one. In it, we will first replace ecx with empty text, then call the print text function, and then save and restore everything as we have done before:
DWORD ret_address = 0x0040BE83;
DWORD text_address = 0x419880;

const char* empty_text = "";

__declspec(naked) void codecave() {

  __asm {
    mov ecx, empty_text
    call text_address
    pushad
  }

  //loop

  __asm {
    popad
    jmp ret_address
  }
}
To call the print text function by ourselves, we need to figure out how to fix the stack. Remember the code we found:
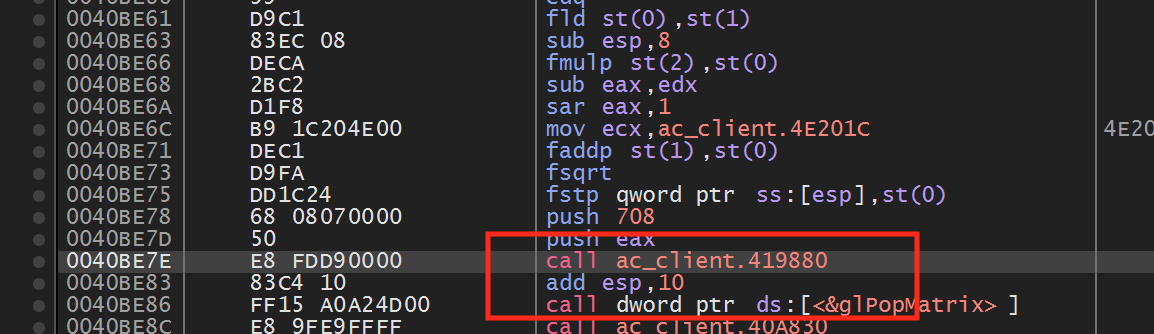
When you see add esp or sub esp after a call, it means the called code expects you to balance the stack. The easiest way to determine how to balance the stack is to find the smallest value of esp being modified and use that call as a basis. This can be done by entering the print text call and finding the references:
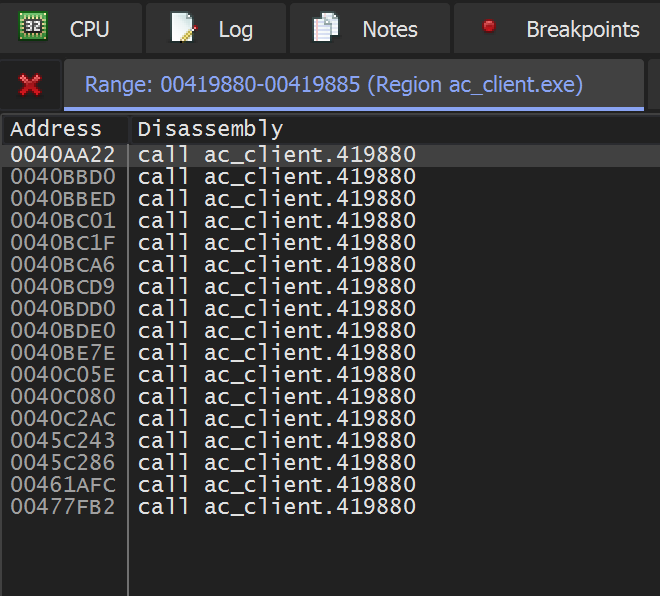
After going through several of these references, you should find the following reference, which shows that add esp, 8 is the lowest required value to balance the stack:

With this information, we can invoke the print text call ourselves. First, we will create a loop that will iterate over all the current players in the game:
current_players = (int*)(0x50F500);

for (int i = 1; i < *current_players; i++) {
To make our array of values easy to use inside the asm block, we will copy the current value into temporary variables:
const char* text = "";

DWORD x = 0;
DWORD y = 0;
...
for ...
  x = x_values[i];
  y = y_values[i];
  text = names[i];
Like before, we will then check the values to make sure that they can be displayed on screen:
if (x > 2400 || x < 0 || y < 0 || y > 1800) {
  text = "";
}
Finally, we will move the enemy’s name into ecx, push our X and Y values, and call the print text function. After that, we will balance the stack:
__asm {
  mov ecx, text
  push y
  push x
  call text_address
  add esp, 8
}
With this in place, we now have all the parts we need to handle multiple enemies. If you build and inject the DLL into Assault Cube, you will see multiple enemy names appearing above their heads:
The full code is available for reference on github.