Overview
When doing any sort of hacking, it’s best practice to separate your personal and hacking machines. One easy way to achieve this is using a virtual machine, or VM. In this lesson, we will set up a game hacking VM running Windows 10. This will be the environment we use for all the other lessons as well.
Due to the hardware requirements of games, you will often find that it will be impossible to run a certain game in a VM. In these cases, one option is to create another section on your hard-drive known as a partition. You can then install Windows on this separate partition and reserve it for game hacking.
VirtualBox
For these lessons, we will be using a virtual machine hypervisor known as VirtualBox. This software allows you to run and manage virtual machines. You can download it here.
Virtual Machine
Next, we need a virtual machine. Since most games are released for Windows, we will be using a Windows 10 VM. Microsoft releases free Windows 10 and 11 VMs for evaluation. These are completely legal but have a limited activation period. For our purposes, we will download a VirtualBox image. You can download the images here or here. Be aware, these VMs are about 7GB in size. Once the image is downloaded, extract the OVF file from the archive. VirtualBox uses extensions of OVA and OVF for images. These images contain a saved copy of a pre-configured machine.
Once we set up our machine, we will create a snapshot of it. This will allow us to throw out the old machine and create a new copy when it expires. Never keep notes or anything personal on your VM.
Open VirtualBox and import the downloaded OVF. Keep all the options as the default.

Once the VM is imported, start it up. Windows 10 will start and send you to a login screen. The password for the user is “Passw0rd!”, without the quotes.
Tools
We will use a Boxstarter script to install some game hacking tools. Boxstarter is a set of utilities that allows you to script and recreate installations. In this case, we will use it to install a memory searcher and debugger. Within your VM, open up Powershell and run the following two commands:
. { iwr -useb https://boxstarter.org/bootstrapper.ps1 } | iex; Get-Boxstarter -Force
Install-BoxstarterPackage -PackageName https://raw.githubusercontent.com/GameHackingAcademy/vmsetup/master/vmsetup.txt -DisableReboots
The first command installs BoxStarter and is taken from their website. The second command is a setup script that enables some folder options and installs three programs:
- Cheat Engine, a memory scanner
- x64dbg, a debugger
- Chocolatey, a package manager
As you discover more tools, you should create your own script and add them.
Cloning VMs
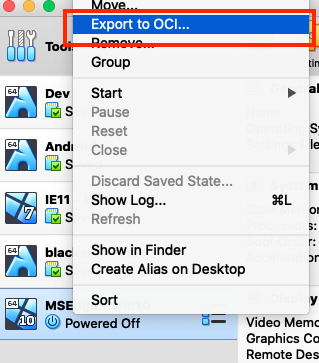
Now that we have our environment set up, we will create a clone. This will allow us to recreate our VM with all the tools already installed. Power off the VM completely and then choose Export to OCI. Keep all the defaults and begin the export.
This will create an OVA, similar to the OVF we initially downloaded. If we ever corrupt our environment, we can simply delete it and import this new OVA. It will already have all of our tools installed, so we don’t need to waste time reinstalling them.