Target
Our target in this lesson will be Wesnoth 1.14.9.
Identify
In this lesson, we will create a C++ program that will modify a player’s gold in Wesnoth.
Understand
In the Defeating DMA lesson, we defeated DMA in
Wesnoth and located the player’s base pointer at 0x017EECB8.
We then determined the offsets necessary to locate the player’s gold from
the base pointer. This allowed us to start at a static address, add a
series of static offsets, and reach a dynamic address.
Since these addresses and offsets are static, we can create a program to perform this operation. We covered several approaches to do this in Programming Fundamentals lesson. In this lesson, we will create an external executable.
Visual Studio
To create C++ programs, we need a compiler and a linker. A compiler is used to turn high-level language code into opcodes. A linker is used to then create an executable that the OS understands from these opcodes. These two components are normally bundled into an Integrated Development Environment, or IDE. IDE’s contain other components as well, such as code-completion and interactive debugging. Visual Studio is an IDE that Microsoft has released for Windows. The community edition is free to download and use in personal projects. It can be installed using Chocolatey, which we installed when first setting up the VM. To do so, open up Command Prompt or Powershell and run the following command:
choco install visualstudio2019community
In Visual Studio, source code files are contained within projects. Several of these projects can be contained within a solution. For example, the Visual Studio solution for Wesnoth might look like:
Game - Solution
    Engine - Project
        Player.cpp - Source Code
        main.cpp - Source Code
    UI - Project
    ...
    Network - Project
    ...
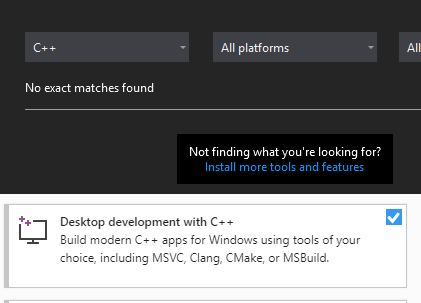
To create a C++ solution, we will first need to install some C++ components. This can be done by selecting the Install more tools and features link, and then selecting Desktop development with C++ in the wizard.
With these components installed, we can now create C++ projects and compile them.
Creating Projects
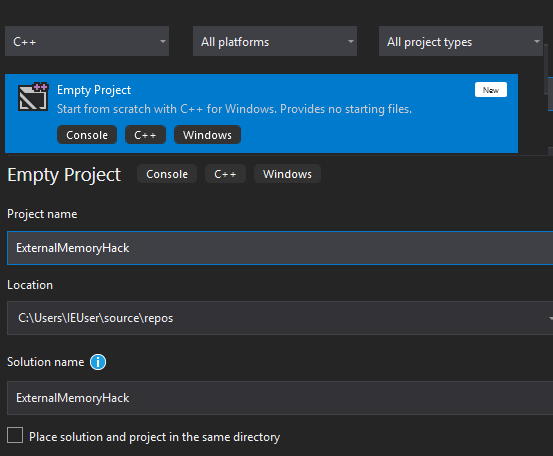
Once these components are installed, create an empty C++ project and name it ExternalMemoryHack.
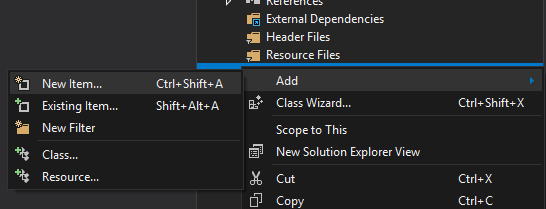
With the new project created, we can now add our source code file that will contain all of our code. To do this, right-click on Source Files and select Add -> New Item:
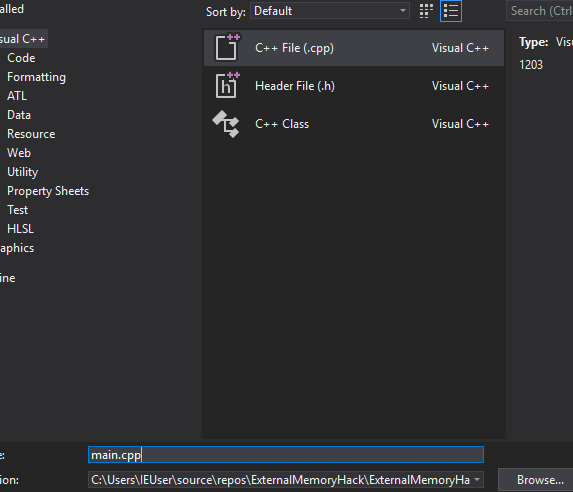
In the modal that appears, choose C++ File and name it main.cpp:
With the project and source file created, we can now begin programming.
C++ Basics
C++ has many features and is a versatile language. For our purposes, we will focus on the most important ones for creating hacks. For this lesson, we need to know two things about the language:
- Programs start at a function called main. This function has to return a value.
- Programs can call other functions built into Windows.
Any C++ executable needs to have a main function that returns an integer. This function takes two parameters, which are not important to know at the moment. When executed, the OS looks for and executes this function. When the function returns, it signals to the OS that the program is finished executing.
In addition to functions we create, we can call other functions that are built into Windows. Windows has many API’s to do things like displaying text, playing sounds, and creating files. Windows also has API’s that allow us to read and write values to an address in a process. These are what we will use to create our hack.
To use these functions, we need to include certain header files. Header files contain definitions for functions that are defined outside of our source file. To read and write memory, we will need to include the header file Windows.h.
Reading Values
We need to read several values in Wesnoth to locate our gold value. The API to read another process’s memory is called ReadProcessMemory. If you google this name, the first result will be documentation by Microsoft. This documentation describes how the API works, including what parameters it takes and what values it returns.
By examining this documentation, we can determine what values we need to provide. For any values we still need, we can then determine how to get them. The Win32 Coding Style Conventions documentation provides information on how each parameter is formatted and named.
ReadProcessMemory’s function definition is:
BOOL ReadProcessMemory(
    HANDLE  hProcess,
    LPCVOID lpBaseAddress,
    LPVOID  lpBuffer,
    SIZE_T  nSize,
    SIZE_T  *lpNumberOfBytesRead
);
Looking at the code block above, we can start at the first parameter and work our way down to determine what values we need. First, we do not have a handle to a process, so we will need to find that. We will discuss how to do this in the next section. We have the base address (in this case, our base pointer). The buffer needs to be provided by us, so we will need to create that. The size parameter will be the size of the data to read. In this case, the size will be 4 bytes, due to the size of the registers we saw while reversing. Finally, we will need to create another variable to hold the number of bytes actually read when the function is executed.
While this might seem overwhelming, this gives us a starting point to program from. First, we know that we need to include Windows.h so that we can use ReadProcessMemory:
#include <Windows.h>
Next, since this is a C++ executable, we will create our main function:
int main(int argc, char** argv) {

    return 0;
}
Finally, in the main function, above the return statement, we can insert our call to ReadProcessMemory. For values we don’t have yet, we will put in a variable name. As we figure out how to retrieve these values, we can then assign these variables.
ReadProcessMemory(wesnoth_process, 0x017EECB8, gold_value, 4, bytes_read);
Both the gold_value and bytes_read values are provided by us and populated by the API. Therefore, we need to initialize two variables to hold these values. Since we are reading 4 bytes, these variables need to be large enough to hold amounts of this size. One option to accomplish this is to use a DWORD, which is 32 bits (or 4 bytes) long. We need to place these declarations above the call to ReadProcessMemory:
DWORD gold_value = 0;
DWORD bytes_read = 0;
Since both of these parameters are expected to be pointers, we need to also change our ReadProcessMemory call. Instead of passing the variable’s value, we need to pass the address of these variables using &:
ReadProcessMemory(wesnoth_process, 0x017EECB8, &gold_value, 4, &bytes_read);
Opening Processes
Our next step is retrieving a process handle. To do this, we can use an API called OpenProcess. The definition for this API is:
HANDLE OpenProcess(
    DWORD dwDesiredAccess,
    BOOL  bInheritHandle,
    DWORD dwProcessId
);
From this definition, we see that OpenProcess returns a handle to a process. This handle can be used as the first parameter for ReadProcessMemory. Looking at the documentation, we want our desired access to be PROCESS_ALL_ACCESS, so that we can both read and write to the process. The second parameter does not matter for what we are doing, so we will set it to the value of true. We will need to find the last parameter, so for now, we will create a variable. Since we need the result of this function to call ReadProcessMemory, we will place the call to it above ReadProcessMemory. Our code should now look like:
HANDLE wesnoth_process = OpenProcess(PROCESS_ALL_ACCESS, true, process_id);

DWORD gold_value = 0;
DWORD bytes_read = 0;
ReadProcessMemory(wesnoth_process, 0x017EECB8, &gold_value, 4, &bytes_read);
Next, we will retrieve a process_id for the OpenProcess call. Similar to the previous two API’s, we will use another API and then fill in any information we need. In this case, the API will be GetWindowThreadProcessId. This API retrieves a process ID when provided with a window handle, which is different than a process handle. The definition for this API is:
DWORD GetWindowThreadProcessId(
    HWND    hWnd,
    LPDWORD lpdwProcessId
);
This function requires a handle to a window and a variable to hold the process ID. Just like before, we will add this code above our call to OpenProcess:
DWORD process_id = 0;
GetWindowThreadProcessId(wesnoth_window, &process_id);
To get a window handle, we can use the API FindWindow. This function takes the name of a window title and returns a handle to the window. The definition is:
HWND FindWindowA(
    LPCSTR lpClassName,
    LPCSTR lpWindowName
);
Since we want to search all windows, we will set the first parameter to NULL. For the second parameter, we know the name of the Wesnoth window, as it is displayed in the game’s title bar. We can insert this final call at the top of our main function. Right now, our code will look like:
#include <Windows.h>

int main(int argc, char** argv) {
    HWND wesnoth_window = FindWindow(NULL, "The Battle for Wesnoth - 1.14.9");

    DWORD process_id = 0;
    GetWindowThreadProcessId(wesnoth_window, &process_id);

    HANDLE wesnoth_process = OpenProcess(PROCESS_ALL_ACCESS, true, process_id);

    DWORD gold_value = 0;
    DWORD bytes_read = 0;
    ReadProcessMemory(wesnoth_process, 0x017EECB8, &gold_value, 4, &bytes_read);
    return 0;
}
Casting Parameters
Visual Studio will display several errors for the code we have written. This is because we have not properly casted two of our variables. As a result, the compiler cannot understand how we want to pass data to a function. If we want to compile our program, we will need to fix these errors. Luckily, by reading the Error List in Visual Studio, we can determine what we need to do to fix these errors.
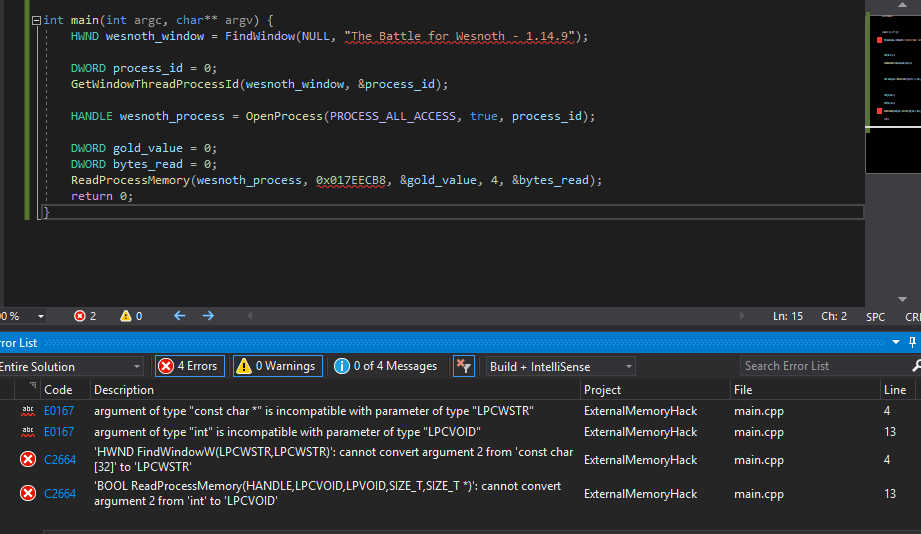
Let’s address the two ReadProcessMemory errors that occur
on Line 13 of the code. The first error for Line 13 is
argument of type “int” is compatible with parameter type “LPCVOID”.
This indicates that we have a parameter that is an integer that is
supposed to be a LPCVOID. The second error,
cannot convert argument 2 from ‘int’ to ‘LPCVOID’, indicates which
parameter this is. Argument 2 is our address
0x017EECB8. If we google LPCVOID, the first result is Microsoft’s documentation regarding LPCVOID. The documentation shows us that LPCVOID is defined as a
void*:
typedef const void* LPCVOID;
To solve these errors, we can cast our address as a void*. The resulting code looks like:
ReadProcessMemory(wesnoth_process, (void*)0x017EECB8, &gold_value, 4, &bytes_read);
With this, those errors will disappear. Now we can examine the second set of errors that occur on Line 4, regarding the FindWindow call. These errors indicate that the The Battle for Wesnoth - 1.14.9 string is not cast correctly. It is a const char* and needs to be cast as a LPCWSTR. To do this, we can prefix the string with an L. Our FindWindow call now looks like:
HWND wesnoth_window = FindWindow(NULL, L"The Battle for Wesnoth - 1.14.9");
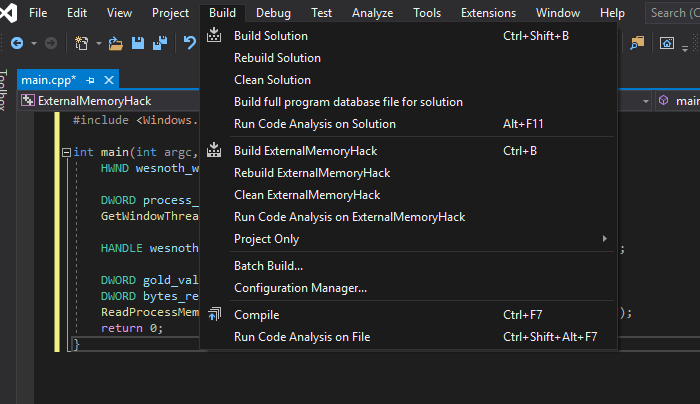
After making this change, the errors will disappear and we can now compile and execute our program. To do this, go to the Build menu item and select Build Solution. Once this completes, we will have a program that we can execute.
Debugging
To verify that this code works, we need to make sure that we are actually
reading the correct value at the memory address 0x017EECB8.
To do this, we will debug our program inside Visual Studio and compare the
results of our ReadProcessMemory call against Cheat
Engine.
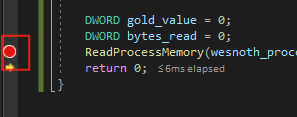
First, open up Cheat Engine and manually add the address
0x017EECB8. Then, set a breakpoint on the
ReadProcessMemory line. This can be done by left-clicking
on the area to the left of the line of code you wish to breakpoint. If
done correctly, a red circle will appear.
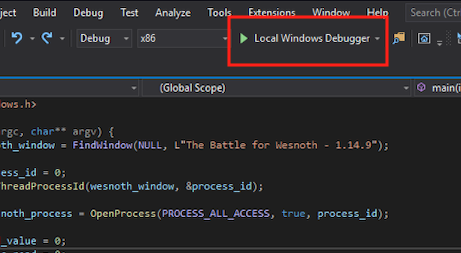
Next, click on the Local Windows Debugger button at the top of the IDE. This will begin executing our program with a debugger attached.
Since we have written the source code, debugging our program will be far easier than debugging Wesnoth. When our breakpoint is reached, the debugger will pop and let us explore various elements of the code, including our variables. These variables will be shown in the bottom left of the IDE. To make sure we are reading memory correctly, we want to look at the gold_value variable and make sure its value matches Cheat Engine.
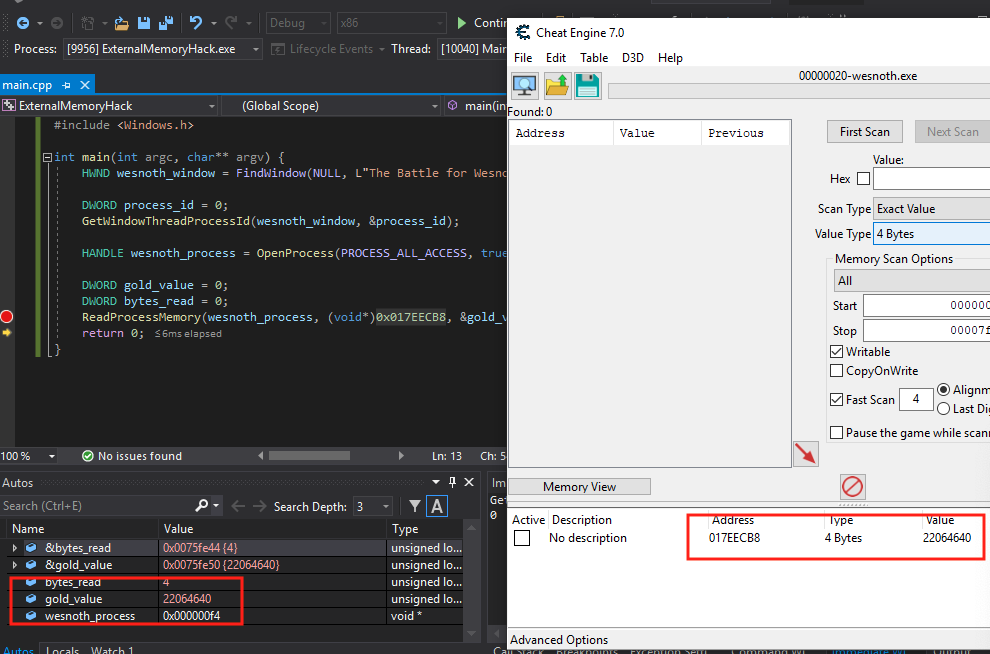
Since the values match, we know that we are correctly reading memory in Wesnoth. Hit the Continue button at the top of the IDE to finish executing our program. Now we can move on to finding our gold value.
DMA
Since we can read memory, we can now retrieve our gold value. In Defeating DMA lesson, we determined that our gold
address is stored at [[0x017EECB8 + 0x60] + 0xA90] + 4. This
can be further simplified to [[0x017EED18] + 0xA90] + 4. To
retrieve the gold address in our program, we can first read the value at
0x017EED18, then add 0xA90 to that value. We can
then read this address and add 4 to it. Once we have done that, we will
have our gold address.
To do this entire process, we can use the
ReadProcessMemory call identically to our previous code.
First, we will read in the value of [[0x017EED18] + 0xA90].
DWORD gold_value = 0;
DWORD bytes_read = 0;
ReadProcessMemory(wesnoth_process, (void*)0x017EED18, &gold_value, 4, &bytes_read);

gold_value += 0xA90;
ReadProcessMemory(wesnoth_process, (void*)gold_value, &gold_value, 4, &bytes_read);
We can use Cheat Engine to examine offsets to ensure that we are reading the value correctly. We can then use a breakpoint on the second ReadProcessMemory call to ensure that the values match. Since Visual Studio displays variables in a decimal format, we will need to convert these numbers to hexadecimal to check.
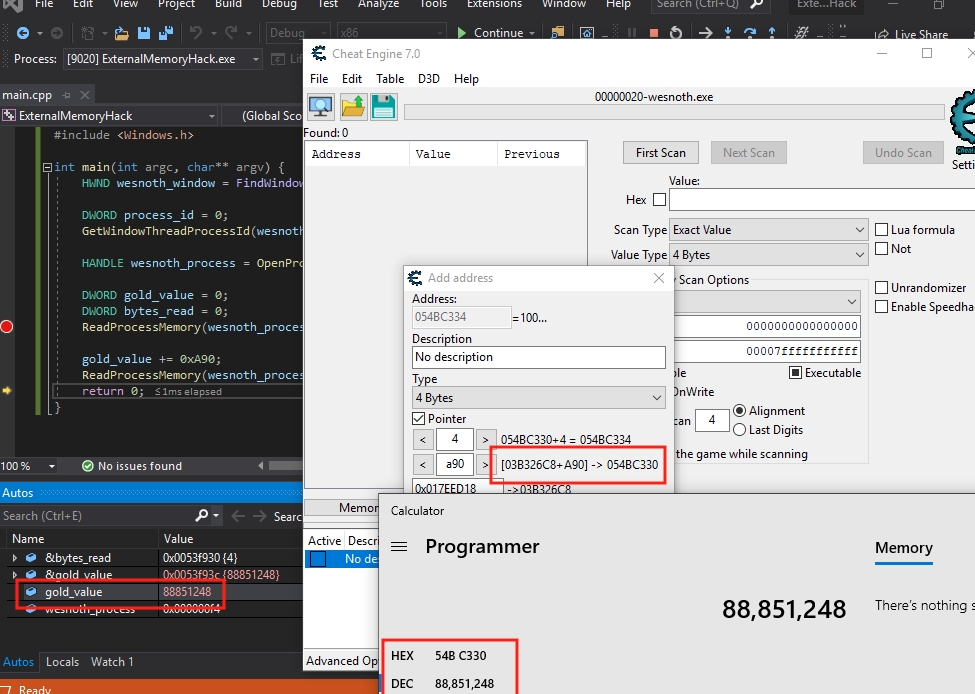
Since our values match, we can add a final offset of 4 to the address to retrieve our gold address. Next, we will focus on writing memory.
gold_value += 4;
Writing Memory
The API to write to another process’s memory is called WriteProcessMemory. Its definition is very similar to ReadProcessMemory:
BOOL WriteProcessMemory(
    HANDLE  hProcess,
    LPVOID  lpBaseAddress,
    LPCVOID lpBuffer,
    SIZE_T  nSize,
    SIZE_T  *lpNumberOfBytesWritten
);
The major difference is that this function writes the value of a buffer into a section of a memory, instead of reading a section of memory into a buffer. Like before, we will need to declare two variables for the buffer and the number of bytes written.
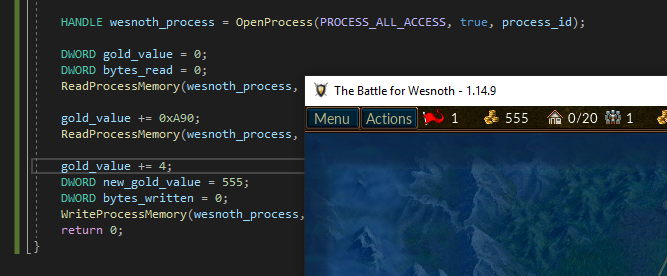
DWORD new_gold_value = 555;
DWORD bytes_written = 0;
Then, we can call WriteProcessMemory in an almost identical manner to ReadProcessMemory. Like with ReadProcessMemory, we will cast our gold_value to (void*):
WriteProcessMemory(wesnoth_process, (void*)gold_value, &new_gold_value, 4, &bytes_written);
When this is executed, our gold will be set to 555 and our hack will be complete. We can now run this executable whenever we want to change our gold. We can also distribute it to other players to execute on their machines.
The full code for this lesson is available on github for comparison.